Install the app
How to install the app on iOS
Follow along with the video below to see how to install our site as a web app on your home screen.
Note: This feature may not be available in some browsers.
You are using an out of date browser. It may not display this or other websites correctly.
You should upgrade or use an alternative browser.
You should upgrade or use an alternative browser.
"Twisted Mini Panther" Amber Holt's TM1000 Sled Build Project
- Thread starter BackCountryBasics
- Start date
- Thread Rating
- 5.00 star(s)
Amber,
Thanks for taking the time to fill us in on your adventure with the build...
I'd rather see more information and pics in a thread that shows the evolution of your build than a smaller one with less pics and less info... I know how much time it takes to make a good post...
Keep up the good work and lets see the Panther evolve....
Looking fwd to seeing it in person at the Puyallup show.
The “Specialty Coat” Powder Coat Process
The “Specialty Coat” Powder Coat Process:
When we arrived at Spectrum Powder Coat, in Hayden, ID, Kevin & his crew helped us unload and we then proceeded to pick out a few cosmetic items for the ‘test coat’. We used items like the coolant bottle shield and steering post face plate for this part.
There were two reasons for a ‘test coat’.
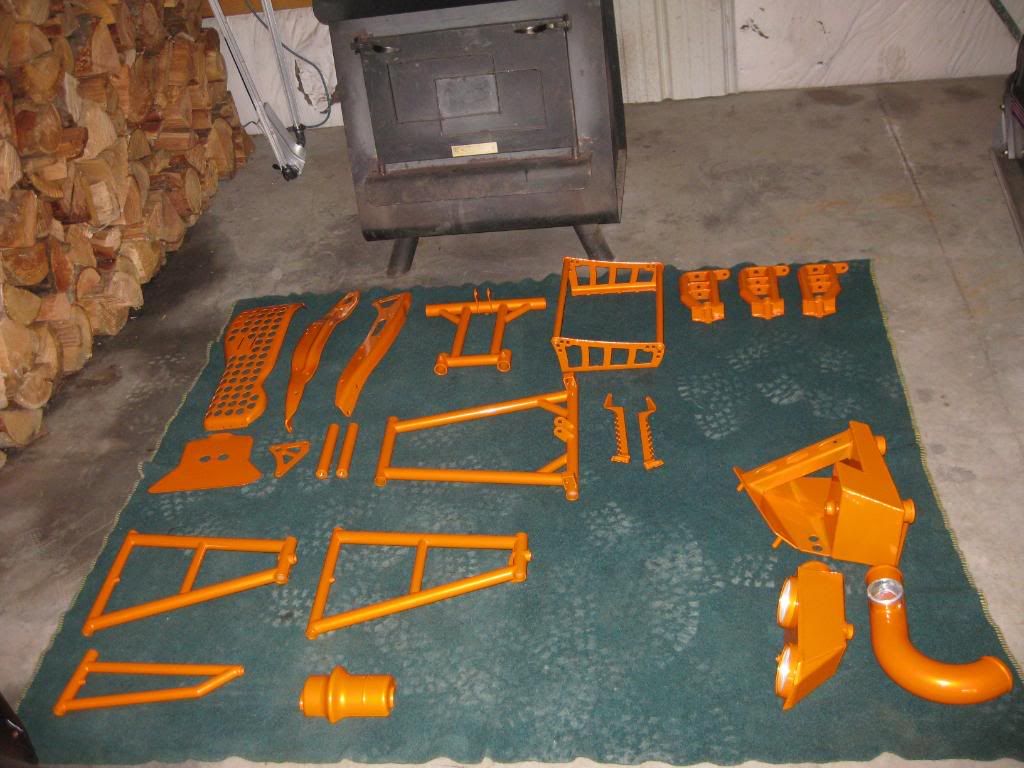
First we did this to insure that once the final coat was applied, no mistakes were to be made resulting in the unwanted process of burning it off and having to start over. Accomplishing one successful coat the first time would allow us to maintain the integrity of the aluminum metal parts without excessive heating and cooling. If these items needed to be recoated the process involved to do this could potentially weaken the integrity of the metal on important structural parts by exposing them to the higher temperature burn off ovens and a two more additional bakes sessions in the oven.
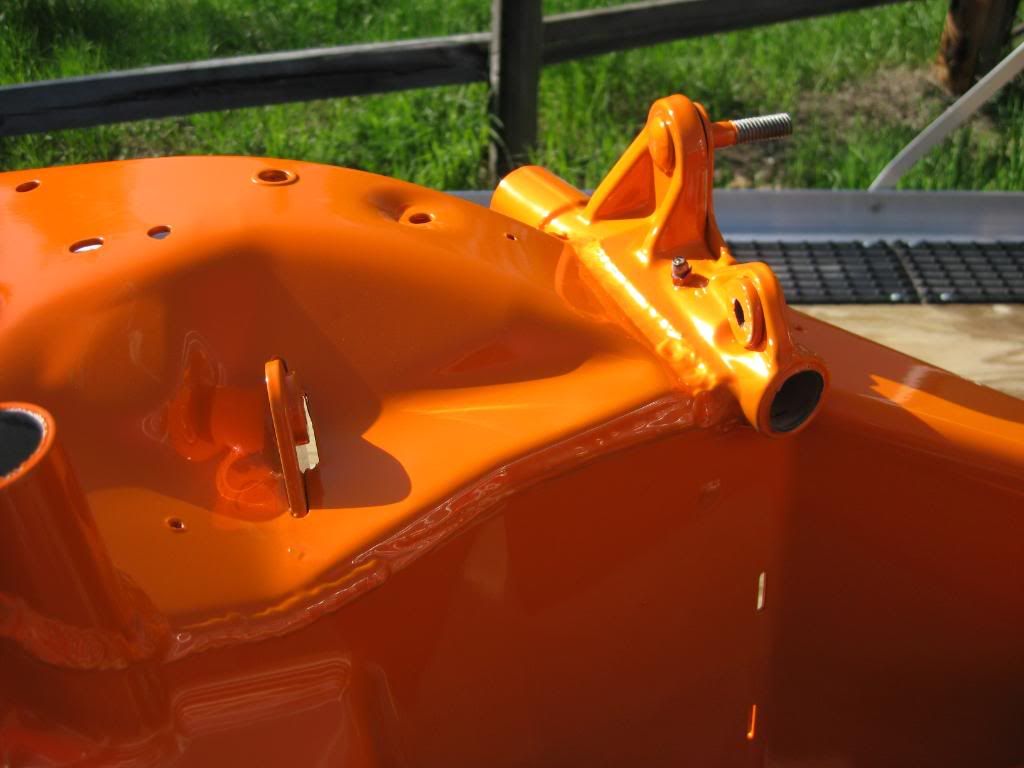
At Spectrum, they are known for their powder coat applications ‘sticking’ and being ‘durable long term’ this is attributed to their attention to the prepping process. This preparation included sandblasting all the pieces to be coated, then cleaning them thoroughly, and last they were all primed in the preparation for the spray booth.
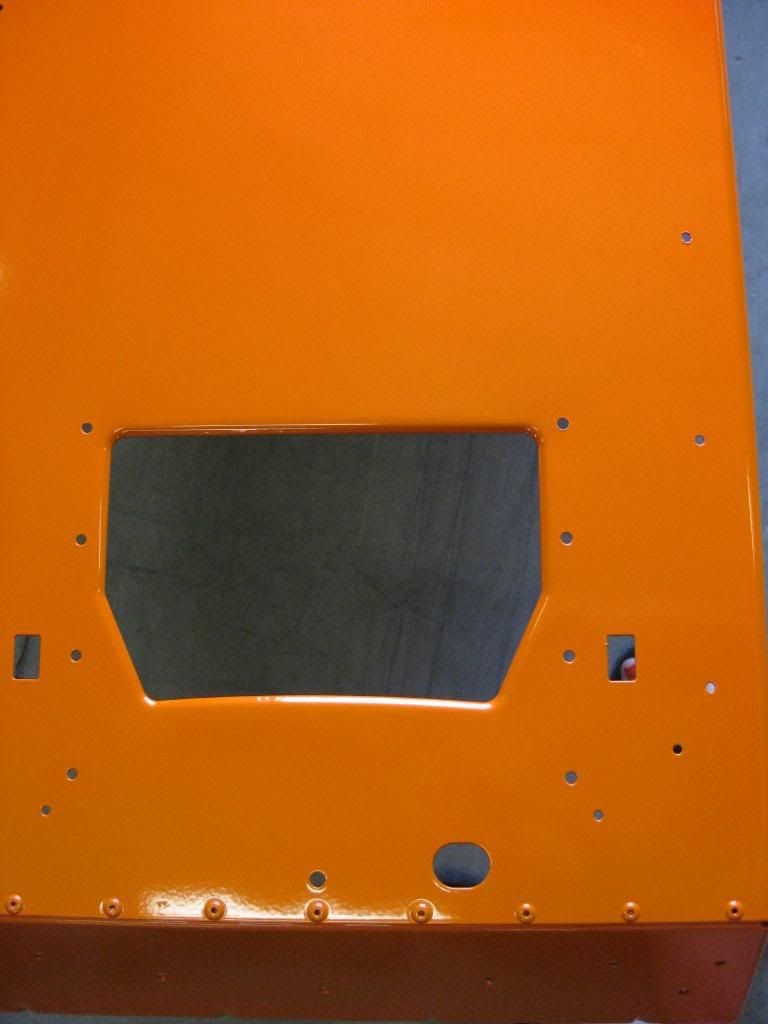
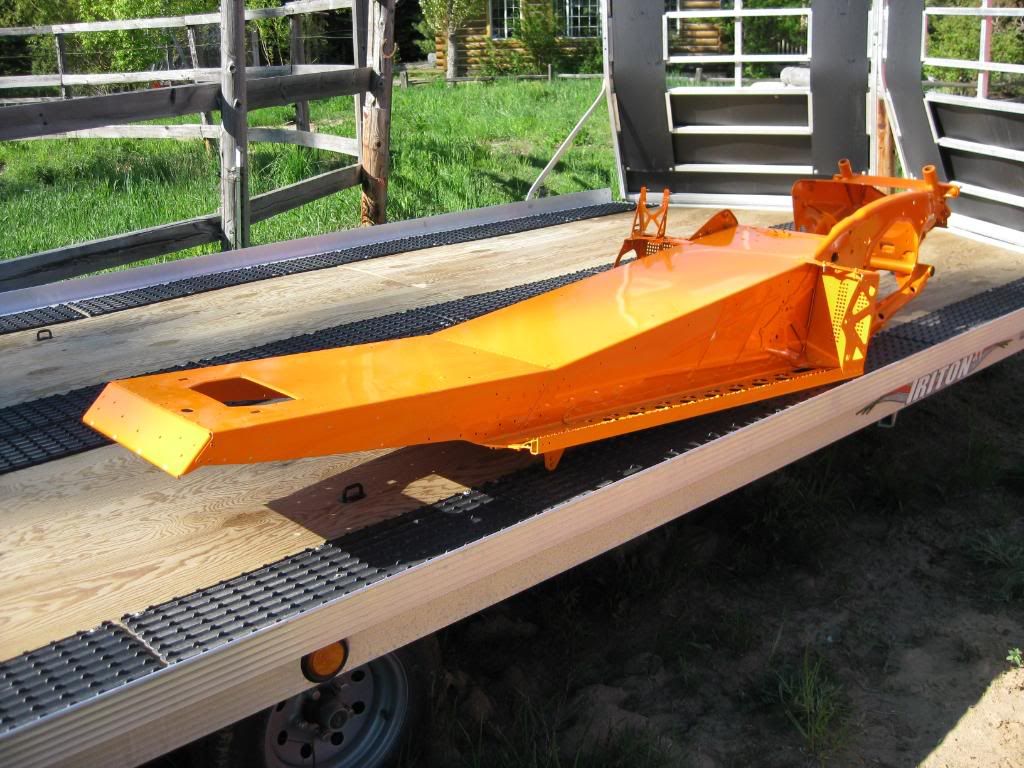
The second reason for the ‘test coat, was to achieve a prismatic affect. This is a type of coating that is referred to as a ‘specialty coat’, and consistency was pertinent. This meant all the pieces had to be sprayed and baked together, for all the pieces to have the result of one uniform rich color with the transparent prismatic affect. A thin layer of Mirror Silver powder was sprayed on and baked for half the time of a normal baking sessions. Then they applied a Orange transparent coat over top, this coat cannot be sprayed on to thick or the end result will be just a solid orange, and if it is sprayed on to thin the result is a ‘dirty appearance’.
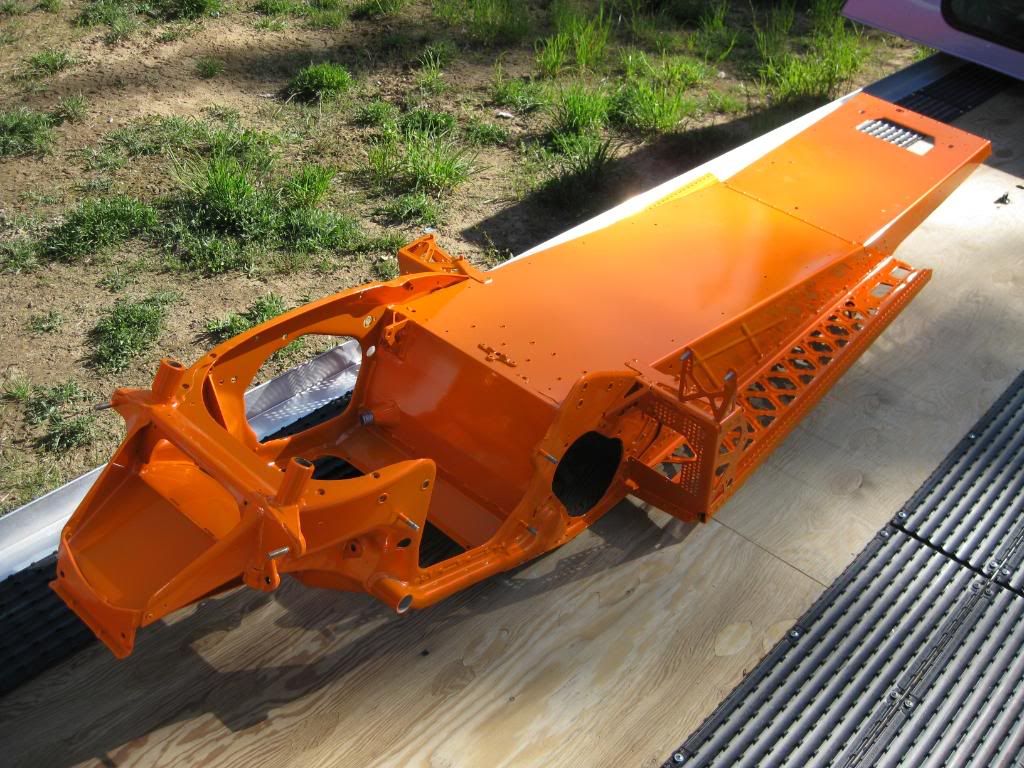
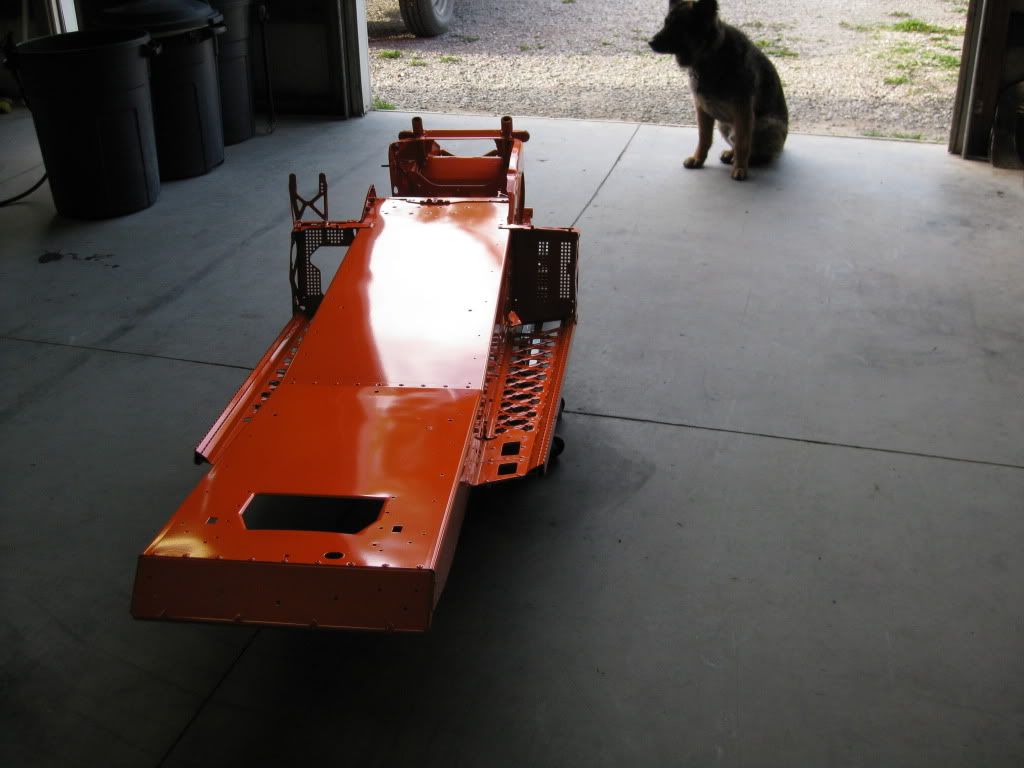
The test process took about a week, until the desired color result was achieved. We then gave the go ahead to coat everything.
When we picked up the finished pieces and brought them home,in the sunlight they would changes from shades of yellow-orange to deep hemi-orange, and under artificial lights it has deep copper tones. The true prismatic affect was accomplished.
I am headed for Puyallup snow show this weekend. So I may not get another post up until Monday morning. However! Come by and visit and see the “Twisted Mini Panther” in the Timbersled Products booth.
Next thread... begins to purrrrrr as parts go back together!
The “Specialty Coat” Powder Coat Process:
When we arrived at Spectrum Powder Coat, in Hayden, ID, Kevin & his crew helped us unload and we then proceeded to pick out a few cosmetic items for the ‘test coat’. We used items like the coolant bottle shield and steering post face plate for this part.
There were two reasons for a ‘test coat’.

First we did this to insure that once the final coat was applied, no mistakes were to be made resulting in the unwanted process of burning it off and having to start over. Accomplishing one successful coat the first time would allow us to maintain the integrity of the aluminum metal parts without excessive heating and cooling. If these items needed to be recoated the process involved to do this could potentially weaken the integrity of the metal on important structural parts by exposing them to the higher temperature burn off ovens and a two more additional bakes sessions in the oven.

At Spectrum, they are known for their powder coat applications ‘sticking’ and being ‘durable long term’ this is attributed to their attention to the prepping process. This preparation included sandblasting all the pieces to be coated, then cleaning them thoroughly, and last they were all primed in the preparation for the spray booth.


The second reason for the ‘test coat, was to achieve a prismatic affect. This is a type of coating that is referred to as a ‘specialty coat’, and consistency was pertinent. This meant all the pieces had to be sprayed and baked together, for all the pieces to have the result of one uniform rich color with the transparent prismatic affect. A thin layer of Mirror Silver powder was sprayed on and baked for half the time of a normal baking sessions. Then they applied a Orange transparent coat over top, this coat cannot be sprayed on to thick or the end result will be just a solid orange, and if it is sprayed on to thin the result is a ‘dirty appearance’.


The test process took about a week, until the desired color result was achieved. We then gave the go ahead to coat everything.
When we picked up the finished pieces and brought them home,in the sunlight they would changes from shades of yellow-orange to deep hemi-orange, and under artificial lights it has deep copper tones. The true prismatic affect was accomplished.
I am headed for Puyallup snow show this weekend. So I may not get another post up until Monday morning. However! Come by and visit and see the “Twisted Mini Panther” in the Timbersled Products booth.
Next thread... begins to purrrrrr as parts go back together!
W
whittaker727
Well-known member
Having seen this sled in person, those pics don't do it justice. Great build Amber (you too Budd)
P
PoWdErCuRlGiRl
Active member
Oh man I can't wait to read the whole rest of this and see the end result!!! Haley is just raving about how beautiful your sled is, can't wait to see it in Spokane!  Stellar little buddy just Stellar!!!!
Nice stuff Amber... I think Spectrum will be getting some of my parts here in the next week... Safety glow orange.

rode with amber once at trestle creek, nice gal. even took time out of her ride to show a guy how to side hill, put on a free mini clinic for him.
seen the new sled at 509 premier, wow! Its far too purdy for me to ride
and to give advice to some dumbace from MN...not sure who that loser was but I bet he enjoyed the advice.
B
BadCheetah
New member
This is so Exciting Amber!!! Your sled is rocking the cheetah seat too, love it!
BC

BC
The Rolling Chassis Assembly Part #1
The Rolling Chassis Assembly:
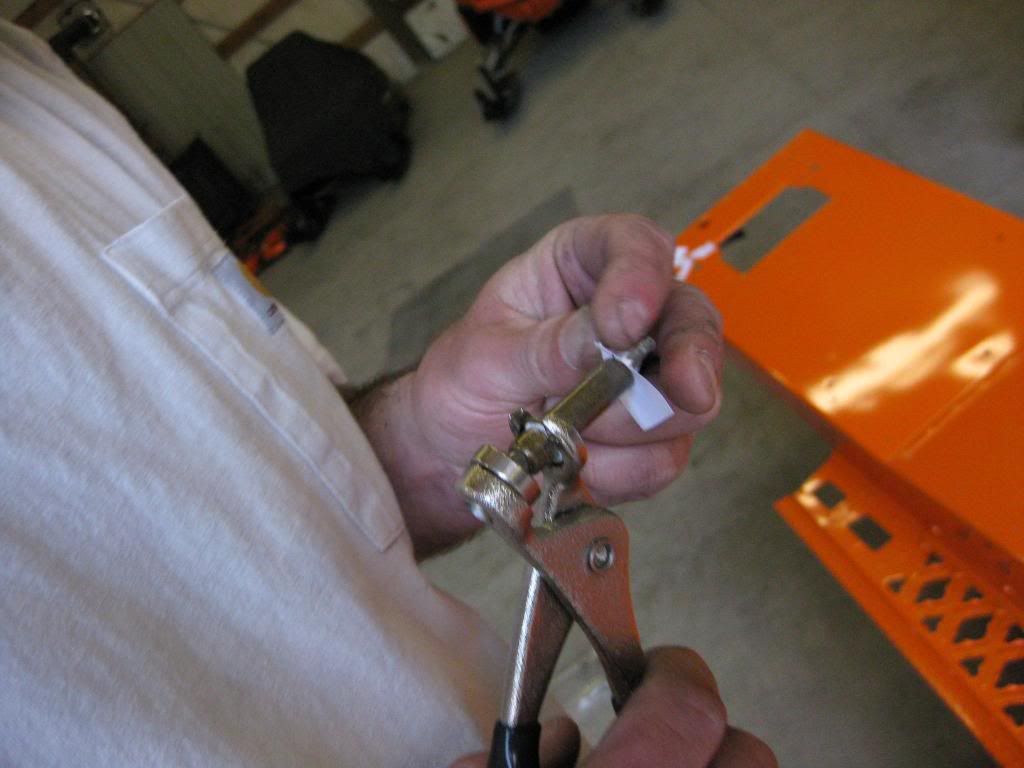
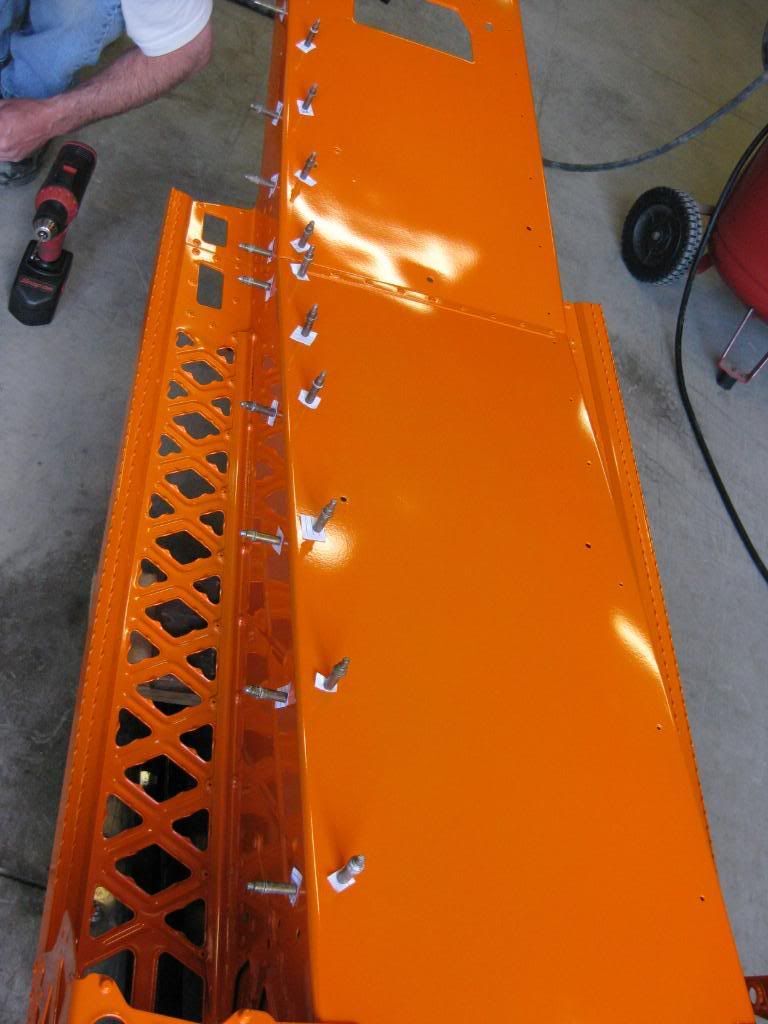
The first step of the re-assembly process was to install the coolant lines. We first cut out small squares of paper and slipped them onto the aviation style cleakos. Cleakos are used to hold the coolant lines in place while riveting the coolant lines to the tunnel skin. The paper squares are used to insure that the Cleakos do not scratch the powder coat during this process.
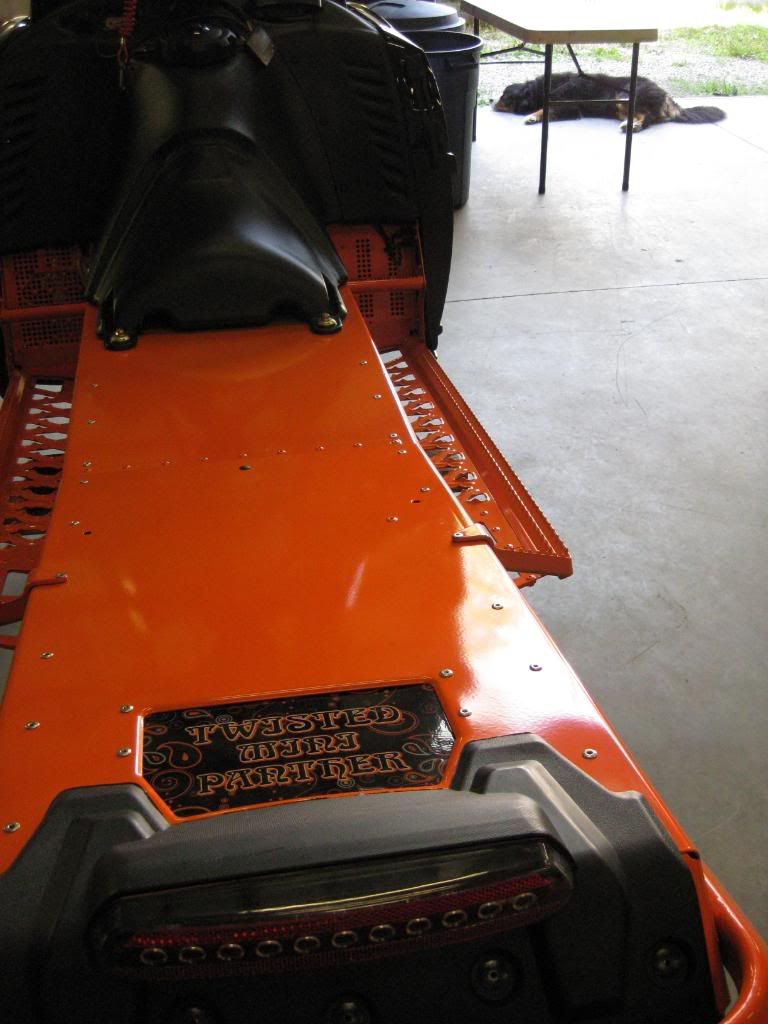
The rear cooler, taillight assembly, and mud flap were to be installed after a Arctic FX vinyl graphic touch was installed to the topside of the rear cooler. This particular graphic needed to be sandwiched in between the tunnel skin and the cooler. I really had a lot of fun working with Jordan, owner of Arctic FX Graphics on the vinyl accents for this project. He was so open to any and all ideas I had, as well as contributed many creative ones of his own. Jordan had products on my doorstep in as little as two days.
The remainder of the coolant system, which consisted of the coolant bottle and shroud, was installed, along with the gas tank, cowling assembly, steering post and hoop, and stock wiring harnesses.
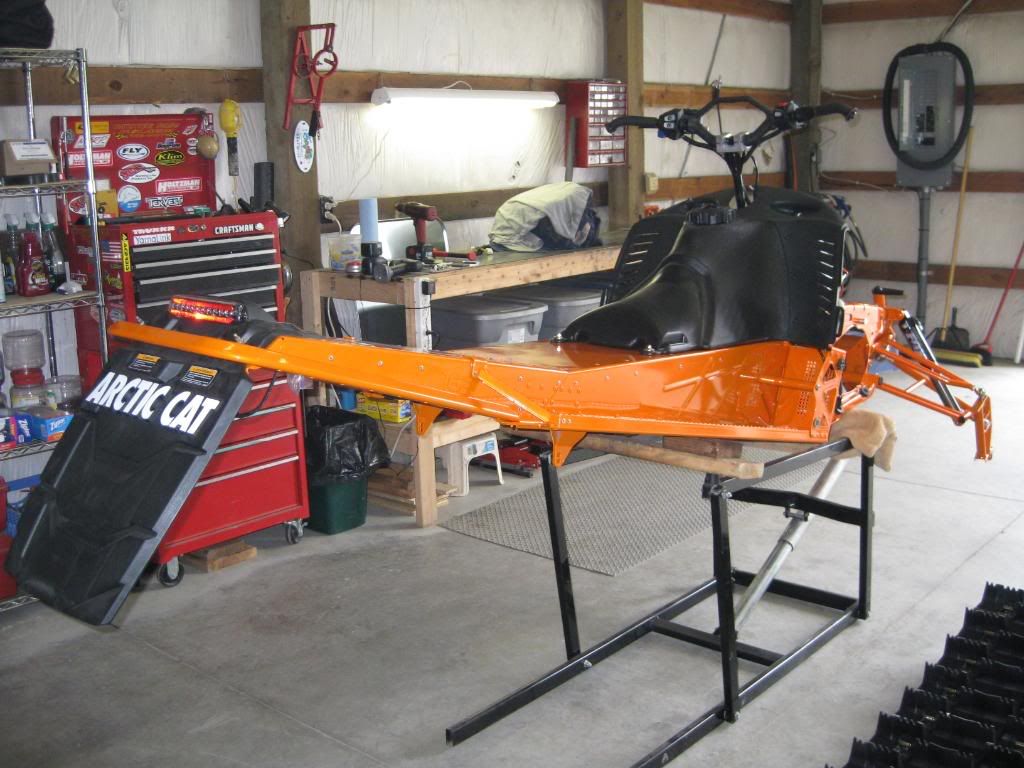
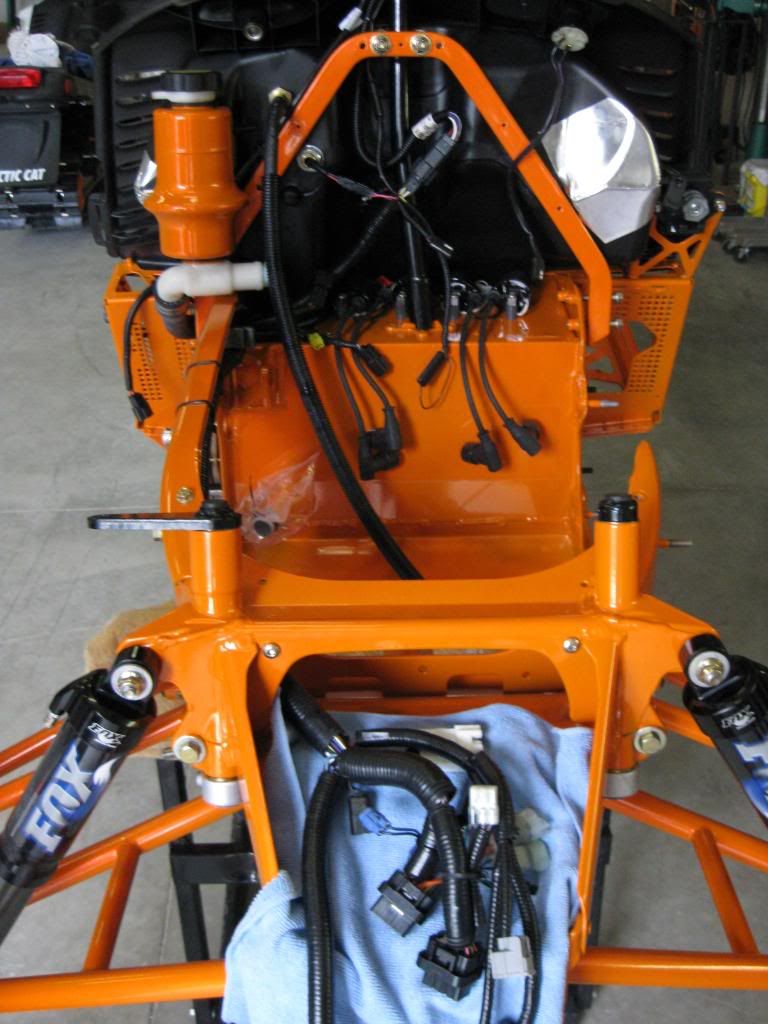
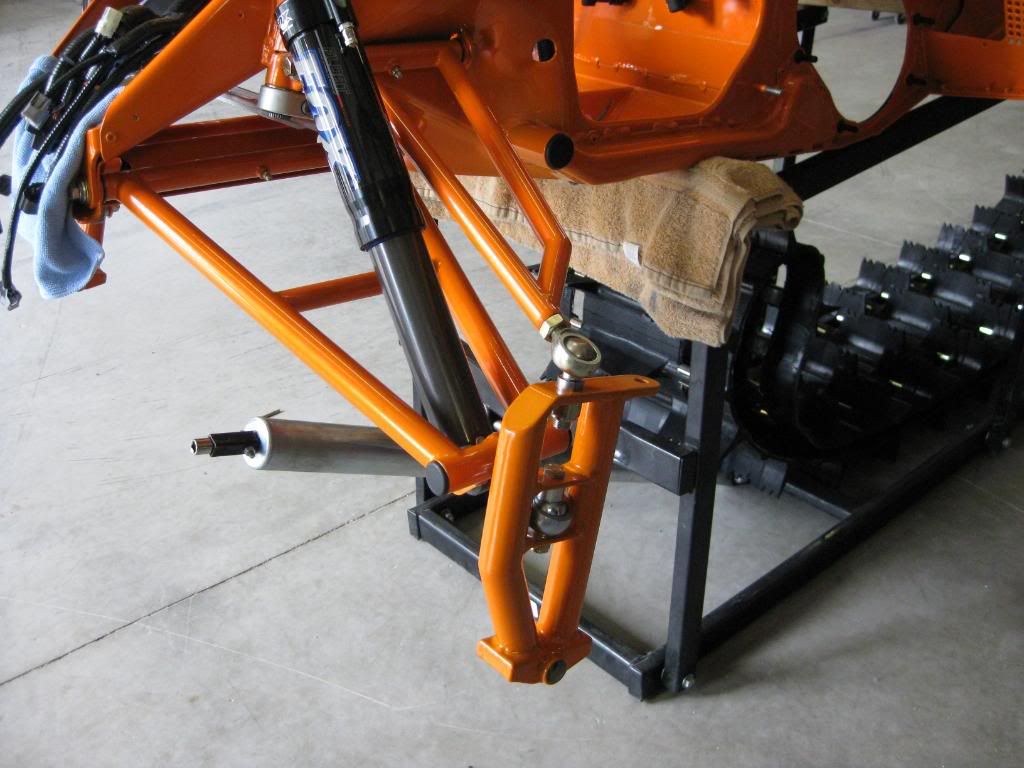
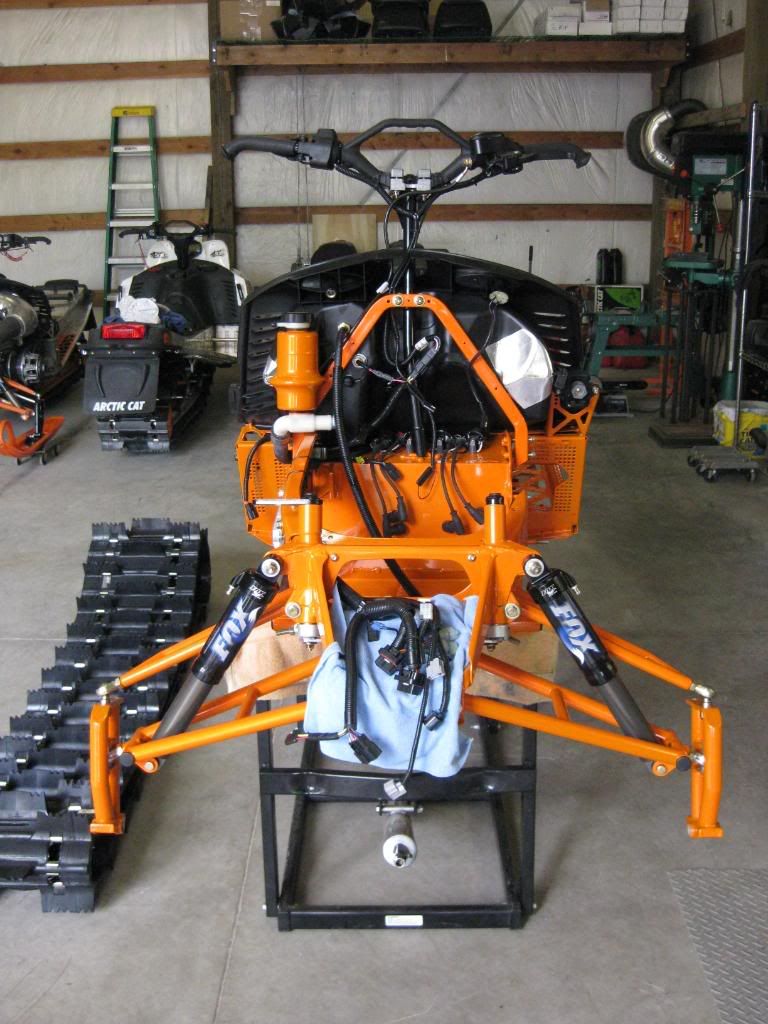
Budd then installed a Timbersled Barkbuster front suspension. I have used this suspension for the last few years on my prior M1000’s. I have found that this suspension not only increases the sleds ability to turn a sharper radius of 12 degrees, but it also creates a much lighter feel while riding as a result of its geometrical design and actual material weight loss of 10 pounds. Timbersled re-designed their spindle this year. ‘The All Terrain’ spindle, is a trailing spindle design and accommodates a wider variety of rider preferred terrain styles and stability. Specifically, this new design attributes are noticed on the trail and while descending steep terrain.
I will be sharing some goodies from Black Diamond Xtreme and Camoplast next!
The Rolling Chassis Assembly:
The first step of the re-assembly process was to install the coolant lines. We first cut out small squares of paper and slipped them onto the aviation style cleakos. Cleakos are used to hold the coolant lines in place while riveting the coolant lines to the tunnel skin. The paper squares are used to insure that the Cleakos do not scratch the powder coat during this process.


The rear cooler, taillight assembly, and mud flap were to be installed after a Arctic FX vinyl graphic touch was installed to the topside of the rear cooler. This particular graphic needed to be sandwiched in between the tunnel skin and the cooler. I really had a lot of fun working with Jordan, owner of Arctic FX Graphics on the vinyl accents for this project. He was so open to any and all ideas I had, as well as contributed many creative ones of his own. Jordan had products on my doorstep in as little as two days.

The remainder of the coolant system, which consisted of the coolant bottle and shroud, was installed, along with the gas tank, cowling assembly, steering post and hoop, and stock wiring harnesses.


Budd then installed a Timbersled Barkbuster front suspension. I have used this suspension for the last few years on my prior M1000’s. I have found that this suspension not only increases the sleds ability to turn a sharper radius of 12 degrees, but it also creates a much lighter feel while riding as a result of its geometrical design and actual material weight loss of 10 pounds. Timbersled re-designed their spindle this year. ‘The All Terrain’ spindle, is a trailing spindle design and accommodates a wider variety of rider preferred terrain styles and stability. Specifically, this new design attributes are noticed on the trail and while descending steep terrain.


I will be sharing some goodies from Black Diamond Xtreme and Camoplast next!
Drive Shaft
When I first spoke with Ray at Black Dimond Xtreme he was ecstatic about this project build! Now, if anyone has ever met Ray at BDX, they have probably experienced his enthusiasm toward building lightweight and tricked out sleds. Ray immediately wanted to make this project into a 4lb titanium monster sled! Unfortunately, I had to throttle him down a bit and explain the main objectives with the build. Number one, it had to be attainable bolt on parts that the average common consumer could afford. The second focus was on the modifications of importance that not only enhanced performance but maintained the integrity of the M-series balanced feel.
Drive Line:
Black Diamond Xtreme is the original brains behind the well known diamond drive in Arctic Cat’s snowmobiles. So we started with the drive line modifications first.
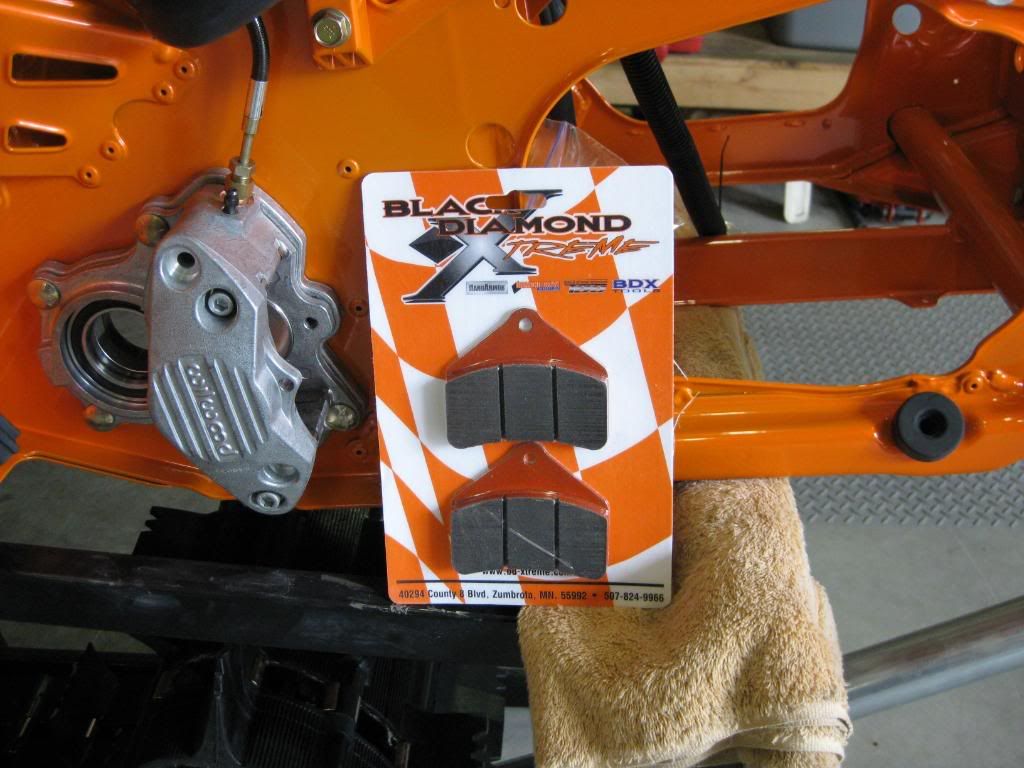
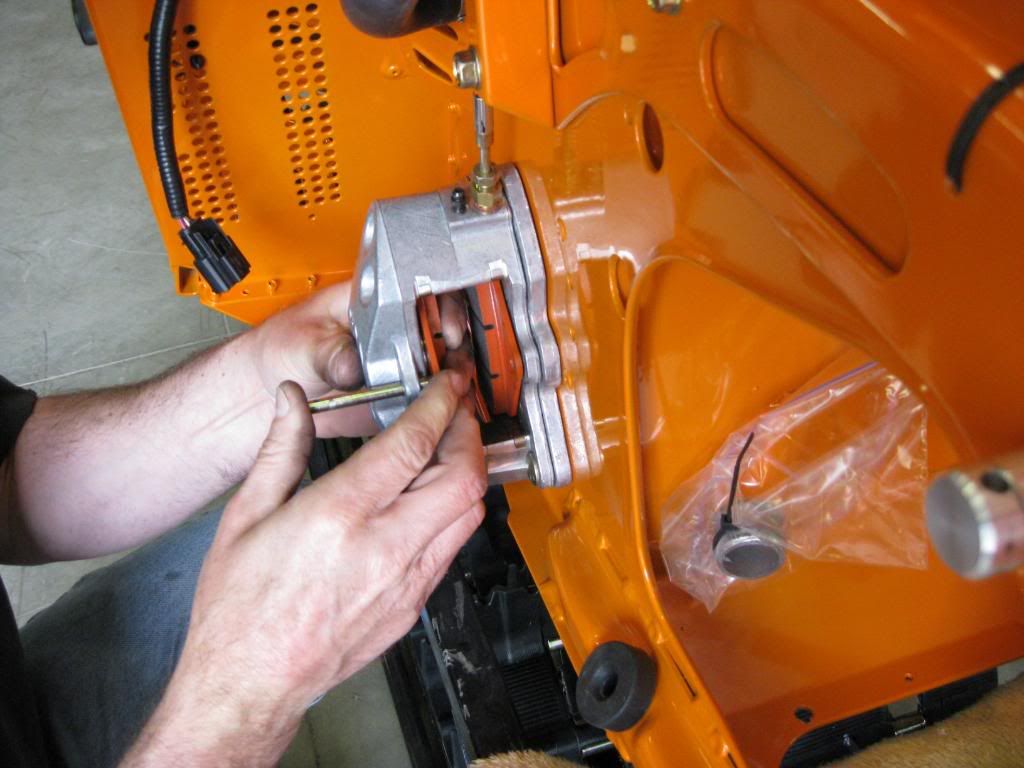
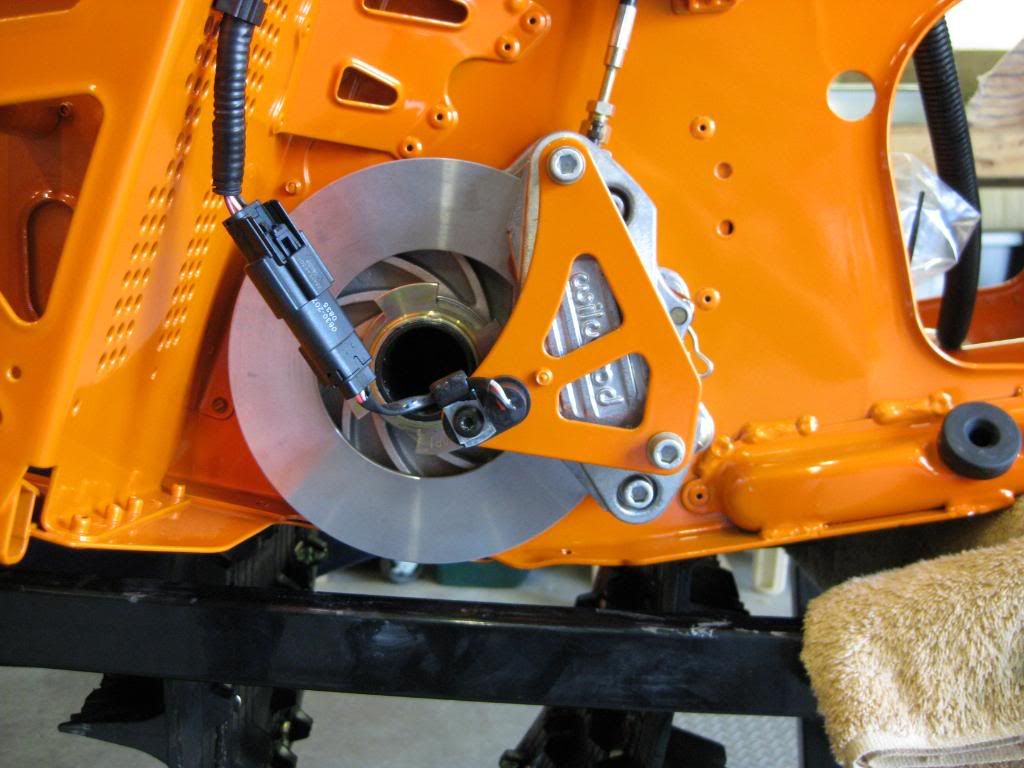
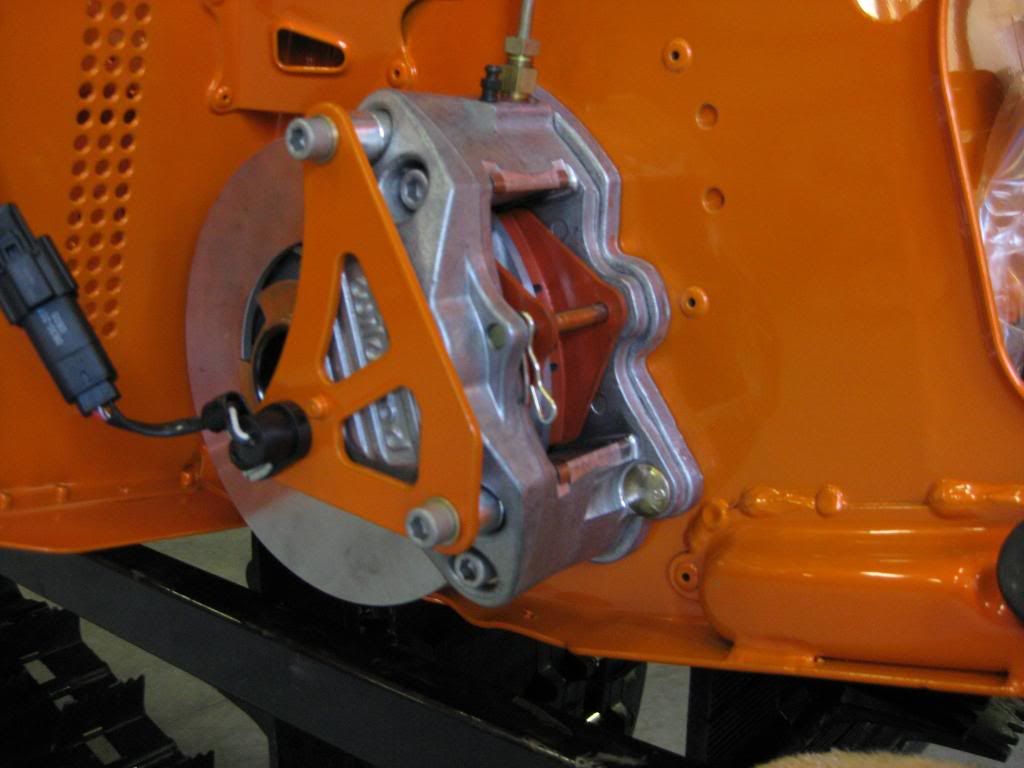
Budd installed the brake housing and BDX black ceramic pads. The ceramic pads need to be used with the light weight rotor or damage will occur.
The BDX brake aluminum/ceramic composite rotor already has the spacer machined in as one complete unit; this is different from the OEM cast iron brake rotor assembly that is two pieces consisting of a spacer and rotor. The BDX rotor saves 1.8 lbs of rotating mass.
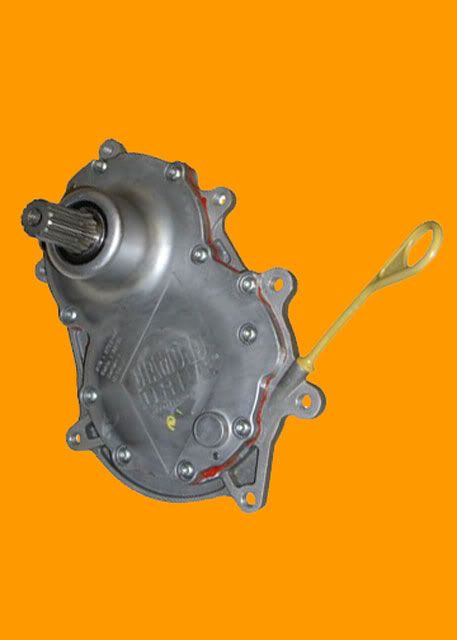
I have always used Black Diamond Xtreme’s Dimond Lite Drive system on all my M1000’s. The weight savings are a bonus, but the ability to gear down a sled is the attribute in performance that I like most about this drive. This drive system combined with proper clutching, creates overall lower engagement performance; enhancing the sleds tree riding capabilities along with utilizing the unleashed freight train feel of power in the M1000’s while climbing. The gear case on the 2009 saves 4lbs (11lbs on older M’s) and we are using 59/61 gearing for the Twisted Turbo package. I have used 55/65 gearing on stock my set sleds in the past.
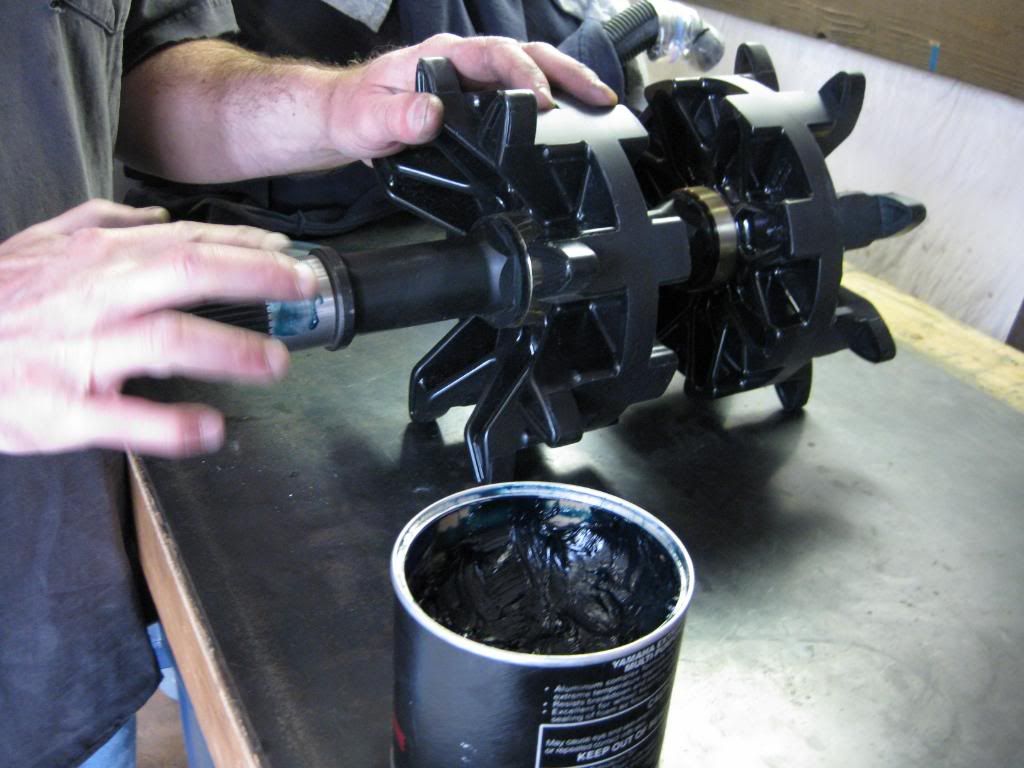
Budd greases the BDX Lite Weight track shaft w/ 9 tooth drivers in preparation to install it. This track shaft saves 2 pounds.
The next part to be installed was the track. I have worked with Bruce at Camoplast for the last 3 years and have tried several lengths and styles of their product line. I always come back to the Camoplast 156 Challenger Xtreme as my overall number one preferred choice. This track is not only nimble enough for tight tree style riding, I find it to hook up and feel very stable in those harder icier conditions. With the stock 162 tunnel there was no need for tunnel fabrication, and we found it to have a very nice overall fit once installed.
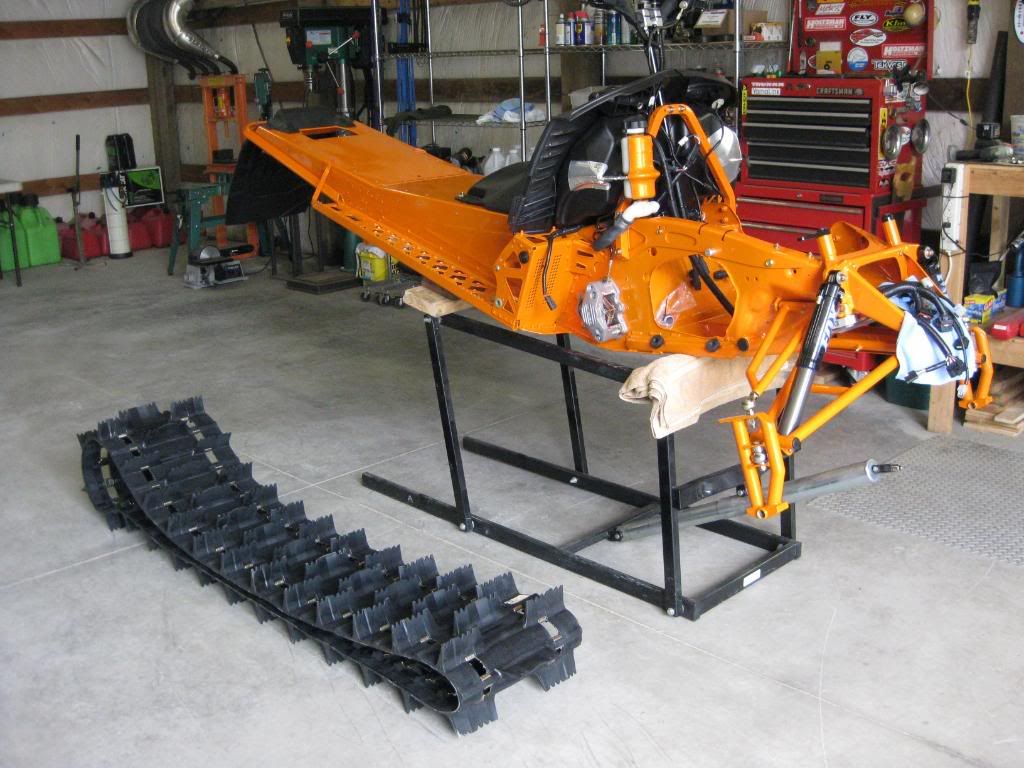
When installing the track and shaft assembly. We taped off the end of the shaft as to not scratch the powder coat while installing. Also, the brake housing assembly is loosened, this is to ease installation of the complete unit without binding during this process.
I am going to be at the Edmonton Show this weekend. So I will not have another post up until next week!
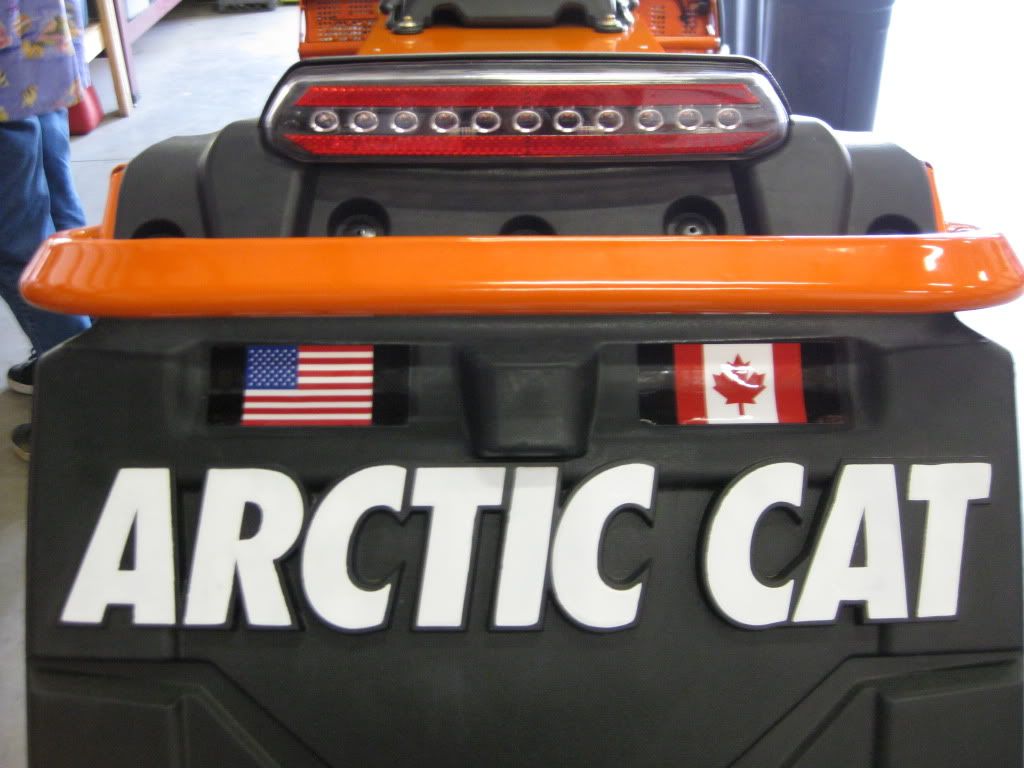
However, the ‘Twisted Mini Panther’ and I will be displaying our dual citizenship pride between the Krazy Canadian booth and Twisted Turbos! So come by and see us all!
When I first spoke with Ray at Black Dimond Xtreme he was ecstatic about this project build! Now, if anyone has ever met Ray at BDX, they have probably experienced his enthusiasm toward building lightweight and tricked out sleds. Ray immediately wanted to make this project into a 4lb titanium monster sled! Unfortunately, I had to throttle him down a bit and explain the main objectives with the build. Number one, it had to be attainable bolt on parts that the average common consumer could afford. The second focus was on the modifications of importance that not only enhanced performance but maintained the integrity of the M-series balanced feel.
Drive Line:
Black Diamond Xtreme is the original brains behind the well known diamond drive in Arctic Cat’s snowmobiles. So we started with the drive line modifications first.
Budd installed the brake housing and BDX black ceramic pads. The ceramic pads need to be used with the light weight rotor or damage will occur.


The BDX brake aluminum/ceramic composite rotor already has the spacer machined in as one complete unit; this is different from the OEM cast iron brake rotor assembly that is two pieces consisting of a spacer and rotor. The BDX rotor saves 1.8 lbs of rotating mass.


I have always used Black Diamond Xtreme’s Dimond Lite Drive system on all my M1000’s. The weight savings are a bonus, but the ability to gear down a sled is the attribute in performance that I like most about this drive. This drive system combined with proper clutching, creates overall lower engagement performance; enhancing the sleds tree riding capabilities along with utilizing the unleashed freight train feel of power in the M1000’s while climbing. The gear case on the 2009 saves 4lbs (11lbs on older M’s) and we are using 59/61 gearing for the Twisted Turbo package. I have used 55/65 gearing on stock my set sleds in the past.

Budd greases the BDX Lite Weight track shaft w/ 9 tooth drivers in preparation to install it. This track shaft saves 2 pounds.

The next part to be installed was the track. I have worked with Bruce at Camoplast for the last 3 years and have tried several lengths and styles of their product line. I always come back to the Camoplast 156 Challenger Xtreme as my overall number one preferred choice. This track is not only nimble enough for tight tree style riding, I find it to hook up and feel very stable in those harder icier conditions. With the stock 162 tunnel there was no need for tunnel fabrication, and we found it to have a very nice overall fit once installed.

When installing the track and shaft assembly. We taped off the end of the shaft as to not scratch the powder coat while installing. Also, the brake housing assembly is loosened, this is to ease installation of the complete unit without binding during this process.
I am going to be at the Edmonton Show this weekend. So I will not have another post up until next week!
However, the ‘Twisted Mini Panther’ and I will be displaying our dual citizenship pride between the Krazy Canadian booth and Twisted Turbos! So come by and see us all!

I feel smarter now. I just finished adding the BDX drive line and brake mods you choose to my 09 M1000 pumper along with some of their Chrome Moly skid items. Can't wait to feel the loss of that weight right in the gut of the sled. From what I hear, a very noticeable change on the 1000s for the money. Remember to break in that brake rotor. I heard of one not broken in correctly last spring and the rotor and pads bonded to each other.
B
BigRed118
Well-known member
I have worked with Ray at BDX and have a lot of there items on my M8. The stuff works. I am down to 437lbs (no oil/fuel) and couldn't be happier. No boost here but man are these sleds fun to ride with a little less mass. Now if I could only do the same with me it would be a great match
Similar threads
F
- Replies
- 8
- Views
- 2K
F
S
- Replies
- 18
- Views
- 3K

