
If you can turn a wrench, you can setup your primary without issue. It doesnt even have to come off of the sled. Just take the cover off and change out the weights and rollers. Nothing too complicated about the secondary clutch either but I dont think any modifications are needed to it with just a 180 kit.
Install the app
How to install the app on iOS
Follow along with the video below to see how to install our site as a web app on your home screen.
Note: This feature may not be available in some browsers.
- Forums
- Snowmobiles: Brands, Performance & Modifications
- Yamaha
- Yamaha: Boosted Sleds (Turbo or Supercharged)
You are using an out of date browser. It may not display this or other websites correctly.
You should upgrade or use an alternative browser.
You should upgrade or use an alternative browser.
Haha im not gonna lie... You lost me at weights and rollers...
Hmm alright off to do some google searches!
Hmm alright off to do some google searches!
If you can turn a wrench, you can setup your primary without issue. It doesnt even have to come off of the sled. Just take the cover off and change out the weights and rollers. Nothing too complicated about the secondary clutch either but I dont think any modifications are needed to it with just a 180 kit.

I posted the clutching information I am using earlier in the thread. Give Dustin at Outlaw Motorsports a call, and he will get you straightened out. He probably has all of the weights and rollers in stock and I am sure he can get them shipped to you too. Enterprise, OR to Idaho would not take long.
I had the same feeling after my turbo install, mine would hit the limiter instantly having never gone into the clutch I was a little intimidated. I really don't have to many options to get the sled worked on, so I phoned the dealer were it was purchased from Darren from E&S Motorsports in Edmonton. I told him my weight elevation riding area, He shipped the parts it in the mail. didn't take to much and they were in. Only prob I had was the secondary spring position, Called him back he set me straight. 
quick clutch how to
This can be done with the clutch still installed on the sled.
<O </ORemove the 6 10mm bolts out of the cover. You can start be removing one from each side then work them around in a circle until the cover is off. Note the X on both the clutch and the cover, that need to line back up when you re-install.
<O</OUse an 8mm ratchet and wrench to remove the bolt and nut that holds the rollers in. The shaft that holds in the roller then can be pushed out. Make sure you don’t lose the plastic washers. Replace the roller with your desired size.
<O</OWith a 2.5mm allen loosen the set screw that holds down the shaft on the primary weight pin. Don't remove only loosen.
<O</ORemove the bolt and nut. Remove the shaft and washers. Remove the factory weight.
<O</OYou may or may not have rivets installed from the factory. Yamaha rivets come in different lengths and different material. Refer to chart to identify them. Yamaha's largest weight is 4.5 grams for the big boys that need a larger rivet we make a brass 7.0 gram rivet!
<O</OInstall rivets into the appropriate holes. Note that the weight will have countersink on one side, that’s where you insert the rivet.
<O</OOnce installed flip over and smash down so they don't come out.
<O</ORe-install weight. Don't forget the washers and to lock the 2.5mm set screws back down.
<O</ORe-install clutch cover.
<O</OGo ride!
<O</O


This can be done with the clutch still installed on the sled.
<O
</ORemove the 6 10mm bolts out of the cover. You can start be removing one from each side then work them around in a circle until the cover is off. Note the X on both the clutch and the cover, that need to line back up when you re-install.<O
</OUse an 8mm ratchet and wrench to remove the bolt and nut that holds the rollers in. The shaft that holds in the roller then can be pushed out. Make sure you don’t lose the plastic washers. Replace the roller with your desired size.<O
</OWith a 2.5mm allen loosen the set screw that holds down the shaft on the primary weight pin. Don't remove only loosen.<O
</ORemove the bolt and nut. Remove the shaft and washers. Remove the factory weight.<O
</OYou may or may not have rivets installed from the factory. Yamaha rivets come in different lengths and different material. Refer to chart to identify them. Yamaha's largest weight is 4.5 grams for the big boys that need a larger rivet we make a brass 7.0 gram rivet!<O
</OInstall rivets into the appropriate holes. Note that the weight will have countersink on one side, that’s where you insert the rivet.<O
</OOnce installed flip over and smash down so they don't come out. <O
</ORe-install weight. Don't forget the washers and to lock the 2.5mm set screws back down.<O
</ORe-install clutch cover. <O
</OGo ride!<O
</O Today's sled report: Well it was freezing cold. Wind chill brought temp to -20. We had Christopher with us, 801, rich racer, and sled goddess. And a non snowester lol
The turbo ran great, top speed of 95 mph at 9400 rpm with room for more if I had a longer run area. Tons of ice build up on the sled, I was letting off so much steam that when I would stop it was like a sauna. Haha
But overall fun day!
I'll have pictures of the clutch install and then a more detailed review later tonight!
You forgot to mention the education you got today, TURBO LAG 101.
Today's sled report: Well it was freezing cold. Wind chill brought temp to -20. We had Christopher with us, 801, rich racer, and sled goddess. And a non snowester lol
The turbo ran great, top speed of 95 mph at 9400 rpm with room for more if I had a longer run area. Tons of ice build up on the sled, I was letting off so much steam that when I would stop it was like a sauna. Haha
But overall fun day!
I'll have pictures of the clutch install and then a more detailed review later tonight!
9400??? With those rivets I sent you? The rev limiter is 9200.
Well guys here is everything that happened with the clutching and the ride!
So first off here is everything that came from Matt@MPI for me. Thanks again Matt for getting that so fast to me and the instructions were just spot on!
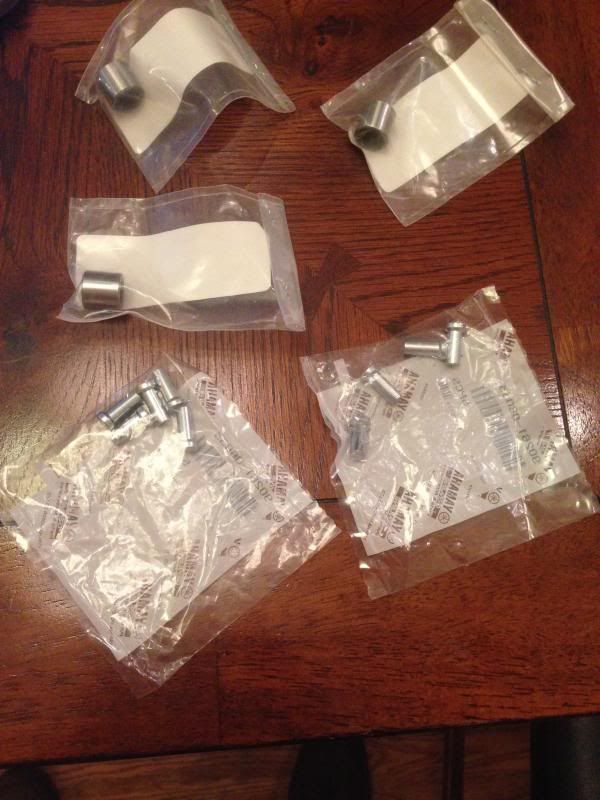
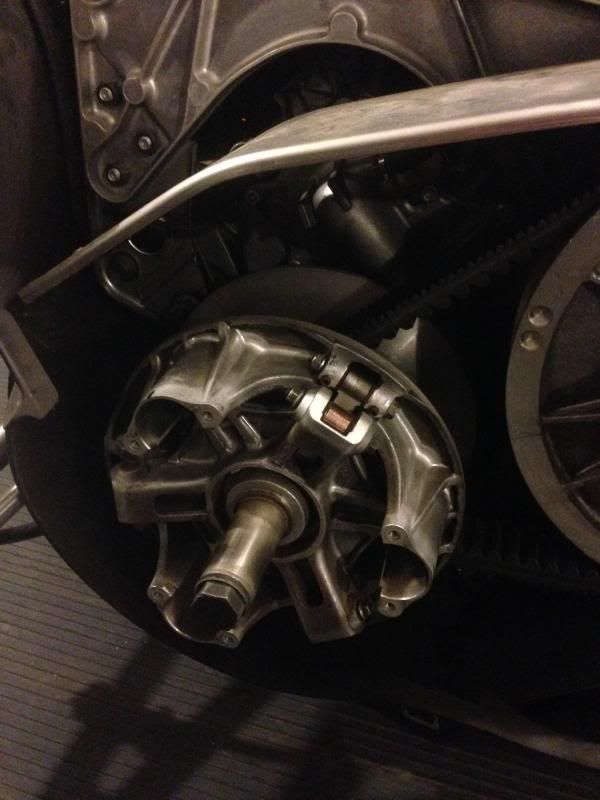
So of course everything looks pretty standard with my clutch, just figured i would throw this in here.
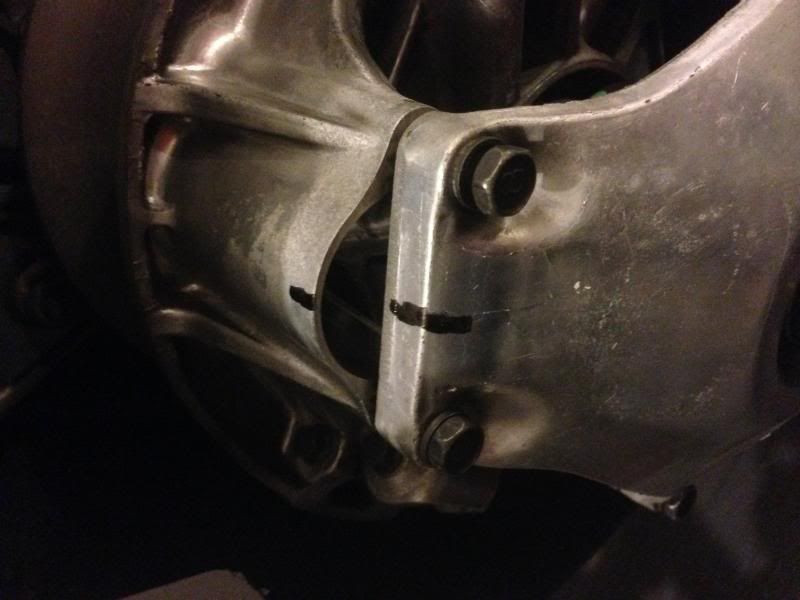
Now on the first step it said to watch out for the X on both the clutch and cover so that it will match up when I put it back together. I didnt see the X (I did find it after I took the cover off) So I took a sharpie and made a mark so it would be put together right.
So first off here is everything that came from Matt@MPI for me. Thanks again Matt for getting that so fast to me and the instructions were just spot on!
So of course everything looks pretty standard with my clutch, just figured i would throw this in here.
Now on the first step it said to watch out for the X on both the clutch and cover so that it will match up when I put it back together. I didnt see the X (I did find it after I took the cover off) So I took a sharpie and made a mark so it would be put together right.
Remove the 6 10mm bolts out of the cover. You can start be removing one from each side then work them around in a circle until the cover is off.
Now in the same picture you can see the 10mm bolts that need to come off.
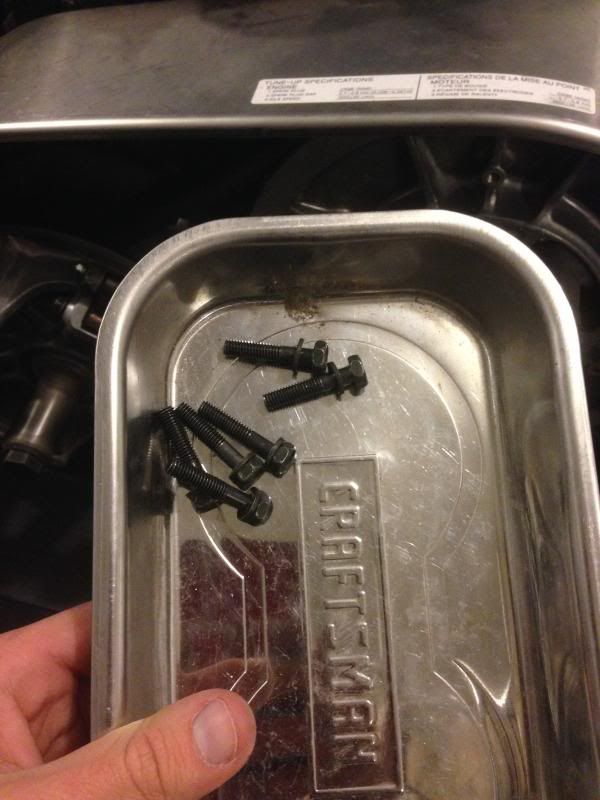
They came off pretty easy and then i was down to the clutch.
Now in the same picture you can see the 10mm bolts that need to come off.
They came off pretty easy and then i was down to the clutch.
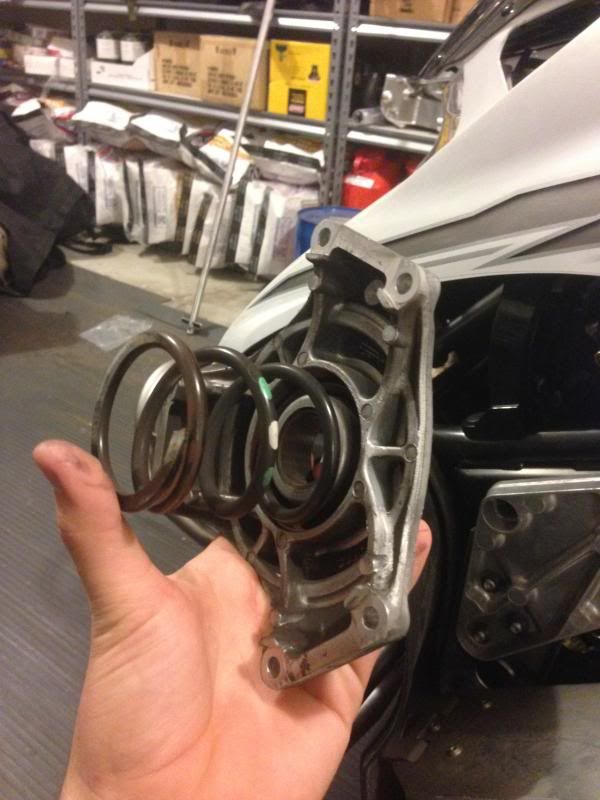
Here is the Case and the main spring.
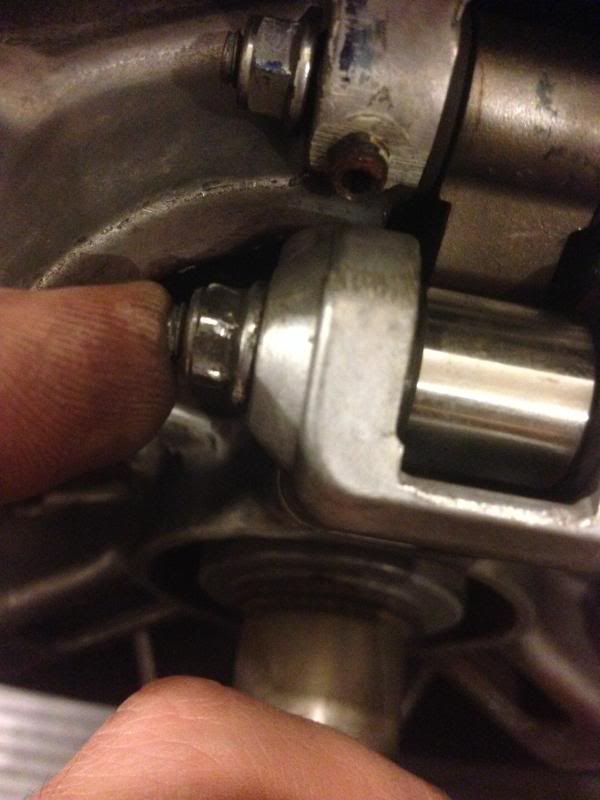
"Use an 8mm ratchet and wrench to remove the bolt and nut that holds the rollers in. The shaft that holds in the roller then can be pushed out. Make sure you don’t lose the plastic washers. Replace the roller with your desired size."
Here are the bolts that hold the rollers in

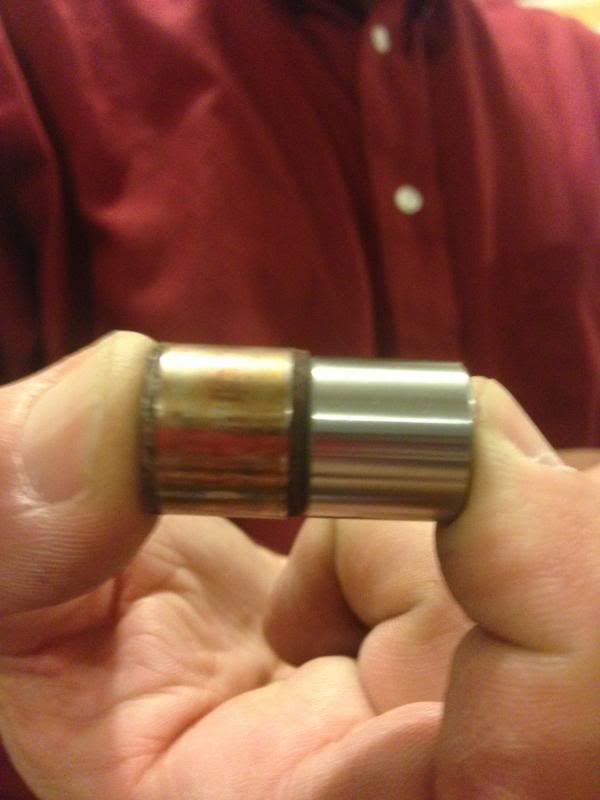
Once the Bolt and nut was out you can see here the roller that was there on the left and the new one on the right.
"Use an 8mm ratchet and wrench to remove the bolt and nut that holds the rollers in. The shaft that holds in the roller then can be pushed out. Make sure you don’t lose the plastic washers. Replace the roller with your desired size."
Here are the bolts that hold the rollers in
Once the Bolt and nut was out you can see here the roller that was there on the left and the new one on the right.
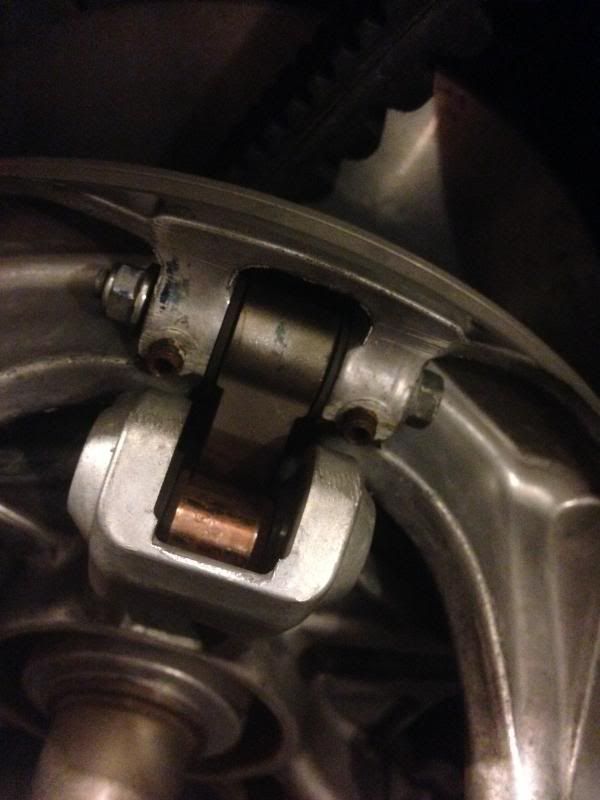
Now once I had put the rollers back in, (making sure the washers were in there as well) I found my self concerned that the bolts did not completely set.
As you can see, there is a bit of movement when the bolt is tightened down all the way. From looking at another nytro this seems to be normal so I didnt worry to much about it after looking at another.
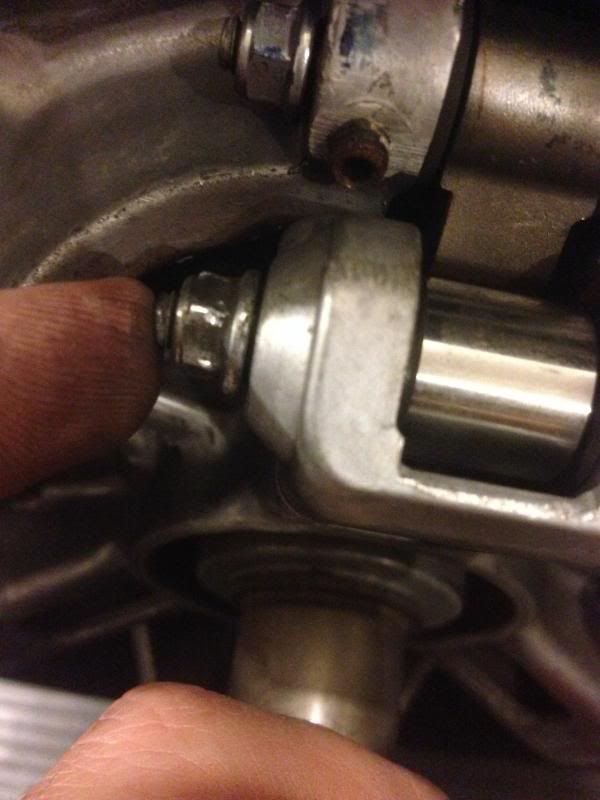
As you can see, there is a bit of movement when the bolt is tightened down all the way. From looking at another nytro this seems to be normal so I didnt worry to much about it after looking at another.
"With a 2.5mm allen loosen the set screw that holds down the shaft on the primary weight pin. Don't remove only loosen."
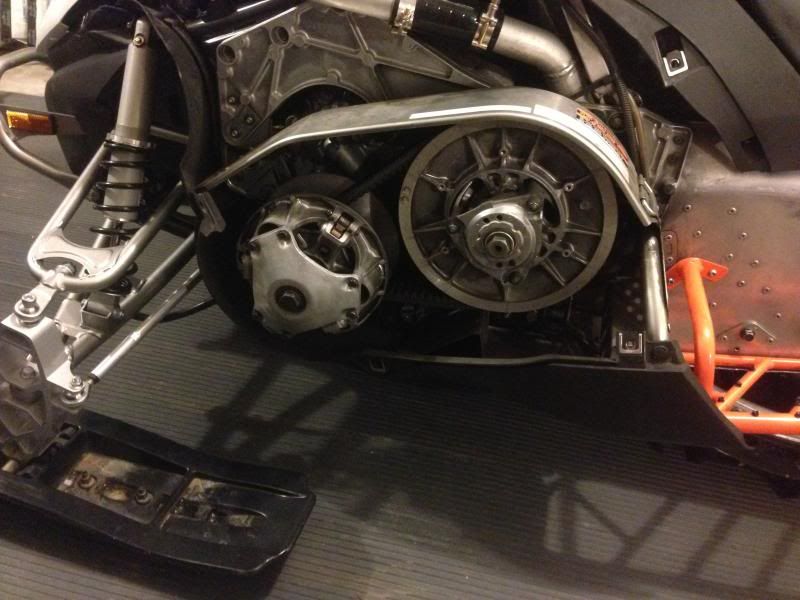
With that in mind, to be able to get to the set screw I had to take the belt off. That is the only thing that made it possible to get at the set screw. That is because you need to be able to separate the clutch fully.
I turned each set screw one half turn to loosen it.
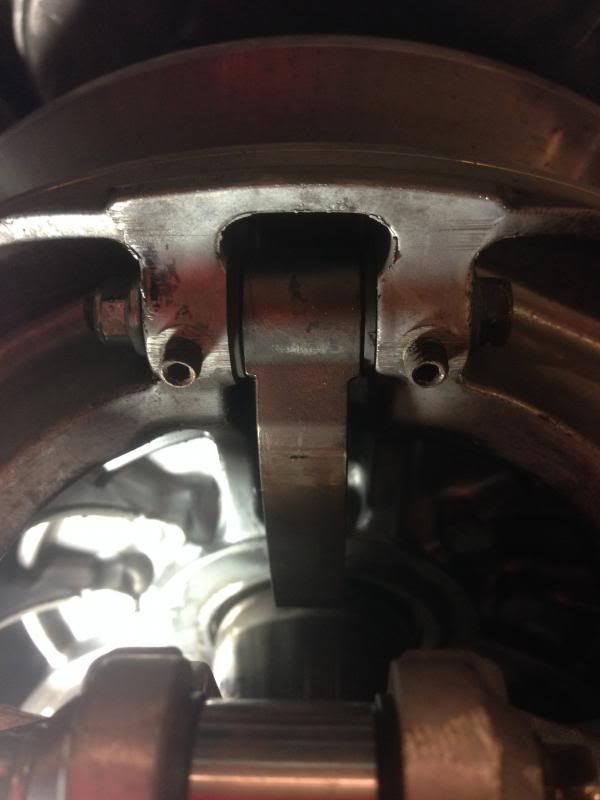
From there it was the same process to remove the screw and bolt. Once that is out the arm will slide right out, being careful not to the lose the washers again!
With that in mind, to be able to get to the set screw I had to take the belt off. That is the only thing that made it possible to get at the set screw. That is because you need to be able to separate the clutch fully.
I turned each set screw one half turn to loosen it.
From there it was the same process to remove the screw and bolt. Once that is out the arm will slide right out, being careful not to the lose the washers again!
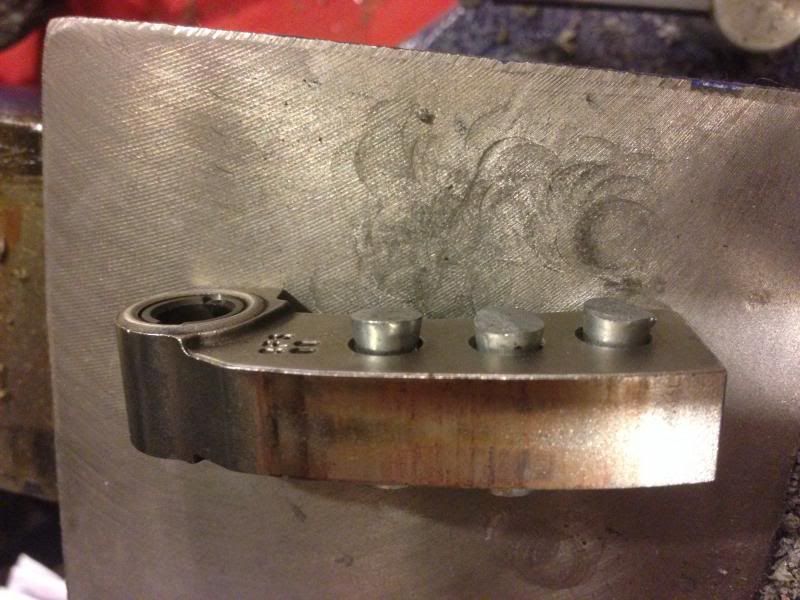
"You may or may not have rivets installed from the factory. Yamaha rivets come in different lengths and different material. Refer to chart to identify them. Yamaha's largest weight is 4.5 grams for the big boys that need a larger rivet we make a brass 7.0 gram rivet!"
"Install rivets into the appropriate holes. Note that the weight will have countersink on one side, that’s where you insert the rivet."
"Once installed flip over and smash down so they don't come out. "
Now with my arms they did not have any installed rivets in them. That made it a lot easier. I placed three rivets into each arm and then smashed them down so they would not come back out.
As you can see when I held the arm I elected to hold it with a towel over it so as to not scratch it.
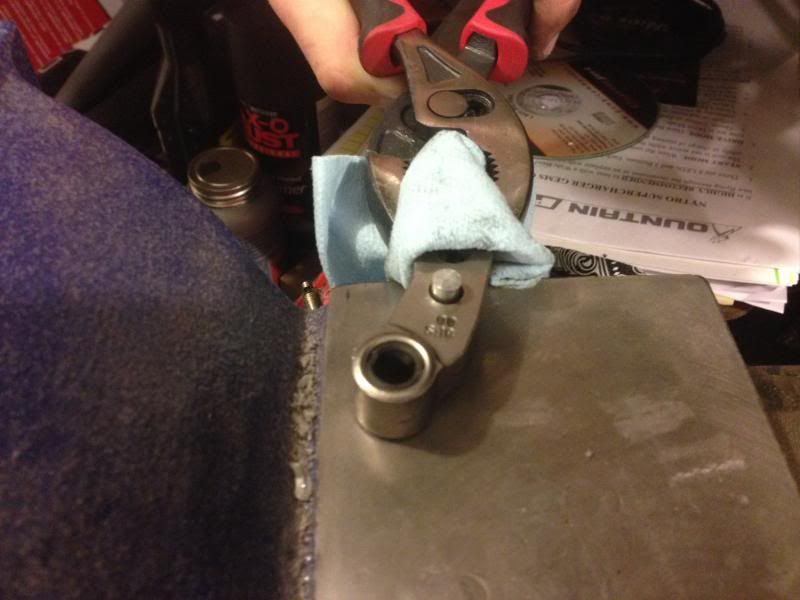
This is what it looks like with all three that have been hit. They dont need to be immobile just need to insure that they will not come out.
Once that has been finished with all three arms. Just reinstall the arms, washers, screws and bolts. Then reinstall belt, and the cover with the 6 10mm screws and its done.
Really only took me about 20 or 30 minutes to do. This included the time it took me to do all the pictures and such.
"Install rivets into the appropriate holes. Note that the weight will have countersink on one side, that’s where you insert the rivet."
"Once installed flip over and smash down so they don't come out. "
Now with my arms they did not have any installed rivets in them. That made it a lot easier. I placed three rivets into each arm and then smashed them down so they would not come back out.
As you can see when I held the arm I elected to hold it with a towel over it so as to not scratch it.
This is what it looks like with all three that have been hit. They dont need to be immobile just need to insure that they will not come out.
Once that has been finished with all three arms. Just reinstall the arms, washers, screws and bolts. Then reinstall belt, and the cover with the 6 10mm screws and its done.
Really only took me about 20 or 30 minutes to do. This included the time it took me to do all the pictures and such.
Now as for the report on the ride that we took yesterday it was overall a pretty good ride.
I believe the largest thing that I learned from this trip was turbo lag. Now when I would be riding at really slow speed be it on the trail or in powder and I would grab a handful of throttle. The sled would make about three bogging sounds and lose power and thing hit me with full power.
Now I thought with a turbo that I would not lose power when I hit the gas but just the additional "turbo" power would come a few seconds later.
This led me to be carving in the snow and I would go to pull a hard turn in the snow and lean into it and then grab the throttle to power out of it and the sled would bog for a second or two and the sled would end up falling over.
From what everyone has been telling me, I need to be brapping the engine more to keep the turbo spooled up so its ready for when I need that instant power.
Similar threads
- Replies
- 16
- Views
- 1K
W
- Replies
- 0
- Views
- 339
U
- Replies
- 8
- Views
- 427
N
- Replies
- 11
- Views
- 2K
J