
What are you guy's finding to be the best rear bumper for utilizing the Snobunjes? I know like a lot of guy's, i broke mine last season jerking on my buddies sled's when they were stuck and it needs to be replaced with something that is better then just looking good. Thanks for any info.
Install the app
How to install the app on iOS
Follow along with the video below to see how to install our site as a web app on your home screen.
Note: This feature may not be available in some browsers.
You are using an out of date browser. It may not display this or other websites correctly.
You should upgrade or use an alternative browser.
You should upgrade or use an alternative browser.
Rear Bumpers for the Pro RMKs
- Thread starter earnhardt38
- Start date
If you are "jerking" on the snowbungie...
IMO, you should be thinking about the strength of the tunnel as much as the bumper.
If the bumper is weak link.. then the tunnel can be saved... If the bumper is stronger... the tunnel may get bent or tweaked.
Just something to add to the equation.
If you doing this a lot.. you should think about the Vanamburg tunnel sides/bumper/boards option.
There are others like AKsnowrider that should start making these tunnel side/bumpers as kits (HINT HINT).
Bumpers out there are
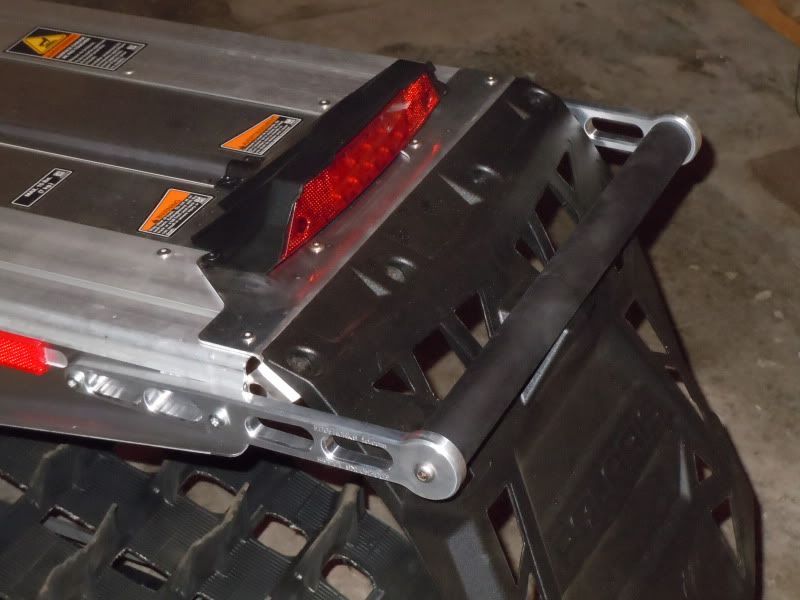
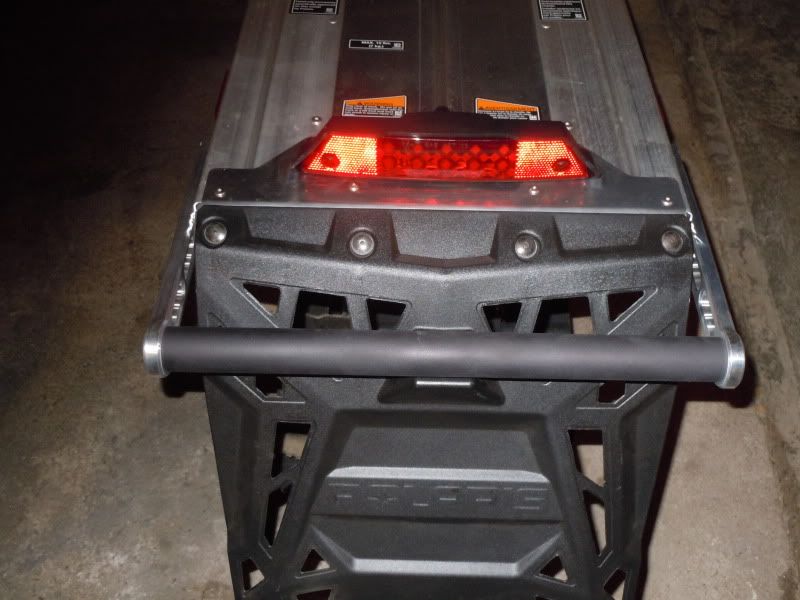
Skinz Protective gear This has enhanced side plates that may distribute the load more.
Edgeworks tool (Carl's Cycles carries them) stock type look with much stronger parts.
Vanamburg makes a bumper as well in addition to their tunnel sides/bumper.
There are probably others that I'm missing
IMO, you should be thinking about the strength of the tunnel as much as the bumper.
If the bumper is weak link.. then the tunnel can be saved... If the bumper is stronger... the tunnel may get bent or tweaked.
Just something to add to the equation.
If you doing this a lot.. you should think about the Vanamburg tunnel sides/bumper/boards option.
There are others like AKsnowrider that should start making these tunnel side/bumpers as kits (HINT HINT).
Bumpers out there are
Skinz Protective gear This has enhanced side plates that may distribute the load more.
Edgeworks tool (Carl's Cycles carries them) stock type look with much stronger parts.
Vanamburg makes a bumper as well in addition to their tunnel sides/bumper.
There are probably others that I'm missing
Last edited:
replace the carbon fiber tube with a piece of chromoly. I used .058, buy 2' and cut it to fit. My memory is shot but I think it was about $20
F
FCR112
ACCOUNT CLOSED
replace the carbon fiber tube with a piece of chromoly. I used .058, buy 2' and cut it to fit. My memory is shot but I think it was about $20
What's the O.D.?
I don't have the sled yet
")
What's the O.D.?
I don't have the sled yet
1 1/8" maybe? Ask someone to measure their stock one, mine's locked in the trailer and I'm lazy.
mtnhorse, you mentioned adding strength to the tunnels. What level of use/ abuse are the stock tunnels good for? If someone plans on jumping and dropping their sled some should they add plates like timbersled offers or should there not be much to worry about?
F
FCR112
ACCOUNT CLOSED
1 1/8" maybe? Ask someone to measure their stock one, mine's locked in the trailer and I'm lazy.
You Suck
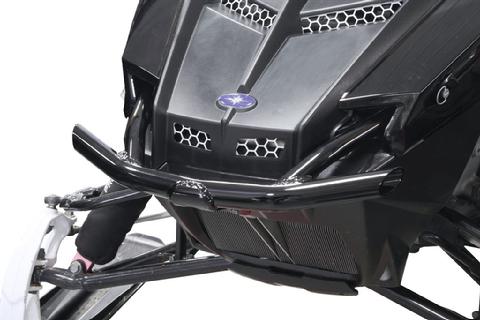
I replaced the rear bumper on my new Pro with the Edgeworks rear bumper. Gives the stock look with stronger parts. I ordered mine from Carls Cycle.
That looks great !!
It's 1.25" O.D. x 16.5" long.
Just replaced it yesterday with aluminum tubing from the local McLendon's Hardware.
Just replaced it yesterday with aluminum tubing from the local McLendon's Hardware.
O
Oregonsledder
Well-known member
It's 1.25" O.D. x 16.5" long.
Just replaced it yesterday with aluminum tubing from the local McLendon's Hardware.
Thanks for the info. I'm assuming fairly thin walled material. If so, do you really think it will be much stronger than the stock bumper?
It is .057" thick tubing, which is almost twice the thickness of the carbon fiber tubing.
Seems pretty stout, unable to flex it in it's original 6' length.
Seems pretty stout, unable to flex it in it's original 6' length.
G
gman086
Well-known member
I replaced my rear bumper with a 162 bumper from a 09-11 Arctic Cat M. Very strong and looks great. Looks like it belongs on the sled more that the stock Polaris bumper.
I was planning to go this route. Can you please post a pic?
Thanks!
G
O
Oregonsledder
Well-known member
Is the stock bumper really that weak? Last memorial Day I saw a stock Pro pulling in an M8 for several miles. I was curious how well the bumper held up, so when we got to the parking lot we found the guy. The bumper looked great. I asked him if he was worried about bending it and he said that he yanked on it pretty hard and didn't have a problem, so I'm just wondering? I don't plan on doing a lot of sled towing.
V
volcano buster
Well-known member
Just a thought...
When I broke my steering post on my Edge, I had a guy with a dragon pull me out. We had some steep little pulls to make and I figured he would be off the throttle then gun it at times. I tied a 10' rope to his running board strut where it attaches to the tunnel, then brought the rope back and made a loop around the bumper at the bend, then continued to the front end of my ski on the side the rope was on. I happened to have 2 pieces of rope so I did both sides to spread the load and have it steer my sled. I sat on the sled to run the power for the pulls, and the brakes for the descents.
Now, for the Sno-Bungi. I can picture a long piece of 1" nylon with a loop sewn in each end. Start by finding the midpoint of the strap and looping the strap around the running board support with both tails pointing back (with the mid-point being at the running board support). Keeping the loops together, make a quick loop around the rear bumper and then attach the bungee to the loops and pull from that. The weight should be applied to the side of the tunnel where it is braced, and only use the wrap around the rear bumper to guide the pull and keep the rope aligned and out of the track. Granted, once the strap gets pulled tight, there will be a minor amount of pull on the bumper as the strap constricts around the bumper and the strap is stretched between the bumper and the front anchor point for the rope.
By using this method, I can see the tunnel withstanding a lot more abuse as you are anchoring in at a point where the suspension ties in and the tunnel is reinforced.
We sell the Skinz rear bumper and the WRP tunnel reinforcement brackets. Contact me at email below for details. I will try mine first and then decide what direction I am going.


G
gman086
Well-known member
I would recommend using the 162 bumper as it comes all the way to the bracket for the rear skid. I may have went a little overboard, but I used 12 rivets per side. 10 on the inside and 2 on the bottom.
So it rivets on instead of bolting on?
Similar threads
R
- Replies
- 11
- Views
- 758
K
W
- Replies
- 3
- Views
- 2K
W