CompFusion Motor Mount Instructions;
Most of the procedure for installation can be found in the service manual for the correct model of sled; however, it recommended that a Polaris service technician with the CORRECT tools perform the installation due to the complex nature of the CFI engine.
Remove engine as per Section 5 of the Polaris service manual.
Remove the front engine support (Part #5134872).
Disassemble the support/mount assembly retaining the Torx bolts for use with the new mount.
Upon final assembly it recommended to use high strength threadlocker on ALL fasteners to prevent loosening from vibration.
Assemble the new aluminum mounting plate to front engine support using the Torx fasteners removed in previous step and the supplied nuts.
Using a drill press drill out the remaining 4 bolt holes and install the supplied Torx bolts and nuts. The short bolt should be placed inside the steering cutout.
Assemble the engine support to engine using the supplied pucks/washers. The thin washer is to be put towards the engine with the thicker washer inside the engine support.
This is important for proper engine alignment.
Make sure the rubber and aluminum components are very clean prior to assembly. This will aid in bonding of the two pieces.
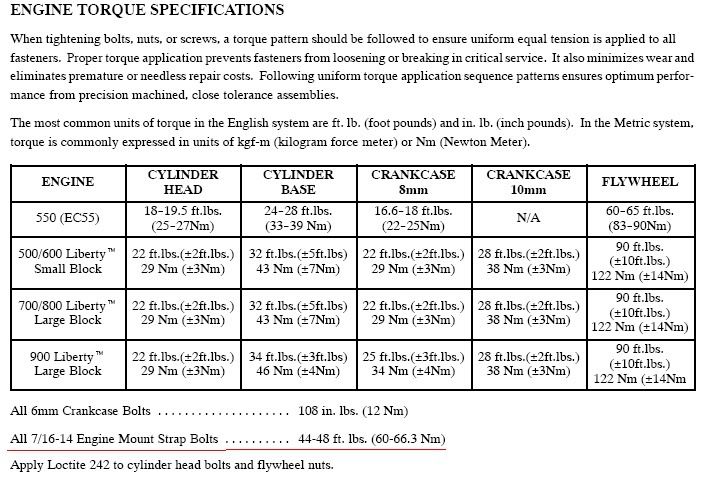
Using the supplied 3/8 x 2.25” bolts torque the support assembly to engine @ 40 ft/lbs. Note: Do not reuse the OEM large washer. It is not necessary and may in fact cause an issue with the bolts threading into the engine case.
Reinstall engine into chassis, preferably using new replacement bolts at the cross-member ends, and check center distance and alignment. It is highly recommended to replace the torque stop as well as the factory update kit urethane washer on the PTO rear mount if worn. This update is very important to prevent side-loading of the front mounts.


