Project 2015/16 Arctic Cat M 8000 SnoPro Build - Part 2
Published online: Apr 01, 2015 Arctic Cat Steve Janes
Web Exclusive
http://www.snowest.com/2015/04/project-201516-arctic-cat-m#
(EDITOR’S NOTE: This is the second in a series of articles about converting a 2015 Arctic Cat M 8000 SnoPro into a SnoWest Forums 2016 Project Cat giveaway sled. Throughout the summer and fall we will be working with SnoWest Forum members to build the perfect snowmobile … and then we will give it away to a Forum member at the end of the build.)
For those just joining in, last week we upgraded our 2015 Arctic Cat M 8000 front suspension with 2016 parts. This week we’re tackling the rear skid and will also update it with 2016 parts.
Once both front and rear suspensions are updated, we only have some clutching and gearing changes to transform the sled into a 2016 snowmobile for all intents and purposes. Where the new front end greatly improves handling and sidehilling, the rear skid will improve how the sled gets up on the snow and also improves the ride through the bumps.
Although we will still be using a 153x2.6 Power Claw track, we still have the option of upgrading it to a three-inch track. But as of right now, we’re not totally sold on the change. There are those who will insist on a three-inch track just because it’s deeper than the 2.6 … but after riding both this spring (in not-so-good snow conditions) we’re still debating what works best in all-around riding. (We’ll leave that argument up to the SnoWest Forums for discussion.)
So back to the rear skid.
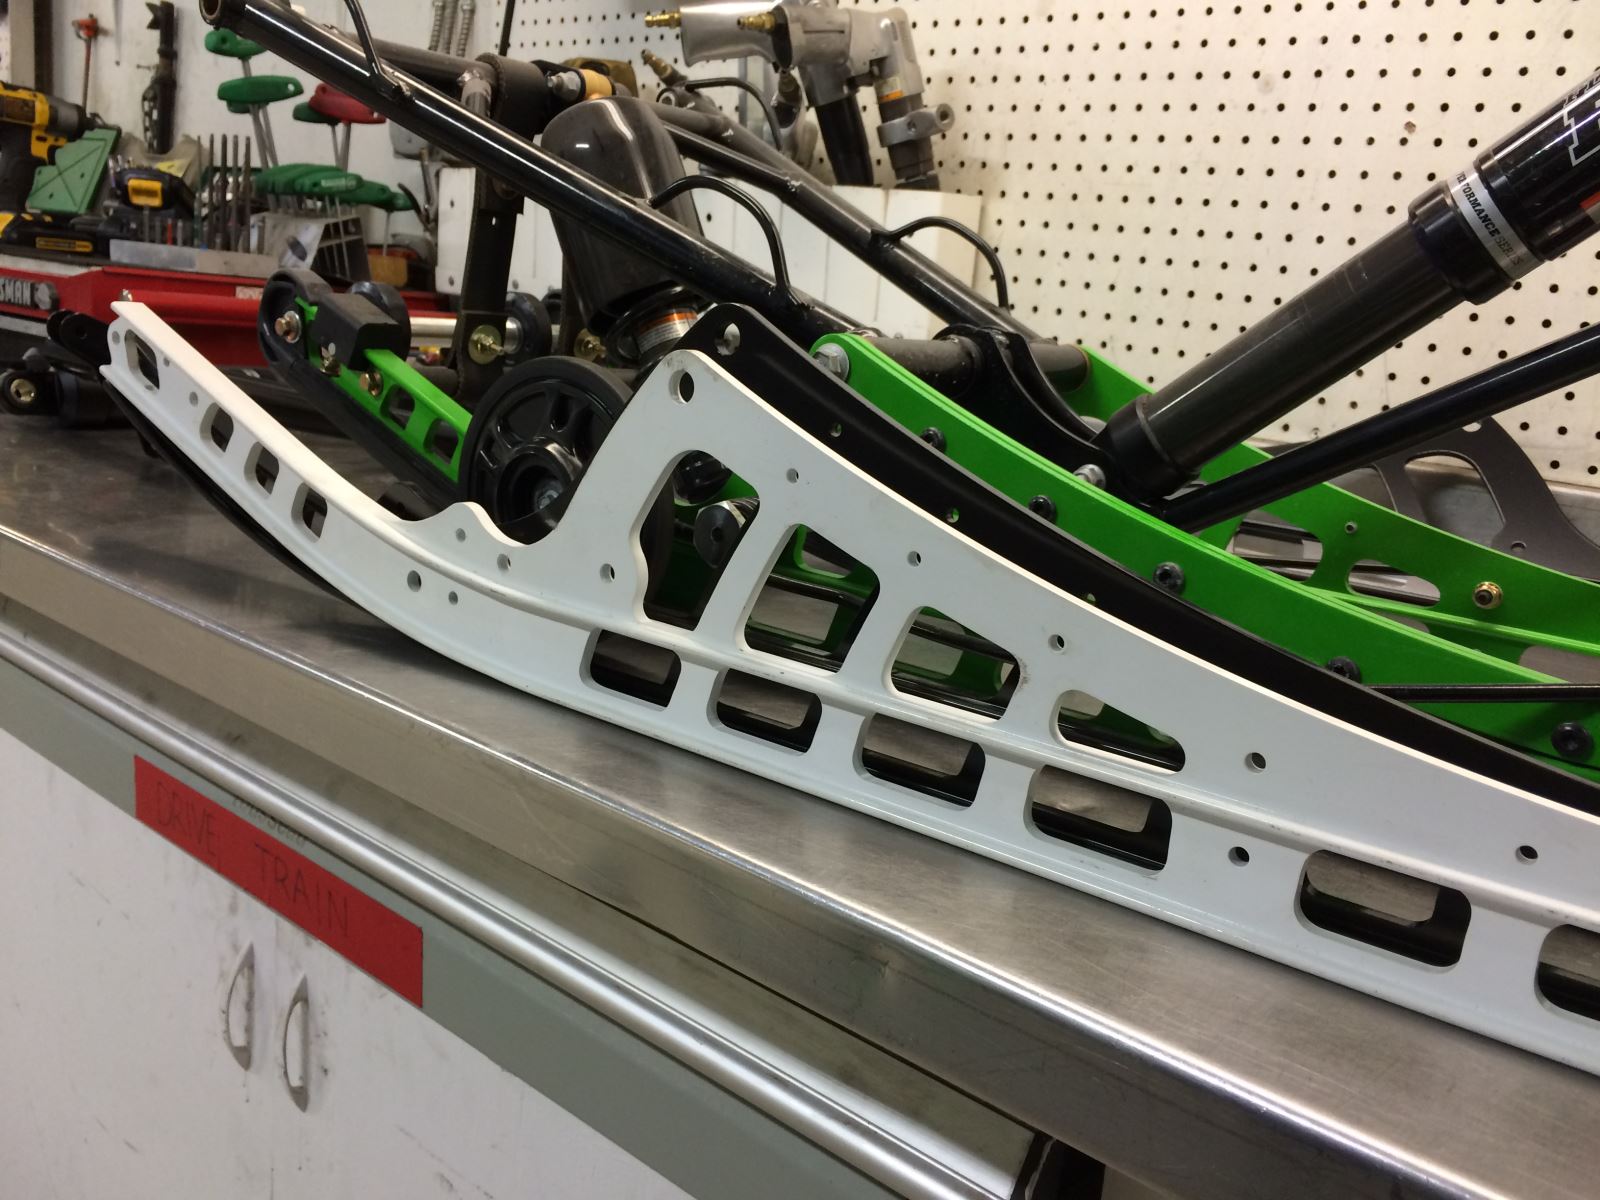
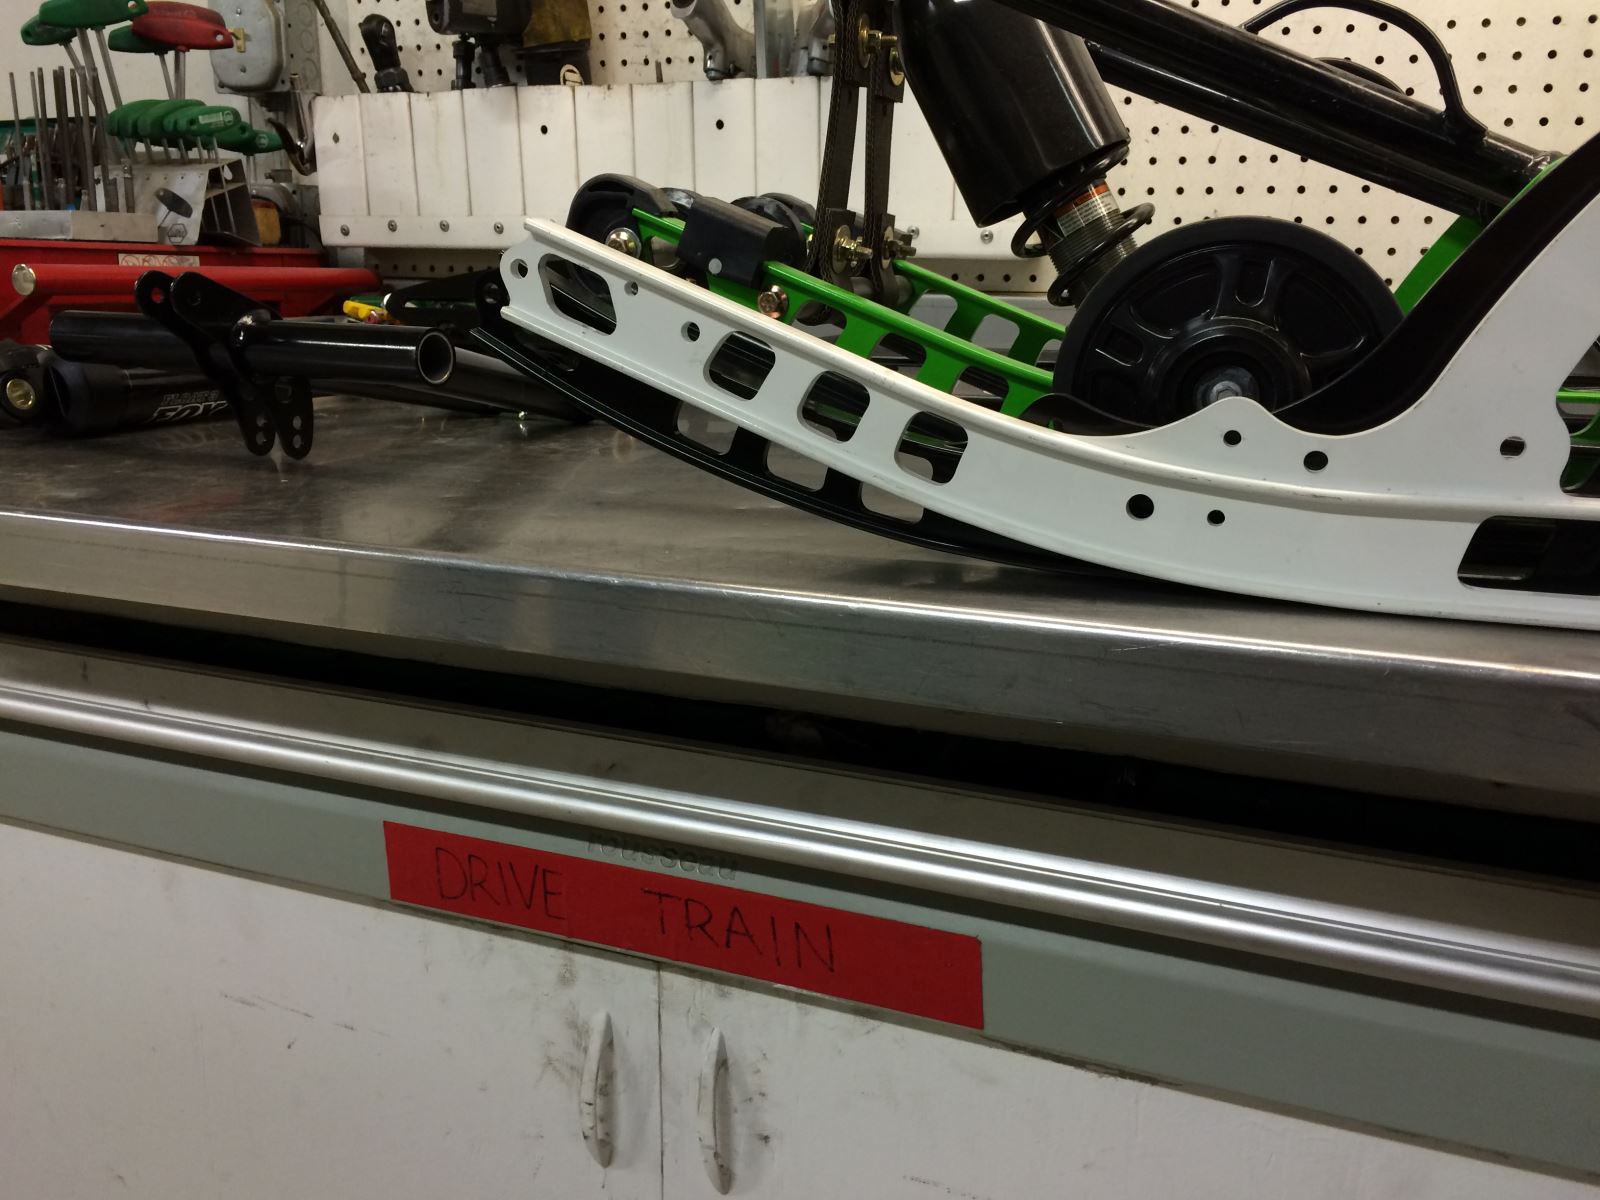
There have been significant changes to the rear which improves its characteristics in deep snow. First, the rail profile was changed giving the front part of the rails a bigger curve radius. Rather than a longer, gradual tip up, the curve radius stays flat longer and then rolls up more abruptly. This has created more travel and better ride control.
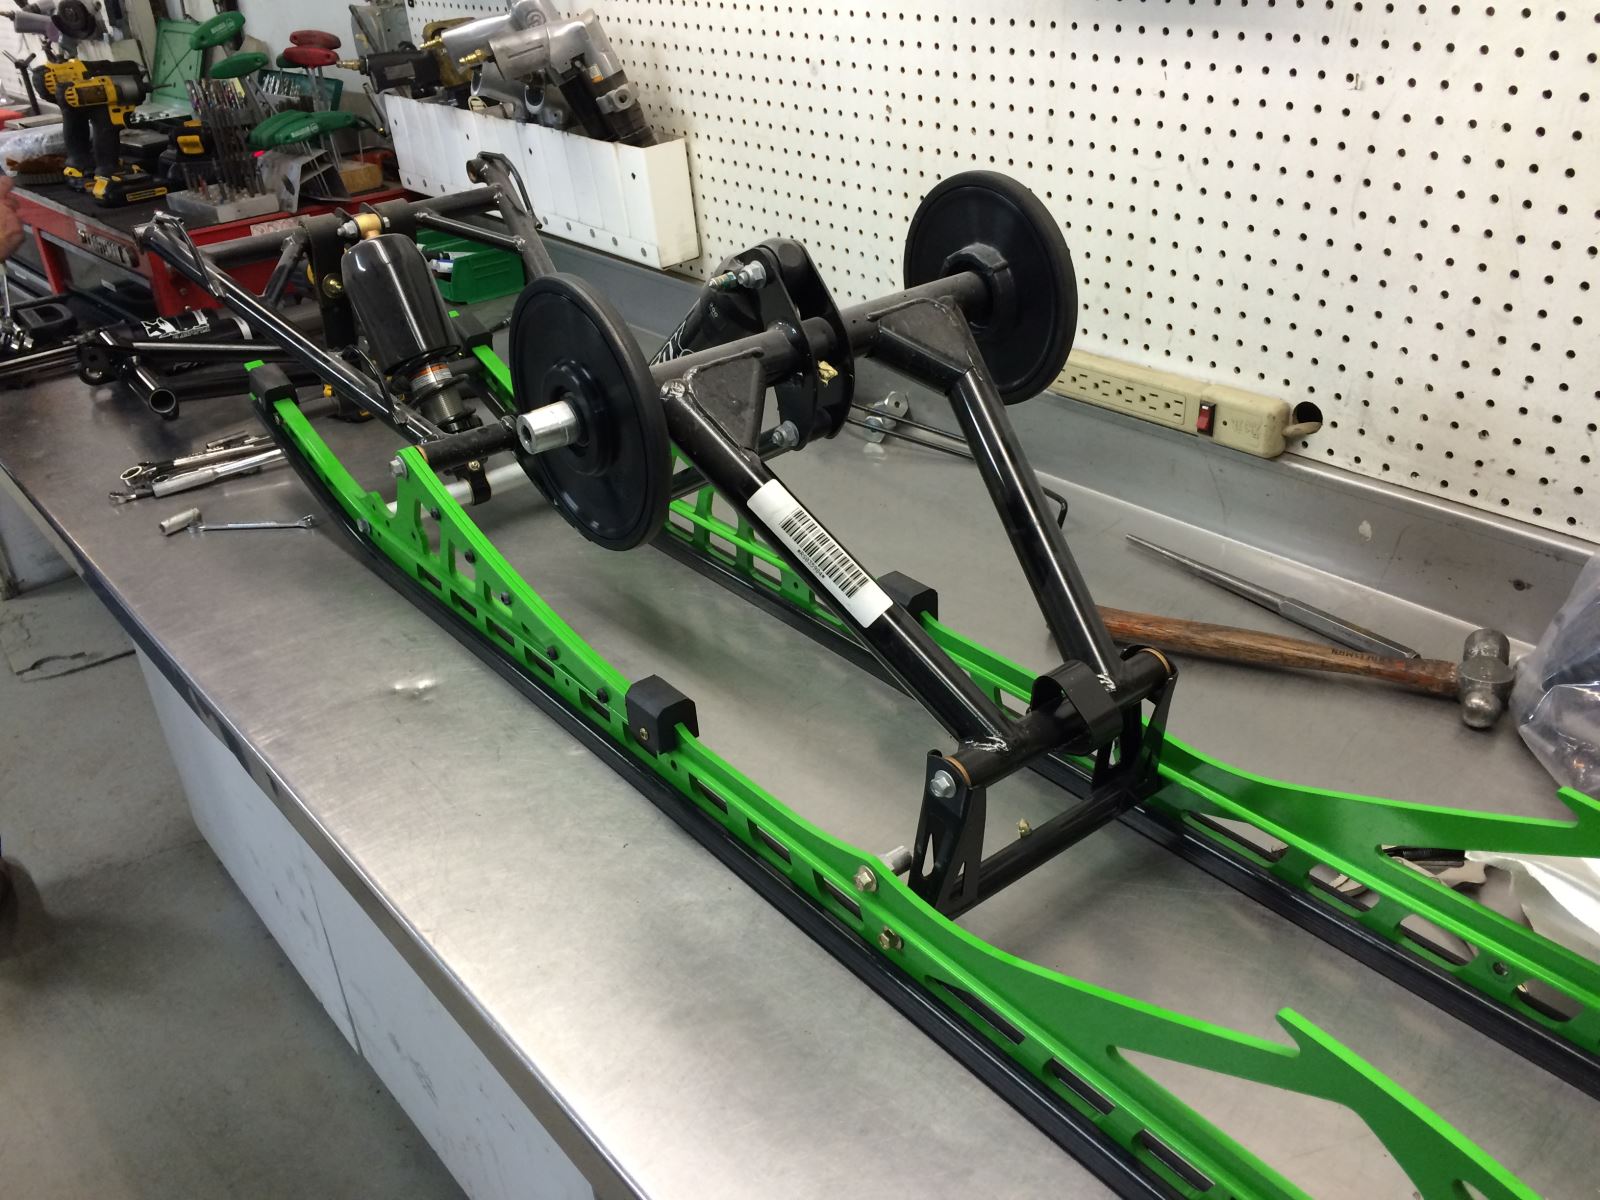
The front arm shock is 1.25-inches longer. The shock pull rod and the idler arm are also different to match the increased length of the shock.
All of these changes are designed to allow the backend to get up on top of the snow much faster. Combine this with Cat’s Power Claw track and you find the sled coming up out of the snow and floating on top much easier.
Installation Process
1) Pulling the rear skid isn’t complicated … although it can sometimes be a little frustrating. There are only four bolts that need to be removed that attach the skid to the tunnel—two in the front where your feet are usually located near the running board and two in the rear just below the running board. (The trick is to loosen a bolt without it spinning the entire shaft. By using an air ratchet, you usually can generate enough torque to loosen the bolt. But if one side is loose and the other side spins, you may need to re-tighten the one side and break the other side free.)
2) With the skid out, you are now going to remove parts from the old skid so you can use the bolts, bushings and stuff on the new skid. This means you will need to take apart the entire skid. We approached the process by breaking down the old and building up the new as we went along so it was a matter of parts off and then parts back on. This way we didn’t have a bunch of parts laying around trying to figure out where they went.
3) If you’re installing a 2016 rear kit, it will likely involve a rear arm, two slide rails, a pull rod and two new shocks (we used the Fox Evol shocks that come with the Limited Edition kit). You will also need to extend your limiter straps to accommodate the longer shocks.
4) There will be a couple of bushings on the front mount that will need to be pressed off the old rails and then pressed on the news rails. Other than that everything pretty much comes off with wrenches.
5) Once the new skid is rebuilt, then it’s just a matter of re-installing the skid back into the chassis, tightening the bolts and re-adjusting the track tension.
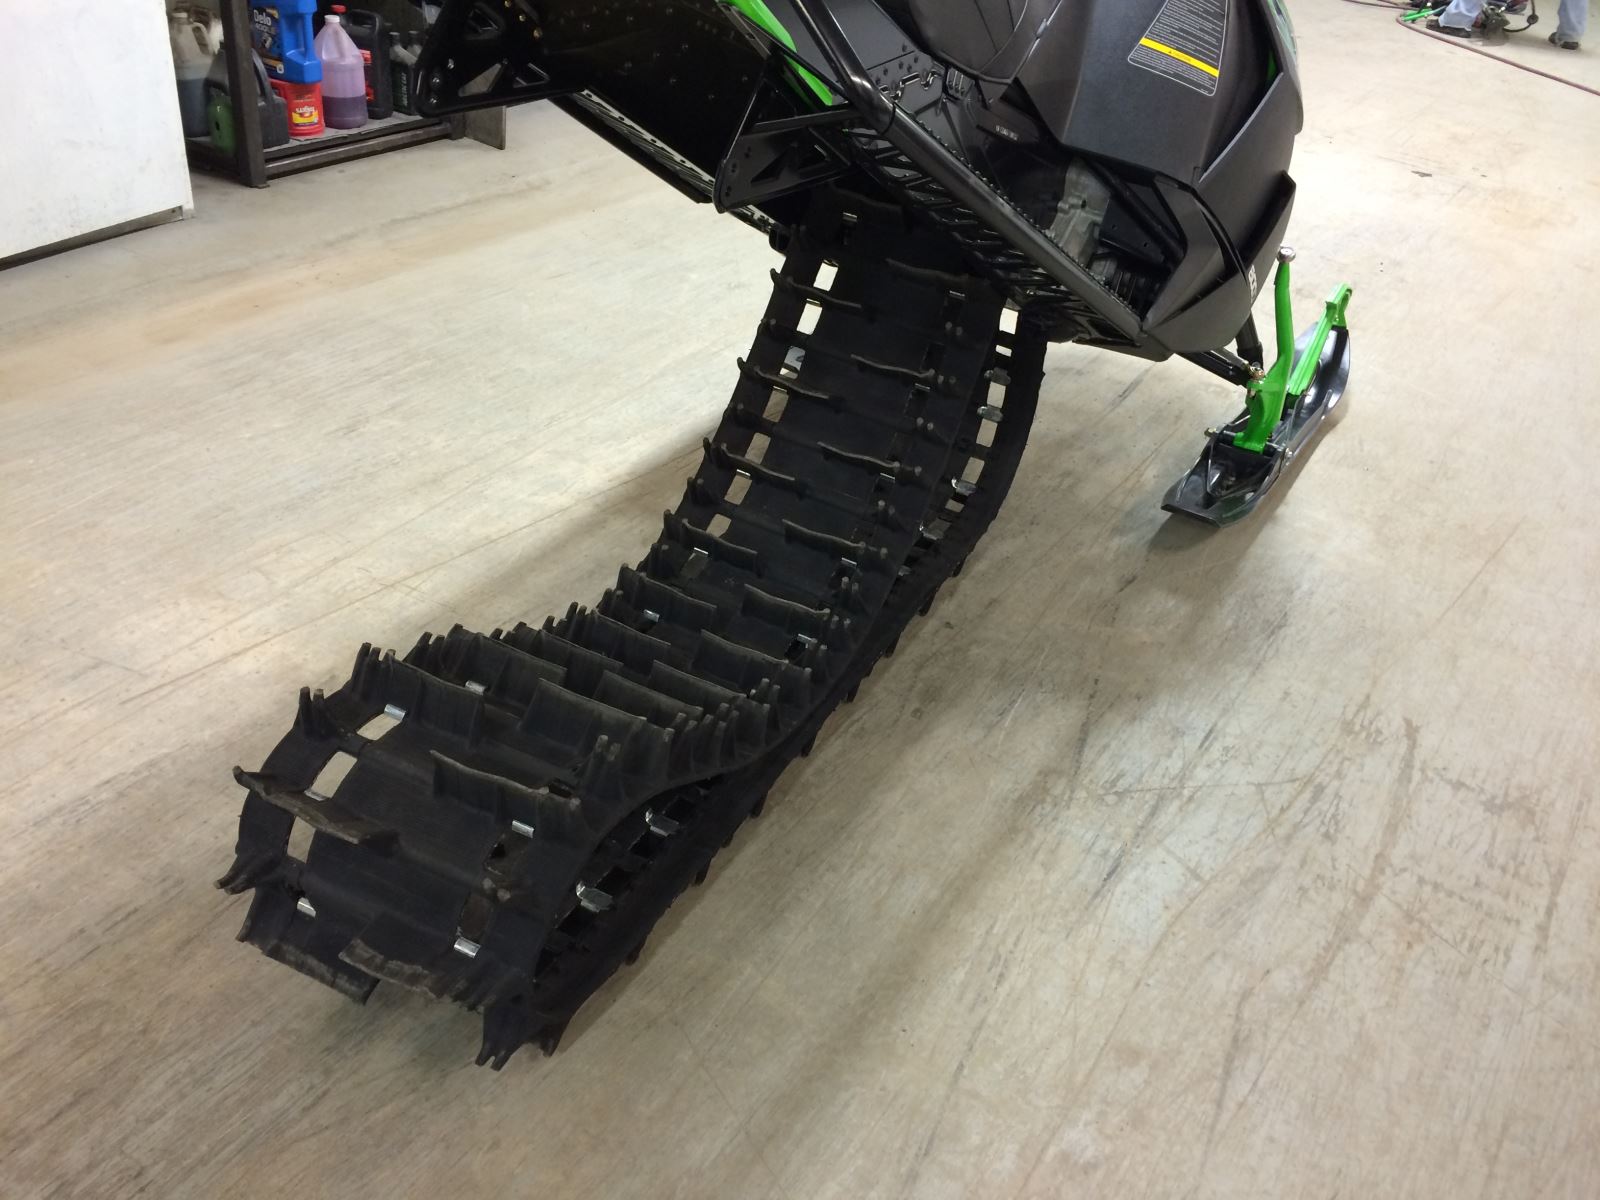
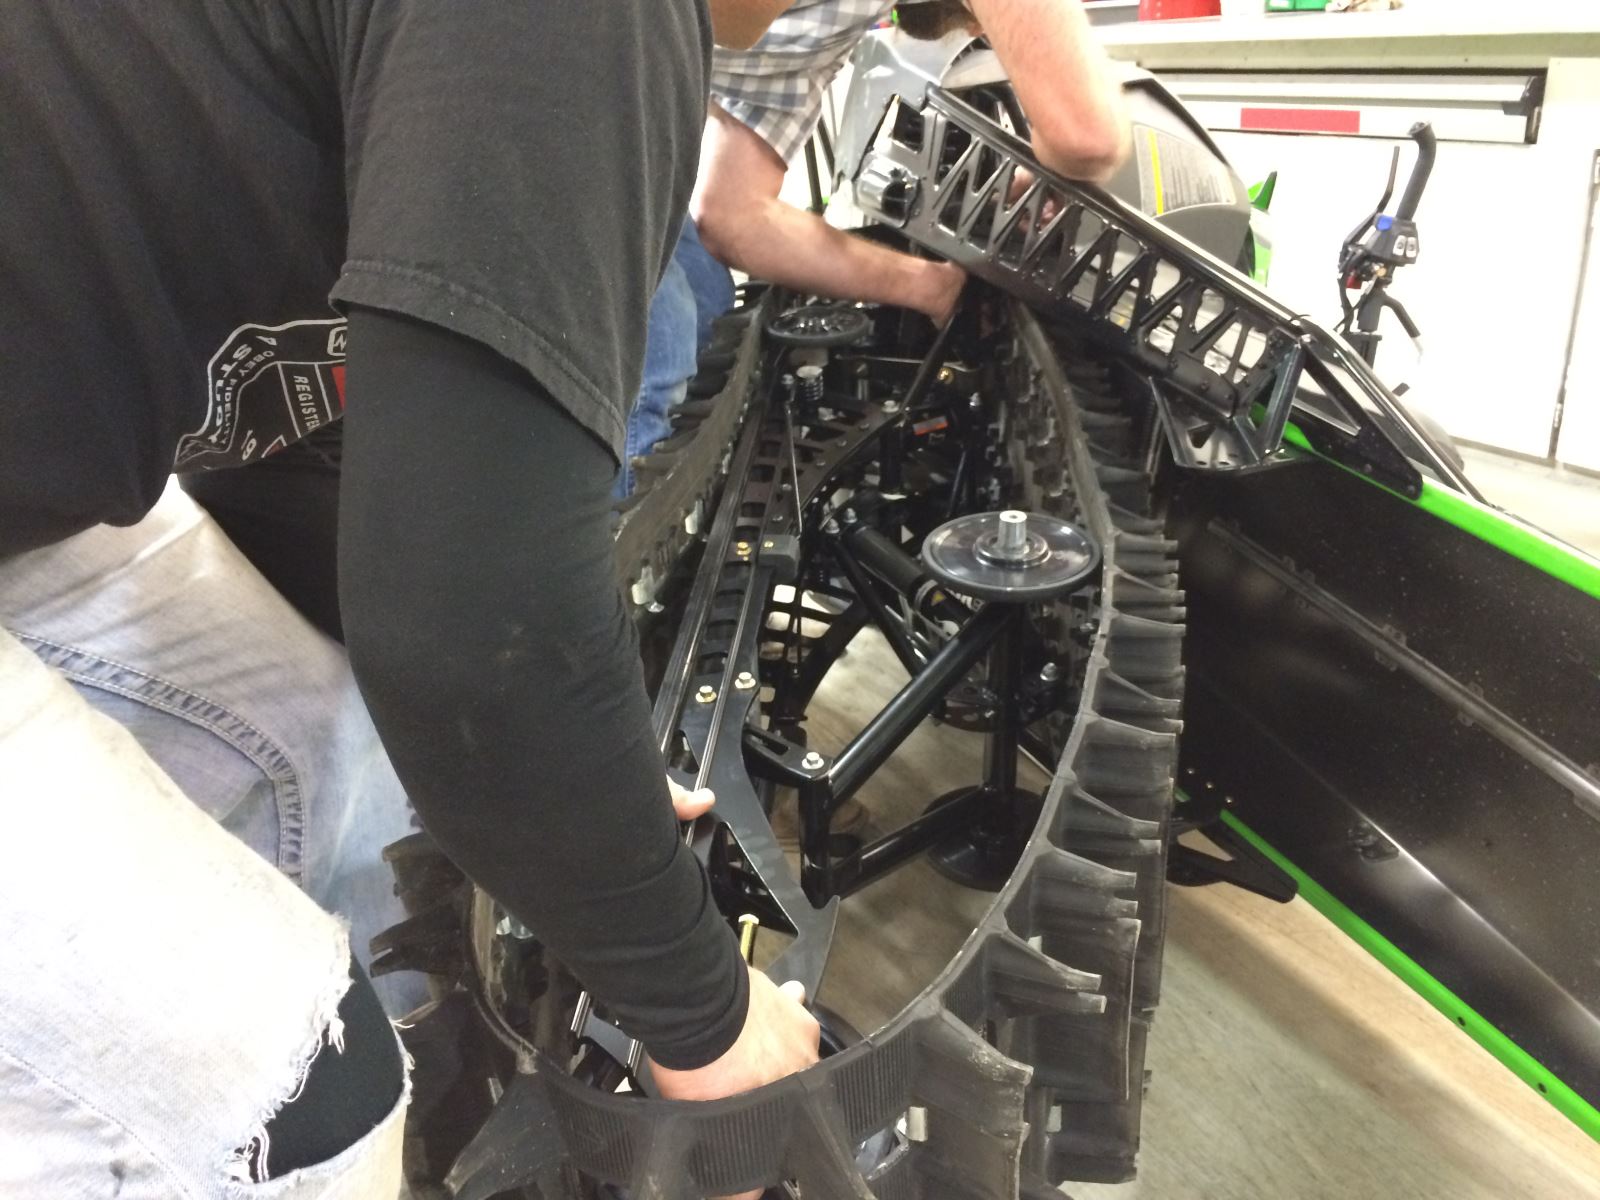
Once you remove the four bolts that attach the rear skid to the tunnel, it’s just a matter of wiggling the skid out from inside the track. We lifted the backend of the sled up so everything would just drop down and out of the way.
Published online: Apr 01, 2015 Arctic Cat Steve Janes
Web Exclusive
http://www.snowest.com/2015/04/project-201516-arctic-cat-m#
(EDITOR’S NOTE: This is the second in a series of articles about converting a 2015 Arctic Cat M 8000 SnoPro into a SnoWest Forums 2016 Project Cat giveaway sled. Throughout the summer and fall we will be working with SnoWest Forum members to build the perfect snowmobile … and then we will give it away to a Forum member at the end of the build.)
For those just joining in, last week we upgraded our 2015 Arctic Cat M 8000 front suspension with 2016 parts. This week we’re tackling the rear skid and will also update it with 2016 parts.
Once both front and rear suspensions are updated, we only have some clutching and gearing changes to transform the sled into a 2016 snowmobile for all intents and purposes. Where the new front end greatly improves handling and sidehilling, the rear skid will improve how the sled gets up on the snow and also improves the ride through the bumps.
Although we will still be using a 153x2.6 Power Claw track, we still have the option of upgrading it to a three-inch track. But as of right now, we’re not totally sold on the change. There are those who will insist on a three-inch track just because it’s deeper than the 2.6 … but after riding both this spring (in not-so-good snow conditions) we’re still debating what works best in all-around riding. (We’ll leave that argument up to the SnoWest Forums for discussion.)
So back to the rear skid.
There have been significant changes to the rear which improves its characteristics in deep snow. First, the rail profile was changed giving the front part of the rails a bigger curve radius. Rather than a longer, gradual tip up, the curve radius stays flat longer and then rolls up more abruptly. This has created more travel and better ride control.
The front arm shock is 1.25-inches longer. The shock pull rod and the idler arm are also different to match the increased length of the shock.
All of these changes are designed to allow the backend to get up on top of the snow much faster. Combine this with Cat’s Power Claw track and you find the sled coming up out of the snow and floating on top much easier.
Installation Process
1) Pulling the rear skid isn’t complicated … although it can sometimes be a little frustrating. There are only four bolts that need to be removed that attach the skid to the tunnel—two in the front where your feet are usually located near the running board and two in the rear just below the running board. (The trick is to loosen a bolt without it spinning the entire shaft. By using an air ratchet, you usually can generate enough torque to loosen the bolt. But if one side is loose and the other side spins, you may need to re-tighten the one side and break the other side free.)
2) With the skid out, you are now going to remove parts from the old skid so you can use the bolts, bushings and stuff on the new skid. This means you will need to take apart the entire skid. We approached the process by breaking down the old and building up the new as we went along so it was a matter of parts off and then parts back on. This way we didn’t have a bunch of parts laying around trying to figure out where they went.
3) If you’re installing a 2016 rear kit, it will likely involve a rear arm, two slide rails, a pull rod and two new shocks (we used the Fox Evol shocks that come with the Limited Edition kit). You will also need to extend your limiter straps to accommodate the longer shocks.
4) There will be a couple of bushings on the front mount that will need to be pressed off the old rails and then pressed on the news rails. Other than that everything pretty much comes off with wrenches.
5) Once the new skid is rebuilt, then it’s just a matter of re-installing the skid back into the chassis, tightening the bolts and re-adjusting the track tension.
Once you remove the four bolts that attach the rear skid to the tunnel, it’s just a matter of wiggling the skid out from inside the track. We lifted the backend of the sled up so everything would just drop down and out of the way.