
now I also have some guys who want to reinforce the rear of their tunnels...so I am building a batch of the tunnel stiffners that I installed on my sled at the start of this thread..these will be without the base peice(the solid black part) and consist of the silver sides that go from the rear bumper to just in front of the rear mount..also included will be the aluminum bumper with plate..these too will come plain aluminum, without rivits or glue(if you need me to get them I can but both the price and time to deleiver will go up)right now I only have these for 163 sleds(if a local can do with out his 155 sled for a night I can do the same in a 155)again tentative price for materials and jet time are going to put these at 300-350 per set..(any who want to add the black base that goes the length of the tunnel just PM me that you want it)and again I plan on placing the order this week..so PM me if you want one..thanks mike
Install the app
How to install the app on iOS
Follow along with the video below to see how to install our site as a web app on your home screen.
Note: This feature may not be available in some browsers.
You are using an out of date browser. It may not display this or other websites correctly.
You should upgrade or use an alternative browser.
You should upgrade or use an alternative browser.
tunnel stiffeners...
- Thread starter AKSNOWRIDER
- Start date
- Thread Rating
- 5.00 star(s)
T
theultrarider
Well-known member
Here is another set of Pro reinforcements that AKSNOWRIDER built for me. Thanks Mike. Awesome work as always. 
 [/IMG]
dang tim what did you do to it? looks good buddy...
T
theultrarider
Well-known member
dang tim what did you do to it? looks good buddy...
That color really chages depends on how the sun/light hits it. It really does look sharp on a sunny day. mellow and classy when dark. Cant wait to get my rails back as well. Should look great. Same orange/brown as the sides. Then I'll do the spindles and front shock springs as well to match. Then just ride the damn thing!!! Well, maybe a head and can
T
theultrarider
Well-known member
Guys that do go this route be warned. The biggest problem with running braced up like this is that you ALWAYS end up being the guy that has tow to out the dead sleds at the end of the day. Everyone else is afraid to tear their chit up. That, and pulling a trailer on overnighters. Once again, nobody seems to want to add 2lbs to their sled so they can go enjoy a multi day trip in the backcountry 
") . They are very good looking kits if I didn't have a cobe bumper and the wrp plates I would have went with a set of these
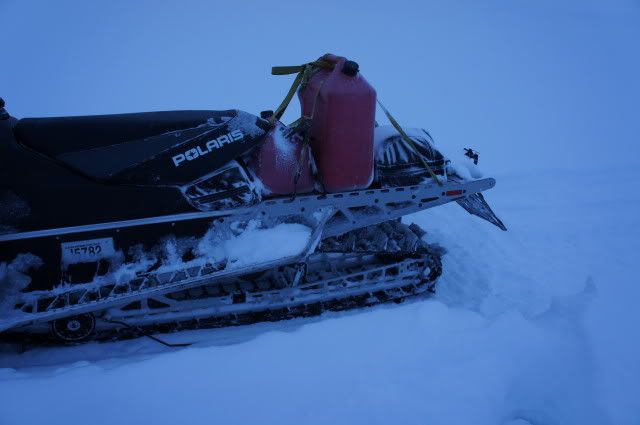
. They are very good looking kits if I didn't have a cobe bumper and the wrp plates I would have went with a set of theseFigured I would post up a pic from this weekend..rode out to my buddies trapping cabin, met up with them(they went in a few days ago), then broke trail over to my cabin..135 miles in a day..I hauled just shy of 10 gallons of fuel on the back of my sled as well as almost 30 pds of tools and gear in my tunnel and underseat bag...I run my suspensions really soft and did not stiffen them for the load...tunnel held up just fine even with bottoming the suspension pretty good several time.......
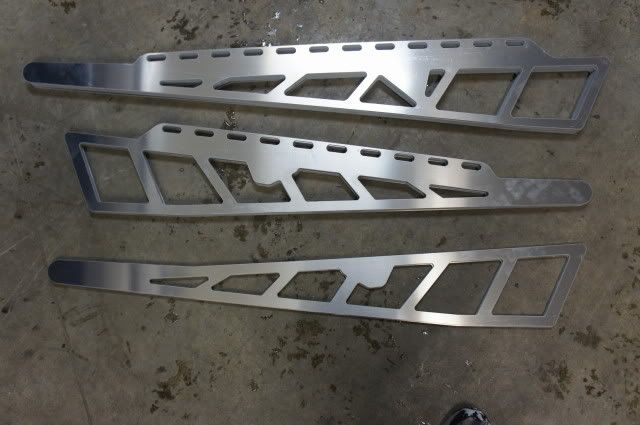
OK, made some stuff up for some guys..and ended up with some extras...so looks like I have 2 ea 155 and 163 rear bumper and rear sides(goes from the rear bumper up to just in front of the rear skid mounts.)
I also have 1 extra chaincase reinforcment..this one reinforces the area between the chaincase and frt skid mount..it consist of 6 peices that get glued and rivited in place(should take an average home sled guy about 4-6 hrs to completely install)this will keep those who really push their sled to the limits from buckling the tunnel up frt(evidently this happens more then I have heard of)
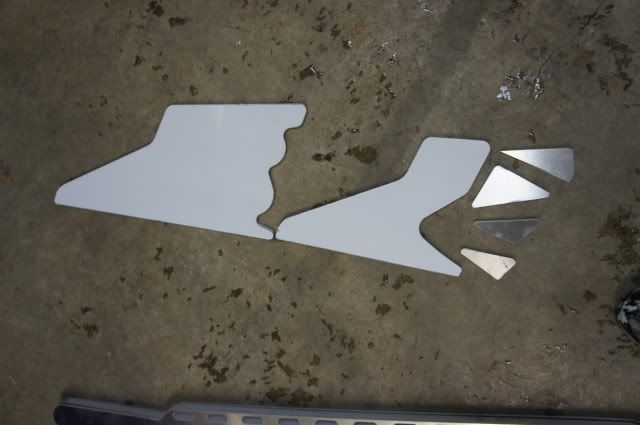
PM me if interested..thanks Mike
I also have 1 extra chaincase reinforcment..this one reinforces the area between the chaincase and frt skid mount..it consist of 6 peices that get glued and rivited in place(should take an average home sled guy about 4-6 hrs to completely install)this will keep those who really push their sled to the limits from buckling the tunnel up frt(evidently this happens more then I have heard of)
PM me if interested..thanks Mike
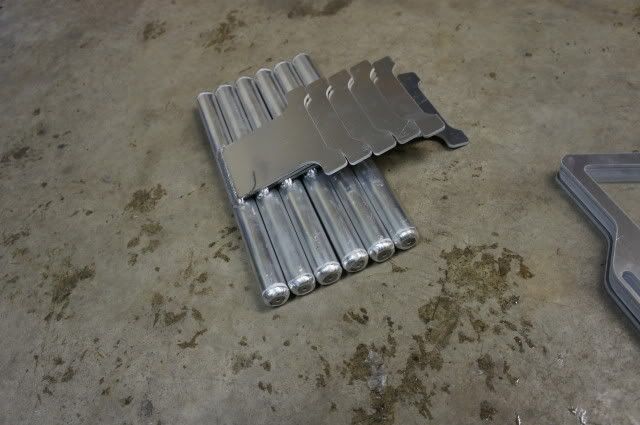
I have been building some new tunnel braces for the pro..latest is a clutch side reinforcment that will strengthen that side of the tunnel for those who are worried about bending their tunnel...it consist of 7 peices..5 fillers to fill the cutouts, 1 rear base peice that brings the tunnel up to the same level and the top overlay that ties everything to geather....
pictured togeather both the clutch side(7 peices on left) and the chaincase side(6 peices on the right).....
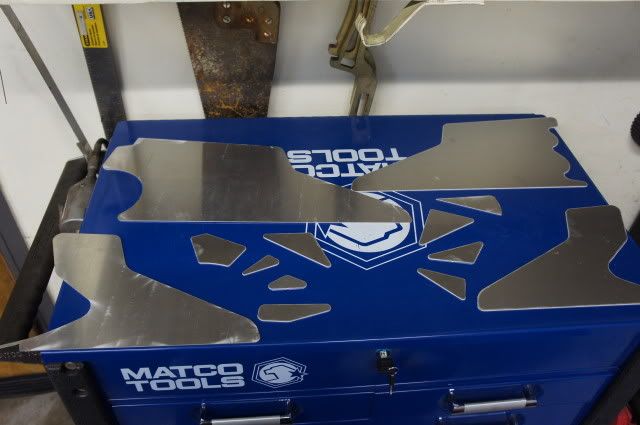
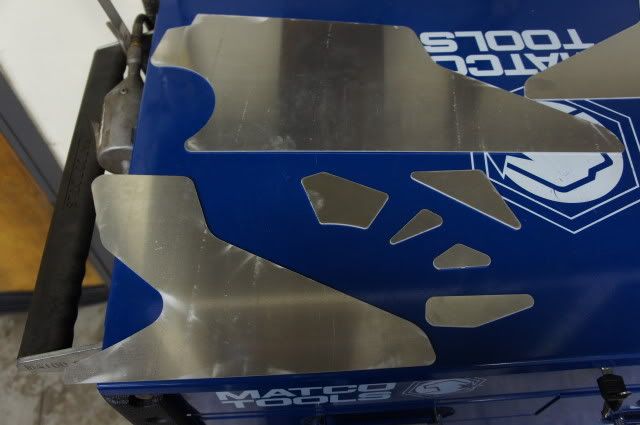
pictured togeather both the clutch side(7 peices on left) and the chaincase side(6 peices on the right).....
figured to bring this back up for those new to poo and looking to make their sled better....the frt tunnel brace kits are a very good idea for anyone who rides their sled hard.....
This is what happened to me when I clipped a tree with my left spindle. This video shows it from my buddy's helmet cam at about 1:45 minutes in.
Wasn't a major hit but it wasn't easy either. Shook me up pretty good and tweaked my wrist a little. Bent the tunnel right behind the secondary clutch. See pics below. Insurance helped pay for a new VanAmburg tunnel.
http://www.youtube.com/watch?v=71I7Q-svf38&list=UUllPvPrVRv3iNp9BZlxkNNA&index=11&feature=plcp
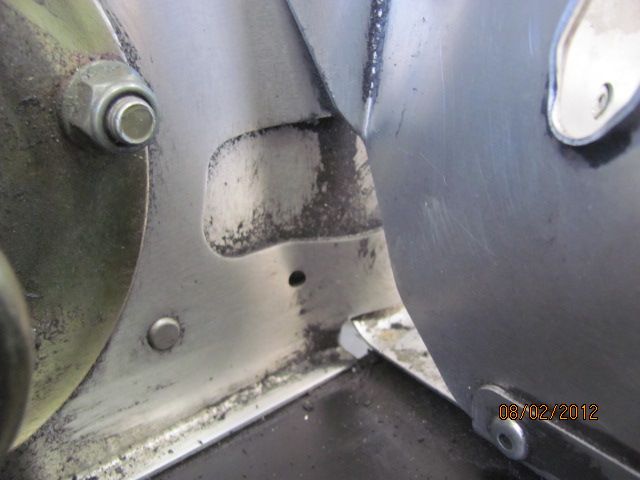
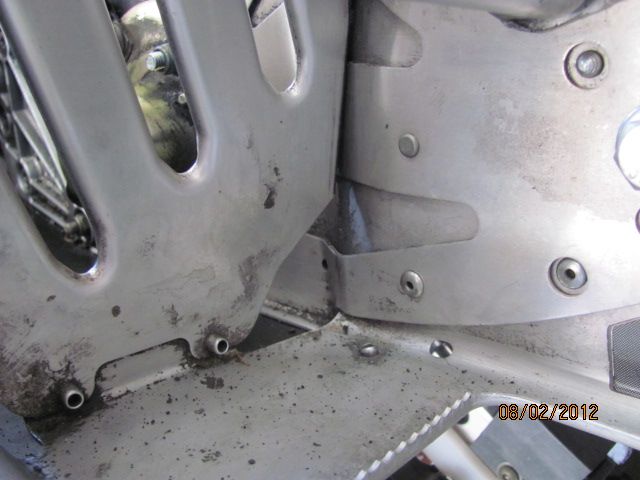
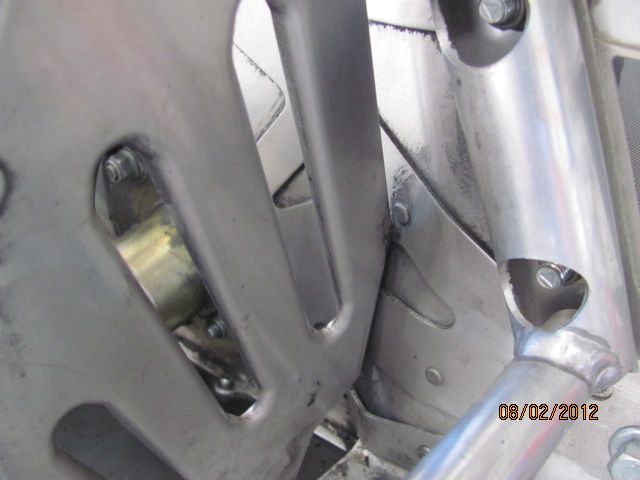
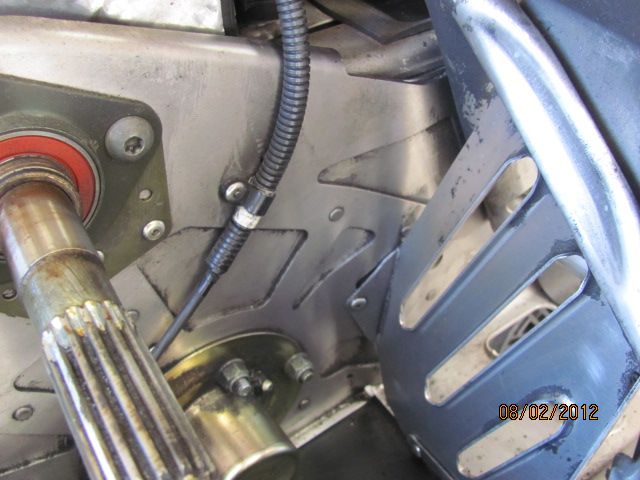
Hey Mike,
I'm interested in your stiffener kit but was wondering if you'd consider modifying the bumper bracket a bit. I roughed out a design in MS Paint--not exactly autocad quality but it's enough to give you an idea.
I don't like the stock tail light and want to go with the low profile LED light bar style--but where to put it? By modding your design a bit there's additional anchor points for stuff strapped to the tunnel and a relatively protected spot for the bar style light.
I'm on the slope but will contact you when I get home.
Erik
on the dragon I machined the lip off where the braces covered it, on the pro the base layer lays against it and the overlay lays over it....if you only run the overlay you should grind off the lip where the overlay goes, but most just lay it over it....Just out of curiosity, what did you do about the lip on side of the tunnel? Did you machine a groove on the inside of your plate to go over this?
just get ahold of me erik when you get time..we can work out something to work for you..that design should work ...Hey Mike,
I'm interested in your stiffener kit but was wondering if you'd consider modifying the bumper bracket a bit. I roughed out a design in MS Paint--not exactly autocad quality but it's enough to give you an idea.
I don't like the stock tail light and want to go with the low profile LED light bar style--but where to put it? By modding your design a bit there's additional anchor points for stuff strapped to the tunnel and a relatively protected spot for the bar style light.
I'm on the slope but will contact you when I get home.
Erik
one of the things I have found from doing these is the braces really stiffen the chassis up, they also stop quite a bit of flex in the stock boards as well(the stock boards are flexing the tunnel sides)...they arnt for everybody but those running big power or who ride hard or hit things these will go a long way in protecting the tunnel from kinking/bending.for those who are into trying to lighten the sled...if they removed the stock tunnelsides/running boards,installed a base made from .040" with a cut out overlay of .062" the tunnel would be way stronger and should be a couple pds lighter..I havent had a close look at the 13 boards but it shouldnt be hard to adapt them to the overlays...resulting in a light, strong tunnel....
Sorry Milo, missed your post...anyway..heres the breakdown..I can build these in varying thicknesses depending on your needs..but for what I have shown on here...the frt tunnel/bulkhead braces run 100 per side, the rear brace(overlay) setup runs 300-350 for the set(includes bumper), to add the center (base) brace set to the overlay set runs 200-225, if you buy a complete setup(both frt braces, the center brace and the rear brace I discount the price by 100.00(so 600-650 for all the peices)... for those who just want the 2 frt brace kits I will knock 20 total off the single price..all prices are for the peices only, if you want me to provide rivits or powcoat it will be extra as well as freight..(we get charged out the gazoo up here for p-coat..so most likely cheaper to get done local in your area...)
these braces will protect your tunnel..(can you still damage one..yes..but most likely the whole sled will be destroyed)..anyone who wants to do something custom as far as materials/thickness/ design..I am more then willing to work with you..with a little creativity..you can make some really cool things as far as designs and such...mike
these braces will protect your tunnel..(can you still damage one..yes..but most likely the whole sled will be destroyed)..anyone who wants to do something custom as far as materials/thickness/ design..I am more then willing to work with you..with a little creativity..you can make some really cool things as far as designs and such...mike
Last edited:
S
Super Sled
Well-known member
Awesome tunnel supports!!!!
I was wondering if you are still making these. I have a 2012 Pro 155, i would be looking at the same type set up as you put on yours maybe just a lighter version. I recently bent/cracked my tunnel where the boards meet the sides and would like a little added security.
Last edited:
Similar threads
- Replies
- 6
- Views
- 169
- Replies
- 8
- Views
- 1K
P
- Replies
- 4
- Views
- 334
K
- Replies
- 2
- Views
- 895