Install the app
How to install the app on iOS

Follow along with the video below to see how to install our site as a web app on your home screen.

Note: This feature may not be available in some browsers.

  • Don't miss out on all the fun! Register on our forums to post and have added features! Membership levels include a FREE membership tier.

DIY Tunnel Update with pics

tunnel mod

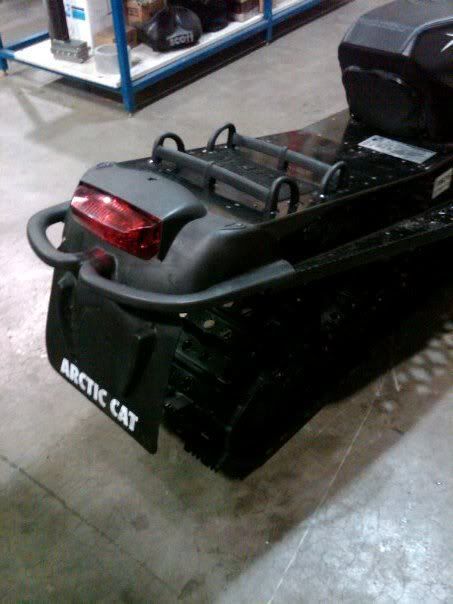
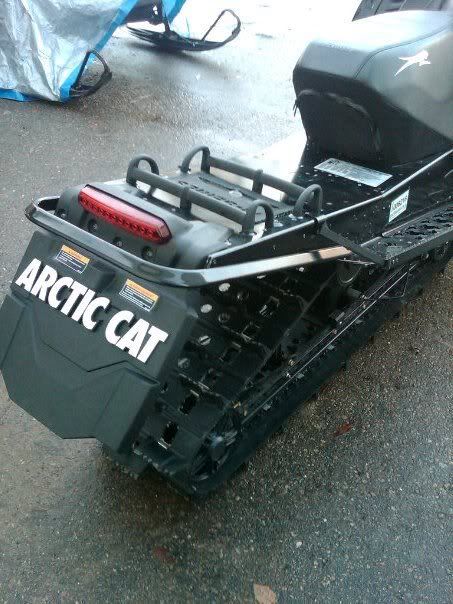
did this mod to my 1m900, did the stright cut to the tunnel, took 2 years to crack and if cut stright it will crack. this way of cutting the tunnel would make it much stronger. I would'nt delete the rail suport
 
Just did this on my 1000. Just wanted to post 2 pics of what i believe the most important pics that no one has shown. First is the angle of the cut that i did. After looking at about 20 pics of what other have done for the angle, i believe i have it pretty good. Second is how close the gusset holes for the rivets come to the coolant rails. One could easily puncture one if drilling carelessly.

IMG_0634.jpg IMG_0635.jpg IMG_0636.jpg IMG_0637.jpg IMG_0638.jpg
 
Looks good Lynn! I like it. BUT.... Red boggies wheels and a purple pull handle REALLY? Im just saying lol

Treavor

LMAO!!!
Orange wheels, and the Barney handle is history! Also are the orange mid-vents, all froggy vents now
 
i'd like to do the tunnel update, the footrests for the new design would mess that all up.

also, i read on the forums a while back that the tail section gets weak after doing the mod. any further comments on that? anyone experience any bending or other problems?

1st off great looking, clean mod. Nice job!

I did experience the problems with the weak tunnel, plus I got sloppy wet in spring conditions, so I re-did the tail. Being an old fuddy duddy I wanted to remove a bunch of drag off the back but keep strength and keep dry. Instead of removing the running boards entirely I cut a wedge out of the sides at the same angle the the above pics. With the wedge cut out, I then bent the running board section up to match that new bumper angle. Riveted it in place with the new style bumper and the 09 end piece with an 09 flap and light ........... an easy, cheap, old fuddy duddy fix...LOL

I think pics of mine are in the performance/mod section under sled builds under a heading called..... M8 w turbo and lots of mods (or something like that...too old to remember....LOL)

Again nicely done.... and didn't mean to hijack.
 
  • Like
Reactions: 4Z
before
154257_1525834188975_1328256152_31351358_1084687_n.jpg

after
154816_1525833108948_1328256152_31351354_1135489_n.jpg
 
  • Like
Reactions: 4Z
What has everyone found is the best tool to cut the stock tunnel extension? I am getting ready to cut mine and am thinking a grinder with a cut-off wheel will do the cleanest job. I have a plasma cutter, so maybe I should just use that.
 
Megatron, I always like to look at those pics of your conversion. One of the slickest that motivated me. Love the black and looks better than factory.

Tonysnoo, that is a cool, innovative mod for sure. Good idea!!!

Big Air, I used a thin cut off wheel on the die grinder then cleaned up with a burr. I know guys using air body saws. I stayed away from the plasma as I didn't know if the heat was a good idea in this semi structural mod. Prolly not a big deal, but with my luck, I would sneeze and mess it up anyway......
 
Cut off wheel is about as easy as your gonna get. I definitely would NOT use the plasma cutter. Even if you did you would have to remove all the slag on the backside which would make more work and give you the same look if not worse than the cutoff wheel. Once you get at it i think you will find it very simple. I was worried when i went about mine as no body really said anything to watch out for, just a simple LOOK! Lol

As stated in mine, watch out when drilling in the gussets that hold the running boards to the tunnel and when drilling stuff out. Lots of stuff is riveted on the coolant rail and could possible turn bad if too many beers were used during the tear down! Lol

-Matt
 
Premium Features


Back
Top