Install the app
How to install the app on iOS
Follow along with the video below to see how to install our site as a web app on your home screen.
Note: This feature may not be available in some browsers.
yz300 woods / snowbike build
- Thread starter dirtrebel
- Start date
no more smart carb no more problems!
took a quick rip today, snow sucked! we got a huge dump saturday and sunday and then it hit 50 degrees yesterday and then 5 overnight! this winter is crap! Anyway with the stock carb it ran like it should, comparable to a 450. 13 countershaft to 17 jackshaft and 17 over 16 case gearing is perfect for mountain riding at least for our area on this bike. I only hit 1220 on the egt once and it performed so much better! The heat collar fell off as I expected it would since it never fit well. The stock pwk carb air inlet has a raised ridge around it for the intake boot to seal on so the heat collar only fits tight on that small ridge, the smart carb and its heat collar was a much better fit. (only good thing about it on this bike) so now the plan is to make my own heat collar and add a heat exchanger under the tunnel, maybe keep the 1 (rh)radiator with the fill cap for simplicity and for spring riding on dirt up to the snow lol, not sure yet. under heavy load with no snow flying up the coolant temps would climb to 200 and engine would have a noticeable drop in power at that temp. using an air cooling system on a "snowmobile" just does not work! I'm so sick (after 4 years of snowbiking) of overheating on a long sustained pull or when trenching going slow and revving the piss out of the engine and then having freezing cold engine temps when cruising in super fluffy snow! the bypass thermostat helps but its still ridiculous! This goes for both 2 and 4 strokes! I run my 4 stroke engine enclosed and same thing gets hot as hell when getting stuck and then cold as hell in the meadows, Im ready for all the cooling you could ever want when needed and none when not!
took a quick rip today, snow sucked! we got a huge dump saturday and sunday and then it hit 50 degrees yesterday and then 5 overnight! this winter is crap! Anyway with the stock carb it ran like it should, comparable to a 450. 13 countershaft to 17 jackshaft and 17 over 16 case gearing is perfect for mountain riding at least for our area on this bike. I only hit 1220 on the egt once and it performed so much better! The heat collar fell off as I expected it would since it never fit well. The stock pwk carb air inlet has a raised ridge around it for the intake boot to seal on so the heat collar only fits tight on that small ridge, the smart carb and its heat collar was a much better fit. (only good thing about it on this bike) so now the plan is to make my own heat collar and add a heat exchanger under the tunnel, maybe keep the 1 (rh)radiator with the fill cap for simplicity and for spring riding on dirt up to the snow lol, not sure yet. under heavy load with no snow flying up the coolant temps would climb to 200 and engine would have a noticeable drop in power at that temp. using an air cooling system on a "snowmobile" just does not work! I'm so sick (after 4 years of snowbiking) of overheating on a long sustained pull or when trenching going slow and revving the piss out of the engine and then having freezing cold engine temps when cruising in super fluffy snow! the bypass thermostat helps but its still ridiculous! This goes for both 2 and 4 strokes! I run my 4 stroke engine enclosed and same thing gets hot as hell when getting stuck and then cold as hell in the meadows, Im ready for all the cooling you could ever want when needed and none when not!
Last edited:
Its true. Air cooling on a snow machine sucks. Keeping one radiator with a cap for filling and pressure relief is good. then a heat exhanger in the tunnel will give you more cooling than you will ever need. It is so nice to ride in any
conditions and not worry about engine temps.
conditions and not worry about engine temps.
Its true. Air cooling on a snow machine sucks. Keeping one radiator with a cap for filling and pressure relief is good. then a heat exhanger in the tunnel will give you more cooling than you will ever need. It is so nice to ride in any
conditions and not worry about engine temps.
thanks for the encouragement ravenous! I was just reviewing your carb ice not thread! In case other were interested and did not see it:
http://www.snowest.com/forum/showthread.php?t=375718
I dug some parts out and I have a small heat exchanger that should work. I also have a coolant bottle with cap from a sled I saved in case I got to this point and wanted to ditch both rads, how do you think that would work? I'm thinking I will stick with the one rad and exchanger like you did, thanks again, any further input is apreciated.
For a tunnel heat exchanger, I found that a front cooler off of an early 90's Arctic Cat EXT 550 fits pretty well.


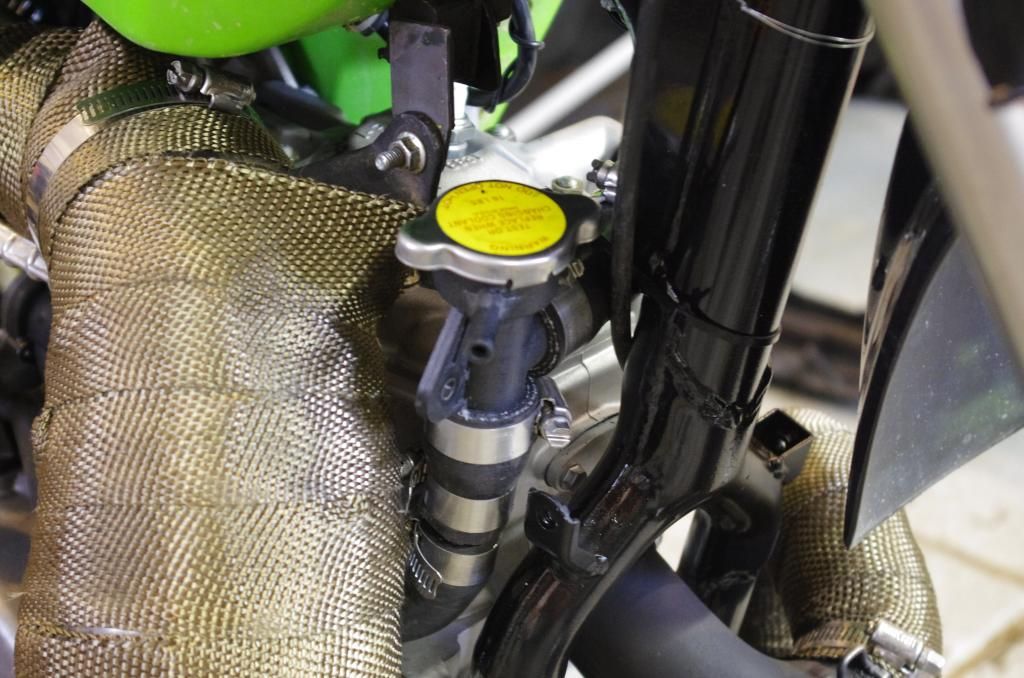
I'm also not running a radiator up front. Instead, I'm using the radiator cap housing off of an ~06ish Arctic Cat utility sled:


I'm also not running a radiator up front. Instead, I'm using the radiator cap housing off of an ~06ish Arctic Cat utility sled:

progress
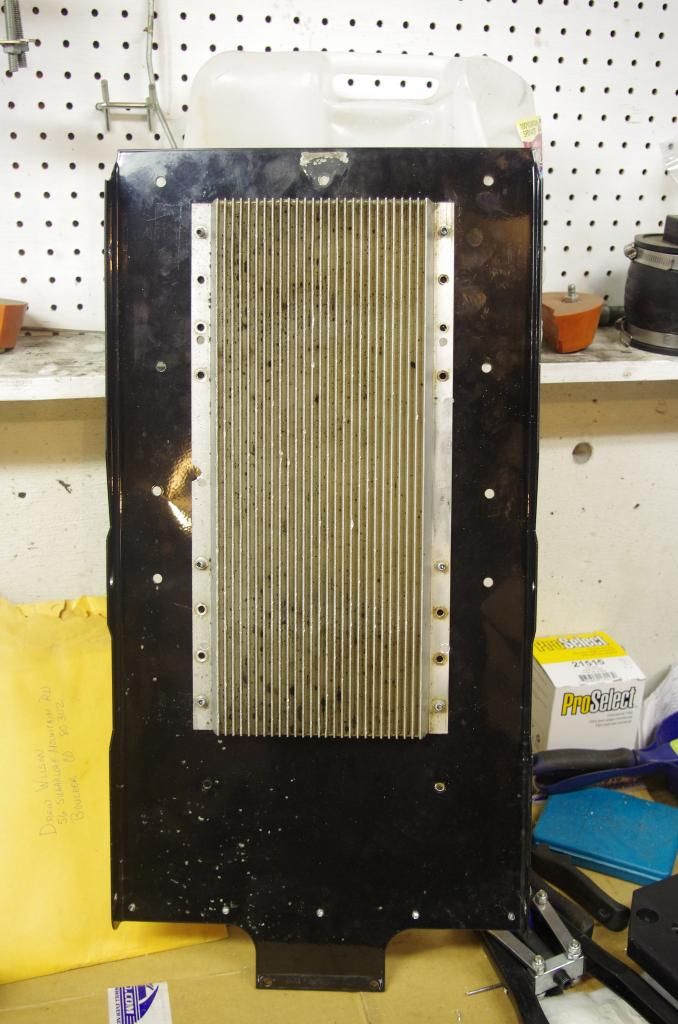
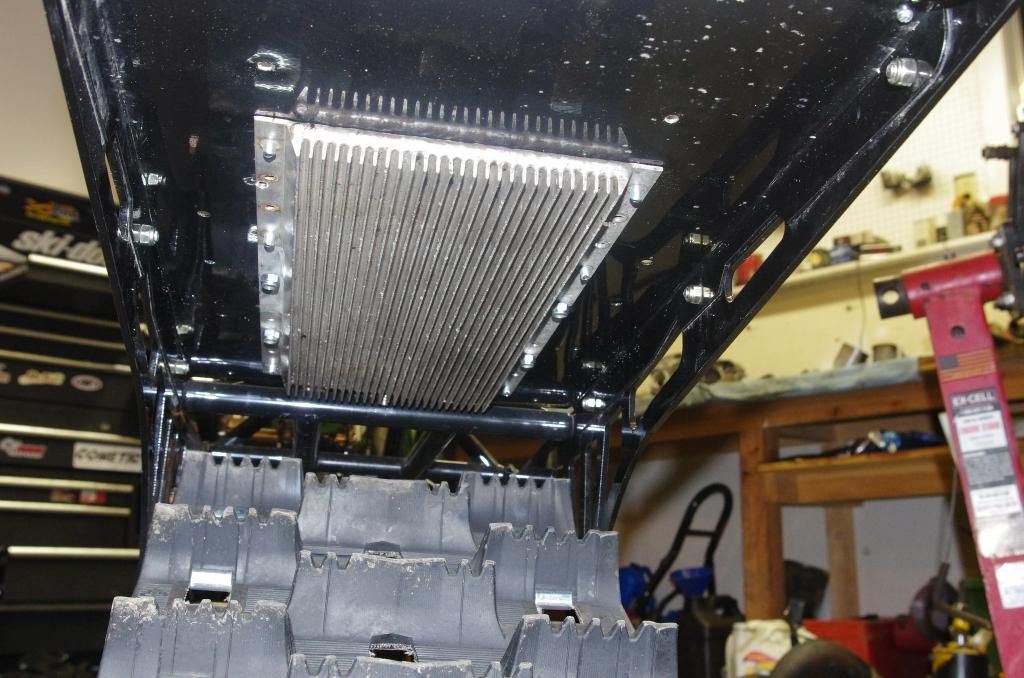
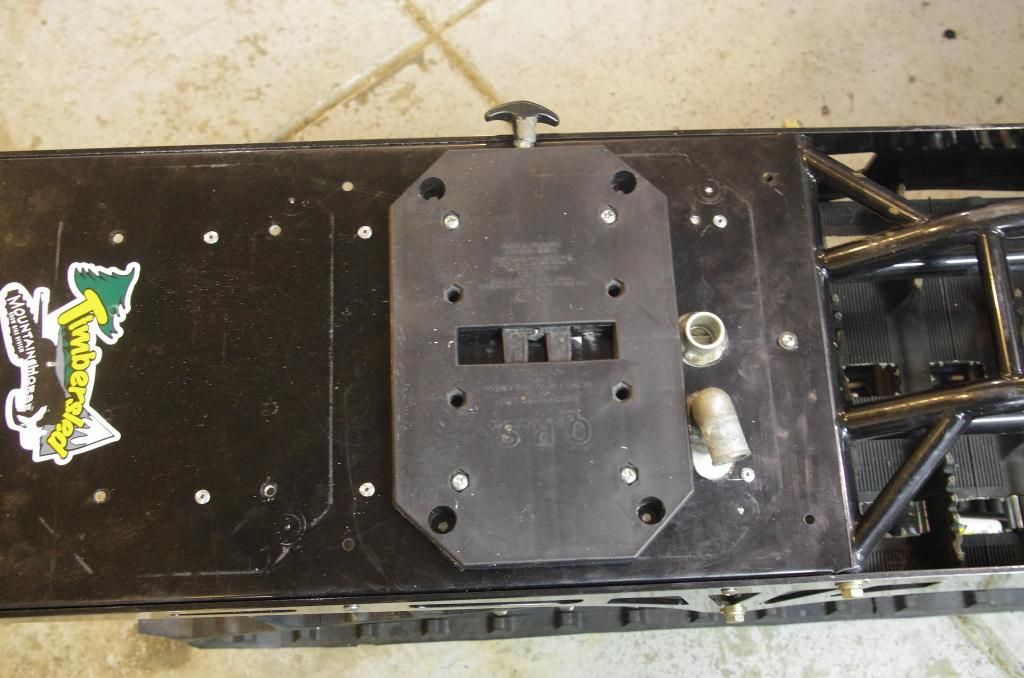
got the heat exchanger mounted and gas can rails moved back. I put a llight layer of silicone between the tunnel top and cooler, hoping to keep vibration down and cracks to a minimum. I will finish plumbing it up tomorow, then make the new round heat collar for the carb, I might wrap the carb with hose if I take it out this weekend, or add a setscrew to the existing heat collar so it does not fall off for now.


got the heat exchanger mounted and gas can rails moved back. I put a llight layer of silicone between the tunnel top and cooler, hoping to keep vibration down and cracks to a minimum. I will finish plumbing it up tomorow, then make the new round heat collar for the carb, I might wrap the carb with hose if I take it out this weekend, or add a setscrew to the existing heat collar so it does not fall off for now.


Gearing
Dirtrebel, Sorry, back to gearing...So if I get an 18, do you think I'll have problems with chain length? How did you figure that you couldn't run 17/17 due to chain length? I am thinking I would like larger gears, like 17/18 or 19/20 so that I don't have to remove the knockouts. Waddaya think?
Dirtrebel, Sorry, back to gearing...So if I get an 18, do you think I'll have problems with chain length? How did you figure that you couldn't run 17/17 due to chain length? I am thinking I would like larger gears, like 17/18 or 19/20 so that I don't have to remove the knockouts. Waddaya think?
Dirtrebel, Sorry, back to gearing...So if I get an 18, do you think I'll have problems with chain length? How did you figure that you couldn't run 17/17 due to chain length? I am thinking I would like larger gears, like 17/18 or 19/20 so that I don't have to remove the knockouts. Waddaya think?
I'm not sure about if you get an 18, it should work with the stock length chain, there should be enough tensioner travel to take up the slack, and cover clearance seems plentiful. Also the case gearing is universal to 14 and previous timbersleds so maybe search gearing threads on here I'm sure alot of guys talked about what combos worked with chain lengths and such. I think I tried 17, 17 and it would not work with 1 link shortened chain, barely would not reach, with the tensioner in there. I did not try the stock length chain with 17 and 17 though, I figured it would be waaay long, but maybe not. Here's a pic of my case setup in case you were curious. You are correct larger gears are better, they last longer and no standoffs need removing. I just had a 16 and spare 17 on hand so that was what I experimented with. Did you try just putting the 20 on top and 17 on bottom? I ran that one time and it seemed a touch tall but I could not be sure because my engine was running so chitty that day. I have regeared like 4 times, it is a pain but that is what it takes to find the sweet spot! Just be glad you aren't playing with the inner jackshaft sprocket, that's fun the first time!


Last edited:
got 'er
got the heat exchanger project wrapped up and ready for tomorrow. I had to make a few coupler adapters for hoses. Also figured out a solution for the heat collar. I was driving to pick up my daughter from school and literally had an epiphany about how to rig up a heat collar with the existing parts I had on hand! I ground down the ridge on the stock carb, making the heat collar way loose. I cut the heat collar turning it into a clamp and installed a bolt to clamp it tight on the carb throat, worked perfectly! Installed shut off valves to heat collar so i can regulate flow and not drain coolant for repairs. I hope this whole deal works or else my friend will have a short day and I will be on the wrong end of a tow rope! Also rejetted carb a touch, smaller pilot and leaner needle, same main, will still be rich but safe. I will report back hopefully tomorrow afternoon!


got the heat exchanger project wrapped up and ready for tomorrow. I had to make a few coupler adapters for hoses. Also figured out a solution for the heat collar. I was driving to pick up my daughter from school and literally had an epiphany about how to rig up a heat collar with the existing parts I had on hand! I ground down the ridge on the stock carb, making the heat collar way loose. I cut the heat collar turning it into a clamp and installed a bolt to clamp it tight on the carb throat, worked perfectly! Installed shut off valves to heat collar so i can regulate flow and not drain coolant for repairs. I hope this whole deal works or else my friend will have a short day and I will be on the wrong end of a tow rope! Also rejetted carb a touch, smaller pilot and leaner needle, same main, will still be rich but safe. I will report back hopefully tomorrow afternoon!


heat exchanger is the bomb! temps ran 132-137 (f) almost all day, super consistent! spiked (if u could call it that) up to 144 once at the top of a looong pull. before on the same pull would have been 200 easy by the top. Ran great, a little fat midrange and a touch lean on the main jet. carb heat collar worked great! The hardest part was getting it filled with coolant, had to bleed it alot and prefill the exchanger and lines but after parking on a hill a few times and a few laps around the yard this morning it got primed and bled. I don't think you need the one radiator but it makes filling and plumbing easy but the exchanger itself is plenty of cooling, only half of it gets warm. Awesome, my 450 is next!
Last edited:
Impressive thanks a lot.... something else to add to the list....heat exchanger is the bomb! temps ran 132-137 (f) almost all day, super consistent! spiked (if u could call it that) up to 144 once at the top of a looong pull. before on the same pull would have been 200 easy by the top. Ran great, a little fat midrange and a touch lean on the main jet. carb heat collar worked great! The hardest part was getting it filled with coolant, had to bleed it alot and prefill the exchanger and lines but after parking on a hill a few times and a few laps around the yard this morning it got primed and bled. I don't think you need the one radiator but it makes filling and plumbing easy but the exchanger itself is plenty of cooling, only half of it gets warm. Awesome, my 450 is next!
good good
good work dirtrebel. I plan on dragging out myyz250 snow bike for some more work and riding this winter. for now my wr450.
Stock carb on my yz250 04 ignition I could not tell a difference in the way the engine ran hooking and unhooking the position sensor.
copper tubing wrapped around the bell of my carb with skidoo little red valves wfo, cooloant off my thermo rob and even in azz cheap powder, that was enough to cure my icing, but yeah not horribly classsy as the aluminum carb heater I made for the 450.
after seeing this thread, one of my old cat heat exchangers will be going on the yz250, I could never make radiators work on sleds .............jetting was all over the place, constant temps are a tuners best friend.
So, better carbs ? stockers are organized leaks. I have run 38 lectrrons on this bike in dirt............quite an improvement.
any updates??? should I sell my 450???
it works well! but if I only had one it would be a 450 longtrack. the short smoker is really fun but it takes alot more finesse and aggressive riding to go the same places. it hangs but I really prefer the 4 stroke for deep snow. If I do another 2 stroke I think it will have to be a 500.
wheels back on
update...I decided to call it a year and convert back to the stock 250cc and wheels for summer. When I pulled off the cylinder I noticed the top ring was not loose on the piston as it should be... uh oh! upon further investigation it turns out a part of the casting on the athena 300cc cylinder where the powervalve rides broke and or melted allowing the valve to eventually contact the piston. luckily it was not catastrophic but very close, good thing I did not ride it the last couple rides of the year in april! It was still running fine I had no idea anything was wrong till teardown. So basically the powervalve rides in the cylinder in a groove above the exhaust port. At the bottom of this groove is a stop that keeps the valve away from the piston. on the top of the groove the stop has plenty of meat in the casting before the bore, on the bottom the cast stop is very thin, I think thinner than stock on this big bore kit. Either the casting just gave way or it melted due to lean conditions I encountered along the way, although the piston looks good and I see no signs of melt, I think it just broke. Either way that thin stop gave way on the bottom side, this allowed the valve to only have the topside stop left which then pounded the mating surface on the valve itself till it then gave out, now the valve was free to ride on the piston, smearing the piston enough to seize the top ring. Luckily the piece of aluminum casting was very small and the crank looks fine, the piece of the steel powervalve stayed in place and only fell out when I took the valve out as shown in the pic. The broken casting is at the tip of the screwdriver in the 1st pic below hard to see, it should look like the top side directly above in the pic. unfortunatly the 300 cylinder is a loss due to this broken casting but oh well! I most likely will not replace it, in the future I would not do a big bore on a 2stroke, just start with a 300 or 500. Anyway it was a fun winter!


update...I decided to call it a year and convert back to the stock 250cc and wheels for summer. When I pulled off the cylinder I noticed the top ring was not loose on the piston as it should be... uh oh! upon further investigation it turns out a part of the casting on the athena 300cc cylinder where the powervalve rides broke and or melted allowing the valve to eventually contact the piston. luckily it was not catastrophic but very close, good thing I did not ride it the last couple rides of the year in april! It was still running fine I had no idea anything was wrong till teardown. So basically the powervalve rides in the cylinder in a groove above the exhaust port. At the bottom of this groove is a stop that keeps the valve away from the piston. on the top of the groove the stop has plenty of meat in the casting before the bore, on the bottom the cast stop is very thin, I think thinner than stock on this big bore kit. Either the casting just gave way or it melted due to lean conditions I encountered along the way, although the piston looks good and I see no signs of melt, I think it just broke. Either way that thin stop gave way on the bottom side, this allowed the valve to only have the topside stop left which then pounded the mating surface on the valve itself till it then gave out, now the valve was free to ride on the piston, smearing the piston enough to seize the top ring. Luckily the piece of aluminum casting was very small and the crank looks fine, the piece of the steel powervalve stayed in place and only fell out when I took the valve out as shown in the pic. The broken casting is at the tip of the screwdriver in the 1st pic below hard to see, it should look like the top side directly above in the pic. unfortunatly the 300 cylinder is a loss due to this broken casting but oh well! I most likely will not replace it, in the future I would not do a big bore on a 2stroke, just start with a 300 or 500. Anyway it was a fun winter!


Similar threads
- Replies
- 7
- Views
- 2K
I
- Replies
- 7
- Views
- 2K
E

