Install the app
How to install the app on iOS

Follow along with the video below to see how to install our site as a web app on your home screen.

Note: This feature may not be available in some browsers.

  • Don't miss out on all the fun! Register on our forums to post and have added features! Membership levels include a FREE membership tier.

simple tricks to make sled maintenance easier

K

knee deep in it

Well-known member
i haven't seen one of these threads around in a while so we may as well resurrect it. Everyone of us has simple tricks to make sled maintenance and repairs a little easier. If we put them all on this thread, it would help a lot of newer riders. We can all learn from eachother.

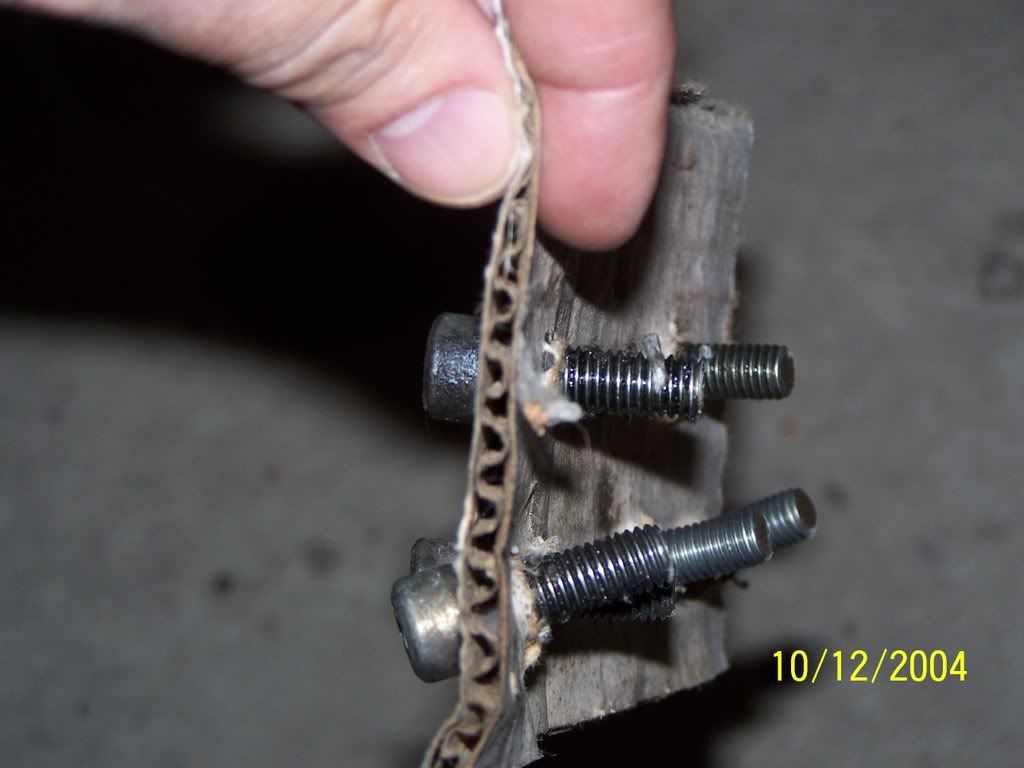
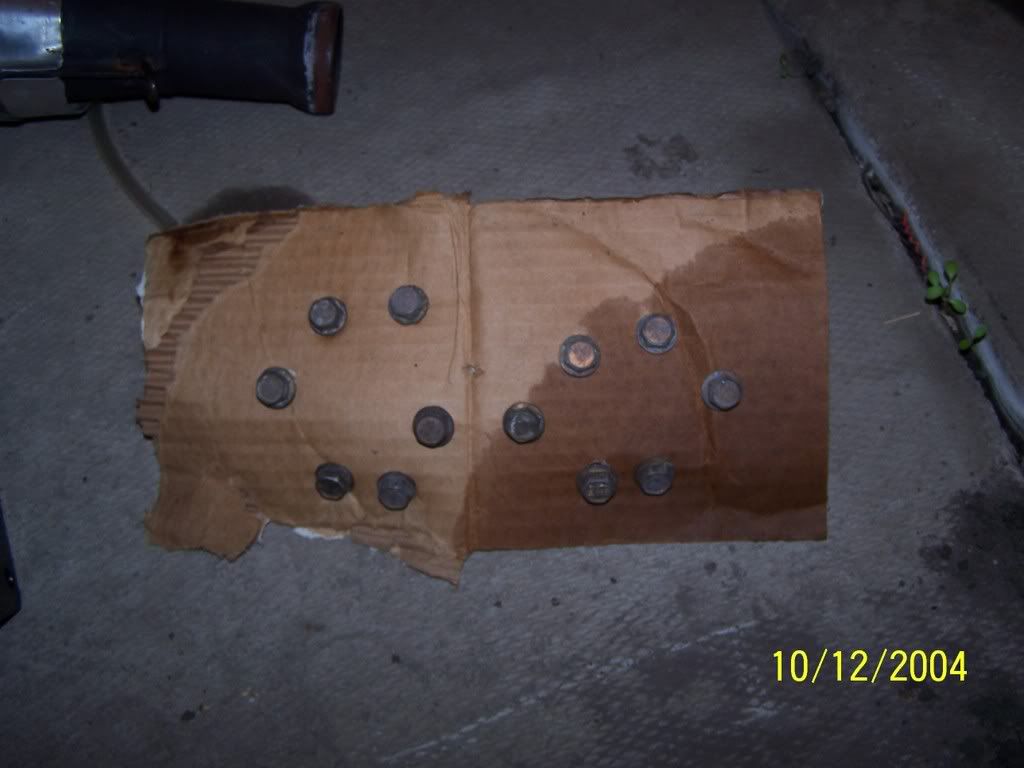
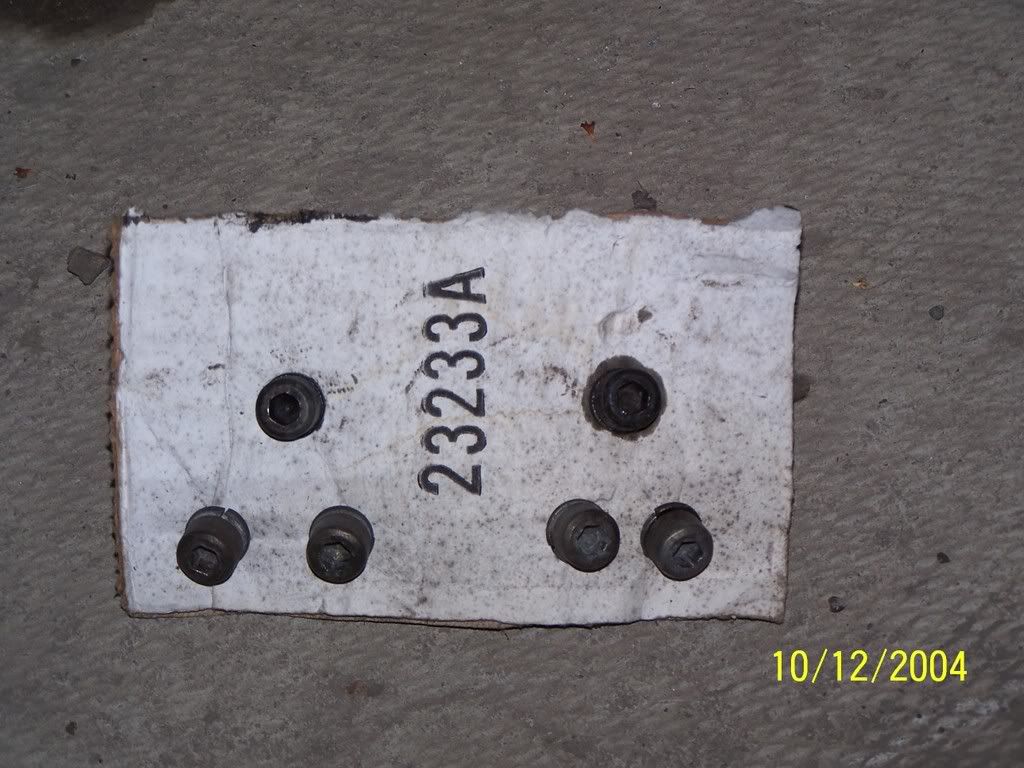
Here is a real simple one. When removing the head, you have to keep track of the bolts. The tops may look the same but they may be different lengths. It is important to put them back in the same location as they were removed. A piece of cardboard works well. Use a phillips screwdriver to punch a series of holes in it that looks exactly like the cylinder head holes.

Every time you remove a bolt, put it in the correct hole. They will be all saved in one place and in the correct orientation. You may have to mark one end to ensure the right orientation.

Here is mine for a 700 VES engine head and the corresponding exhaust bolts
000_0186.jpg


000_0187.jpg


000_0188.jpg
 
Awesome thread.

I always grab a bunch of the little sauce cups from Arbys, use those to keep screws/nuts/bolts together when i'm working on machines... those are probably a bit small for sled parts.
 
Take pictures, a lot of pictures. I just ripped my skid frame apart for powder coating and took about 20 pics of that thing, so I have some kind of visual refer on how it should look when it goes back together.
 
Take pictures, a lot of pictures. I just ripped my skid frame apart for powder coating and took about 20 pics of that thing, so I have some kind of visual refer on how it should look when it goes back together.

very good idea but you know if you put it back together wrong it done work so you know you did wrong :D

always helps to buy a service manual or have the dealership print you off some page of them

mostly for electrical i use the service pages
 
Take pictures, a lot of pictures. I just ripped my skid frame apart for powder coating and took about 20 pics of that thing, so I have some kind of visual refer on how it should look when it goes back together.

Did the same thing earlier this year. Makes it way easier to get back together:beer;
 
On the polarises that i have worked on all the bolts in any group(startercup, head,reeds} are different so iyt;s pretty much straight forward. What i;m saying is the six in the cup are one length, the reed bolts are a different and so on.So for me it all just goes in a box to be used later.
 
I always just lay everything out about where it goes, but sleds are pretty straight forward, not too tough to wrench on
 
I use the zip lock bags and write on each bag with permanent marker what the part go to and then all zip lock bags go in one box to keep it all together. I always find hose clamps and good lighting convenient and a guy can never have enough rags. Paying attention to torque specs is important.

A good way to catch coolant without having it end up in the belly pan or all over the garage floor or all over me is something I still havent figured out.

Aaens book on carb tuning and clutch tuning, service manual, parts manual are a huge help. A good sled lift is also a huge help.

Of course the proper tools are a must.
 
I use the zip lock bags and write on each bag with permanent marker what the part go to and then all zip lock bags go in one box to keep it all together. I always find hose clamps and good lighting convenient and a guy can never have enough rags. Paying attention to torque specs is important. Ziplock bags great idea, been doing that for years on everything!

I'm shopping for a couple good digitial torque wrenches, 1/4 and 3/8 drives...any ideas?

A good way to catch coolant without having it end up in the belly pan or all over the garage floor or all over me is something I still havent figured out. Shop Vac

Aaens book on carb tuning and clutch tuning, service manual, parts manual are a huge help. A good sled lift is also a huge help. I'm gonna get me one

Of course the proper tools are a must. For sure!


I been wrenching on bikes ATV's and trucks for years, sleds come pretty ez other than clutching theory :confused:
 
I been wrenching on bikes ATV's and trucks for years, sleds come pretty ez other than clutching theory :confused:

for digital torque wrenches..snap-on or mac tools...they are expensive..but they will last several lifetimes...make sure you have them calibrated once every couple of years...they do get off ......as for projects..take lots and lots of pics..laying each sub assemble out in order as you take it apart...and taking pics of it right then..showing order and alignment...have done some very major projects...including a 1927 huppmobile bare frame resto..took 11 yrs..and 80 rolls of 36 pic film..
 
another tip to aviod the broken arm after having the carbs off or winter storage is to use a weed brner torch to feed propane into the air box. the sled will start on a pull or two and run untill it picks up fuel. do not do this on pre mix sleds as ther will be no oil to the motor.
 
cardboard trick isn't bad at all.

I always visit Carls Cycle website and print out the micro fiches of what I'm working on.

Also lay the bolts or whatever out in order that they go in.

Haven't used it on sleds, but when I work on my water-ski, if I'm taking bindings off I outline everything in Sharpie first so i know just where it goes back. I suppose that maybe usefull for some sled projects.

Oh and always have a hammer handy, you just never know;)
 
another tip to aviod the broken arm after having the carbs off or winter storage is to use a weed brner torch to feed propane into the air box. the sled will start on a pull or two and run untill it picks up fuel. do not do this on pre mix sleds as ther will be no oil to the motor.

Just make sure you light the torch first, right?:D...Really though, this is a great tip. Thanks!
 
Changing drivers

When I change drivers to extroverts or different pitch track:
1) I put driver shaft (with the old drivers still on) inside the track where it would run.
2) Take a carpenters square put on edge of track and on the floor.

3) Mark the driveshaft with a "scratch" (sharpie will come off) where it lines up with the edge of track using the carpenters square.
4) When you press new drivers on and put driveshaft back in the track the "scratch" mark must line up with edge of track & carpenters square.

Tip: When pressing new drivers on keep checking by putting driveshaft in track. It's easier to do this than press drivers back!!!!!

Note: If you go from 15" track to 16" track or vise versa you have to allow for the 1/2" differance.;)
 
When you are adjusting your track alignment, use a tape measure and measure the length of the adjusting bolt and make sure both sides are the same. Works every time.

I put this on here a few years ago and some dickhead made it a point to tell me how stupid I was and that counting the threads on the bolt was much easier. WTF?????
 
I use the zip lock bags and write on each bag with permanent marker what the part go to and then all zip lock bags go in one box to keep it all together. I always find hose clamps and good lighting convenient and a guy can never have enough rags. Paying attention to torque specs is important.

A good way to catch coolant without having it end up in the belly pan or all over the garage floor or all over me is something I still havent figured out.

Aaens book on carb tuning and clutch tuning, service manual, parts manual are a huge help. A good sled lift is also a huge help.

Of course the proper tools are a must.

http://www.absorbentking.com/page/page/4885855.htm

There ya go. just stuff some of these where the coolant can go and they will soak it up like a sponge (which will also work). These also work awesome on oil!

I use the baggy and marker trick, plus pictures. If possible I will put the bolts back in where they come from after i remove them.

Anything with an adjustment, I always mark the threads with a paint marker, sharpie, or white out/liquid paper.

Put a line of white out from the head of a bolt to the surface of whatever it is. Then you have a quick reference of where to tighten to if a torque wrench is unavailable. Gas/oil wont wash it off. Also provides a quick reference through the season if a bolt is loosening. I use it to mark all of my tools so I can see if my kid has took any when I look in his tools LOL. Has to be the liquid, not the strip kind.

Instead of a sled lift, I use an engine puller. Made a pipe the same length of the sled and ran a chain through it with hooks on both ends. then I use straps on all four corners and hook them to the hooks. Will lift the sled as tall as I am if need be and level with 100% access. Then i have it to use with any other projects I might need lifting for. I even made pipes to run through a pallet and can put pallets in a truck with it. Way more versatile than a sled lift. Get a fold up one and takes about the same amount of floor space too.

if you ever need to pound out a stuck bolt, put the nut on the bolt with some of it sticking out past the threads, then hit the nut with your hammer so you dont bend the threads or the bolt nearly as easy.

Use a larger socket than you need and put duct tape on the inside of the socket head and push your bolt or nut into it. This will hold them pesky buggers that are hard to get into tight spots.
 
Premium Features


Back
Top