
B
barry1me
Well-known member
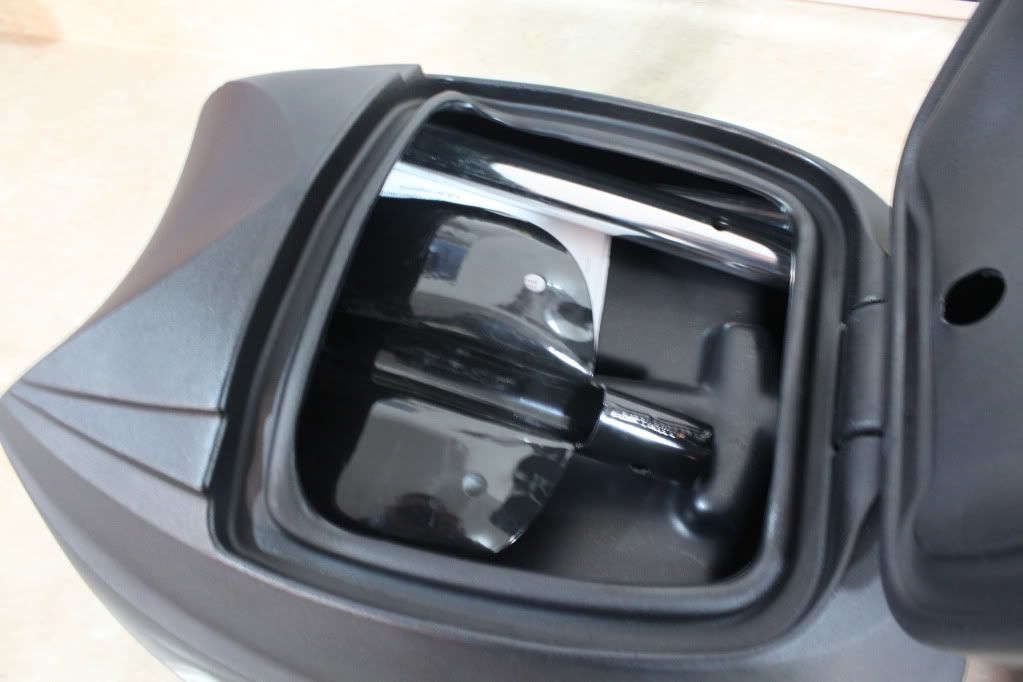
So today I got a nice package in the mail that I was looking forward to. I recieved the Powderkeg and Fuel keg storage for my New RMK. When I first saw how the design of the hard case and interlock between the fuel caddy I thought this looks like a pretty cool product. Anyhow Here are some pictures of the install and my thoughts on this product. First thing I did was take it all out of the box and packaging. All of the hardware, instructions, and Avy shovel is inside the storage compartment
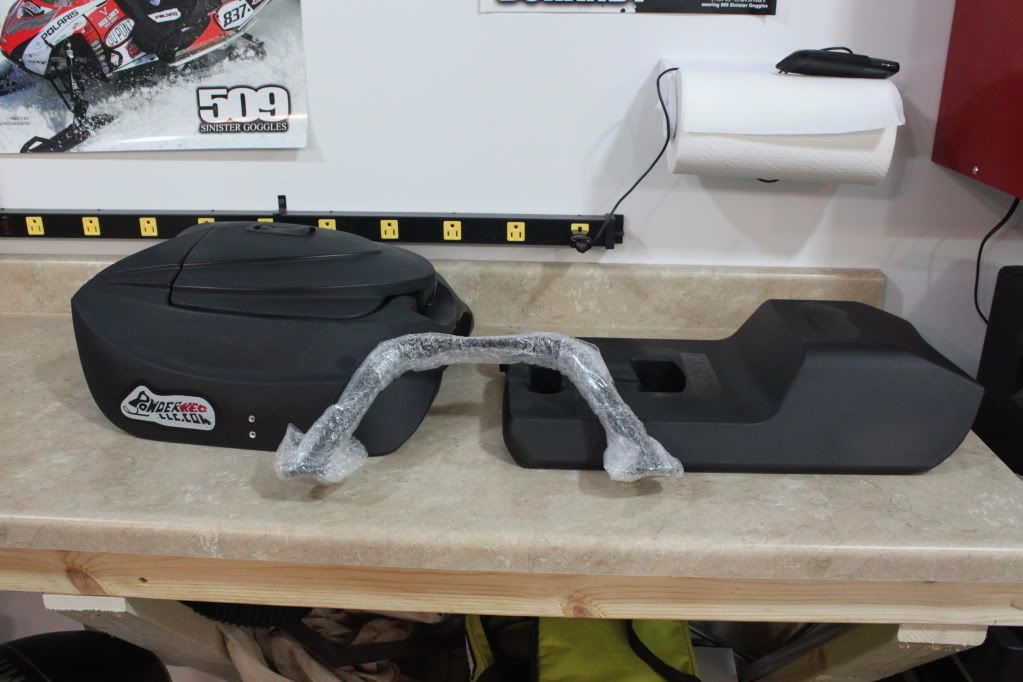
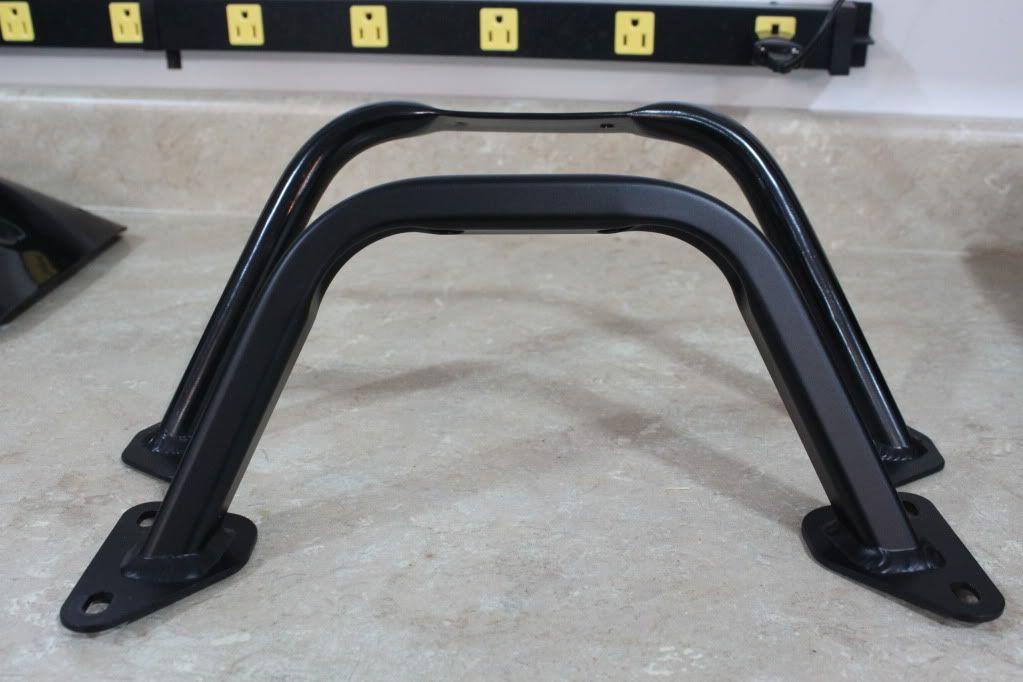
The Powderkeg setup for the 2011 PRO RIDE RMK includes a different rear seat support as the stock seat support is not wide enough to allow the powderkeg to squeeze in between the seat braces. The seat brace that they include is made of aluminum and actually feels lighter then the factory brace.
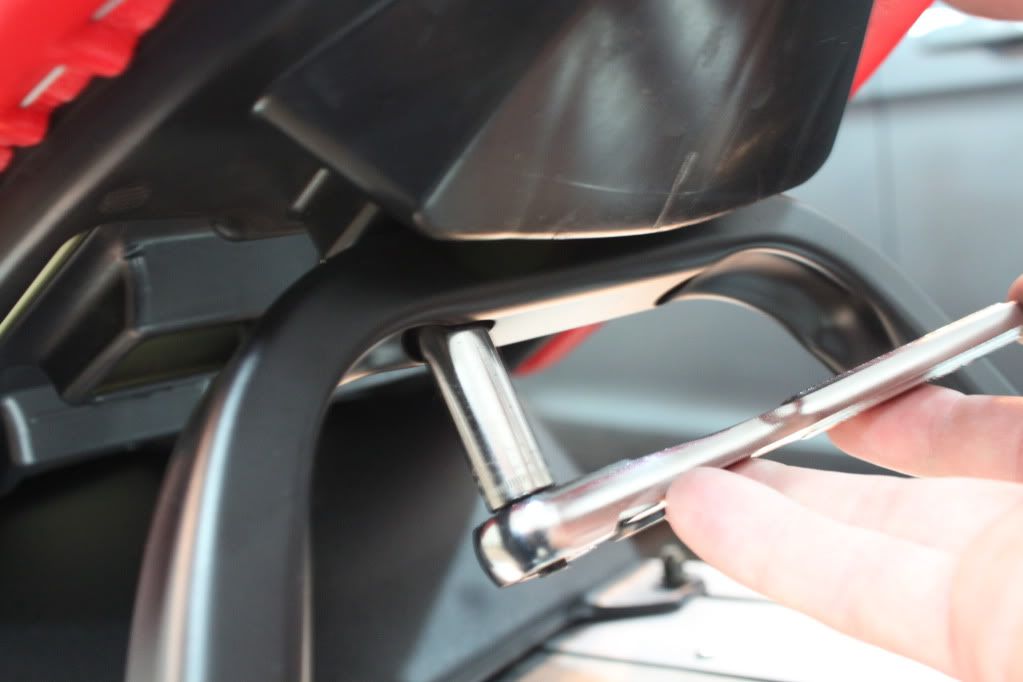
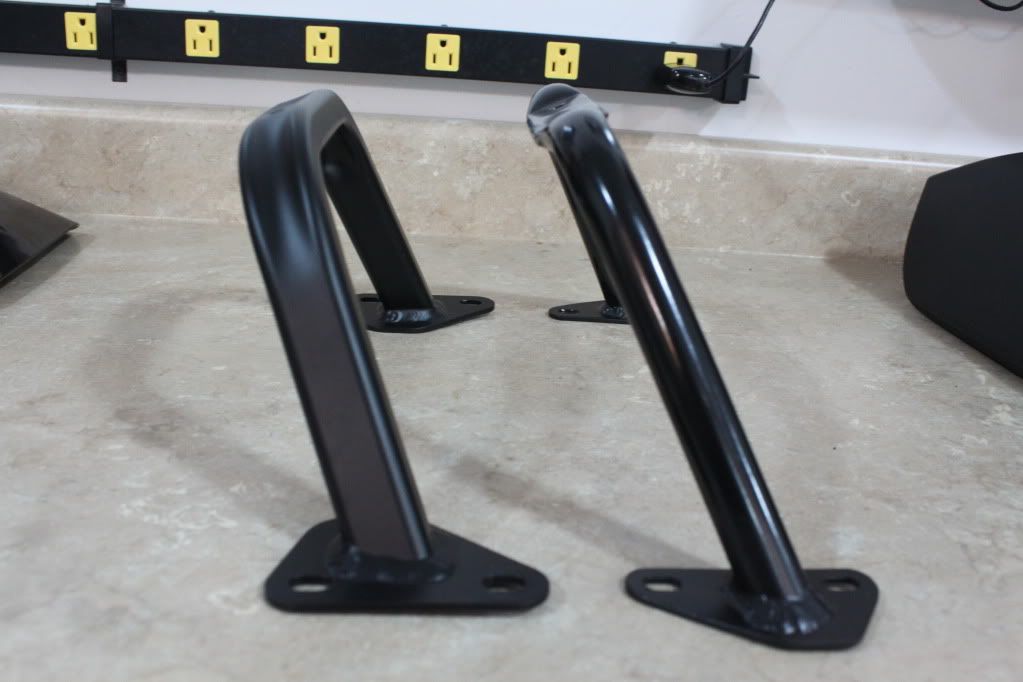
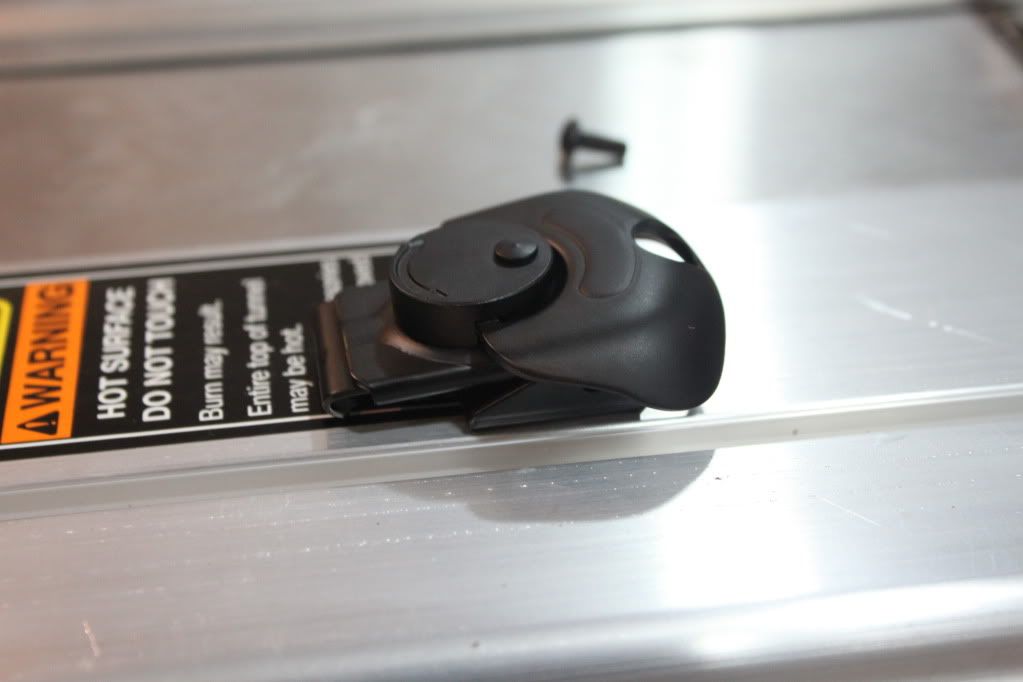
First thing to do is to remove the factory seat brace. This takes a 10mm socket. As you can see from the pictures below the brace Powderkeg includes is much wider then the factory brace. The Powderkeg brace bolts into the stock location of the stock brace. I had no issue with fittment on tunnel or on the seat.

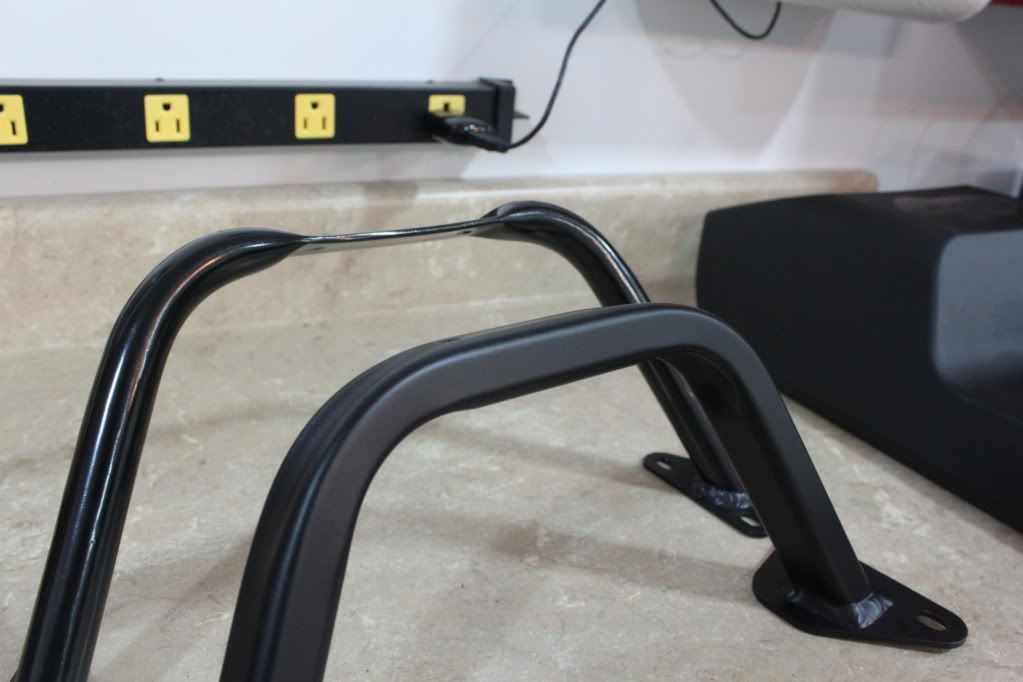
The Powderkeg brace is behind the factory brace. Notice how the Powderkeg brace has the tubing reduced where it mounts to the seat, this allows for clearance for the Fuel keg
Then reinstall the Powderkeg seat brace in the stock location with factory hardware and a 10mm socket.
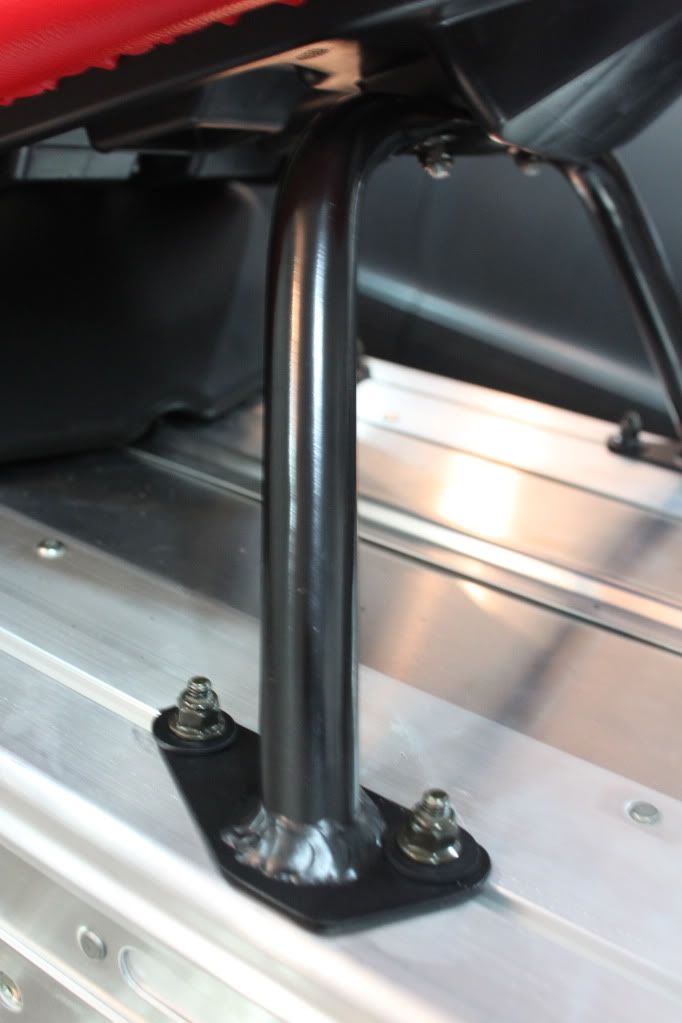
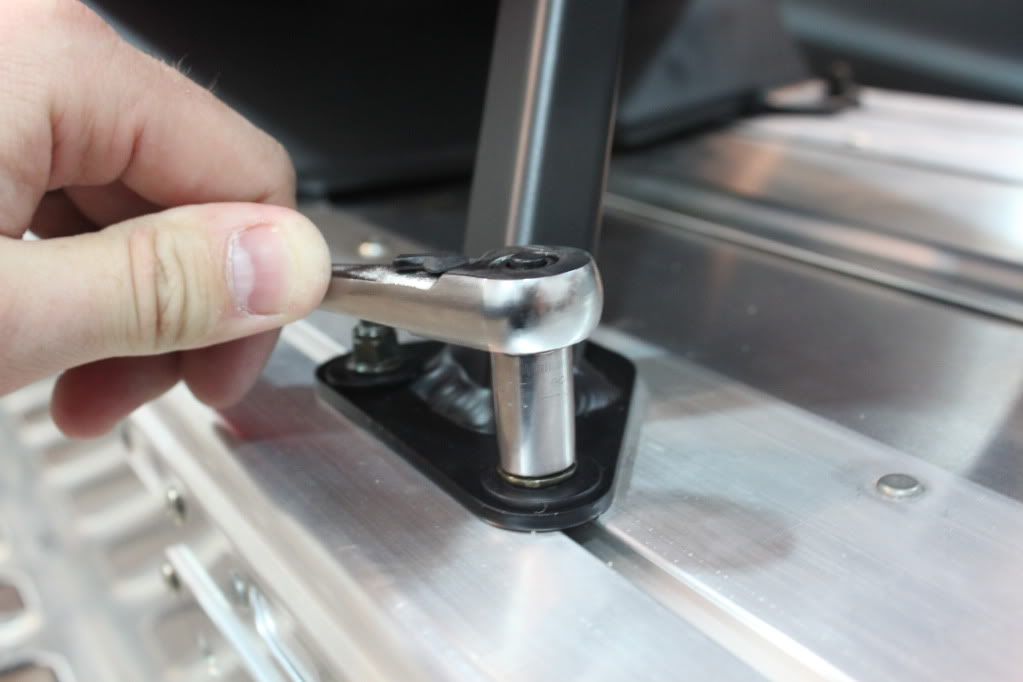
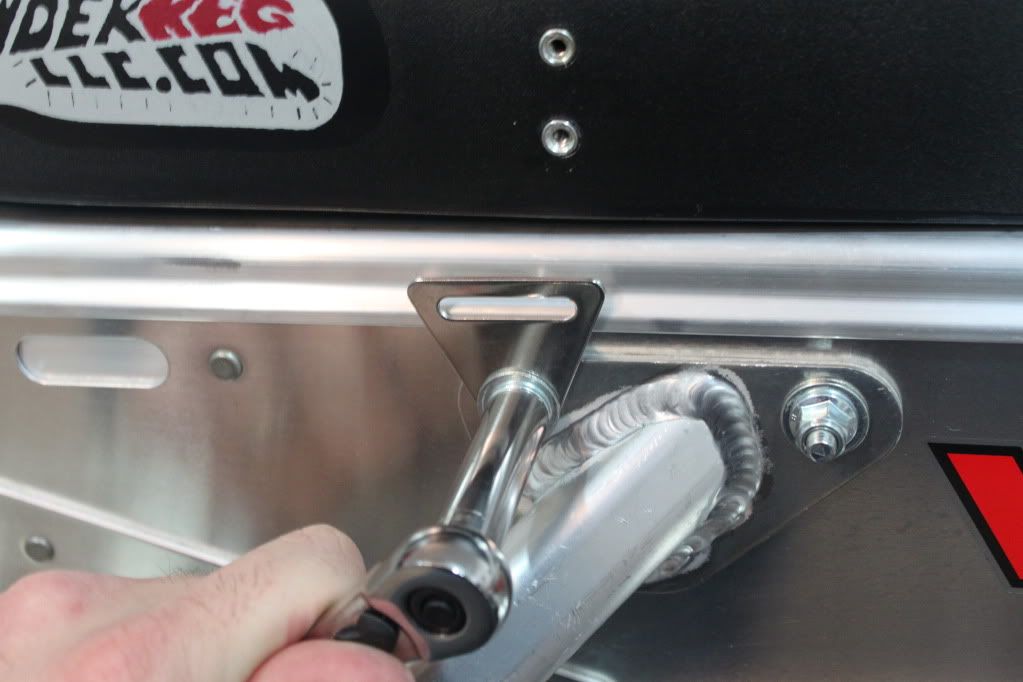
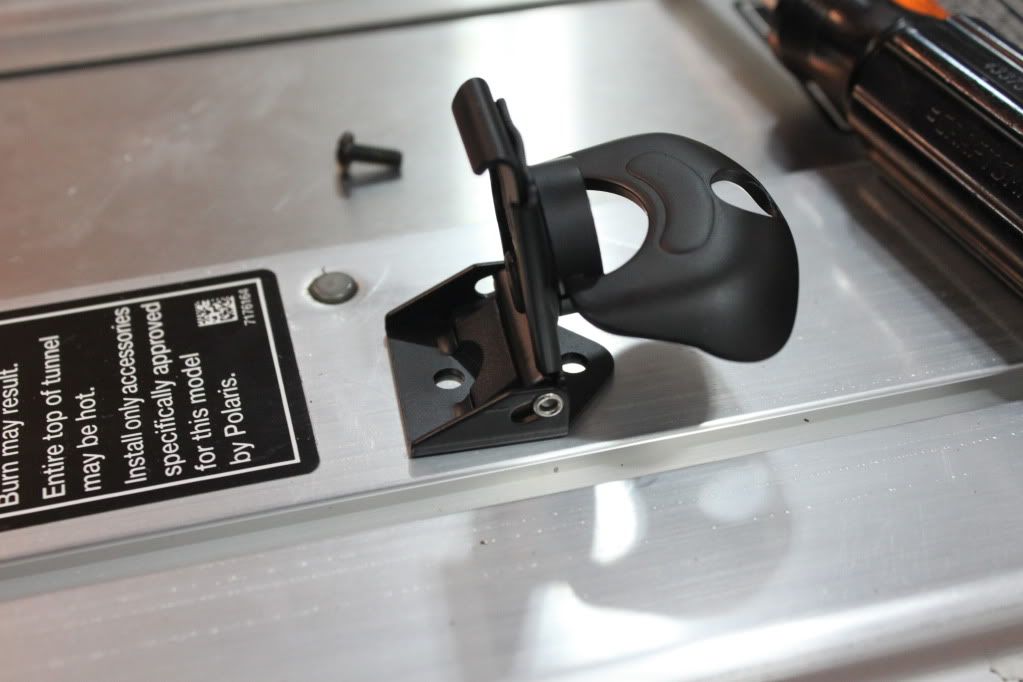
The next step is to remove the front most bolt holding the running board support on the side of the tunnel with a 10mm socket wrench. You must do this to both side running boards
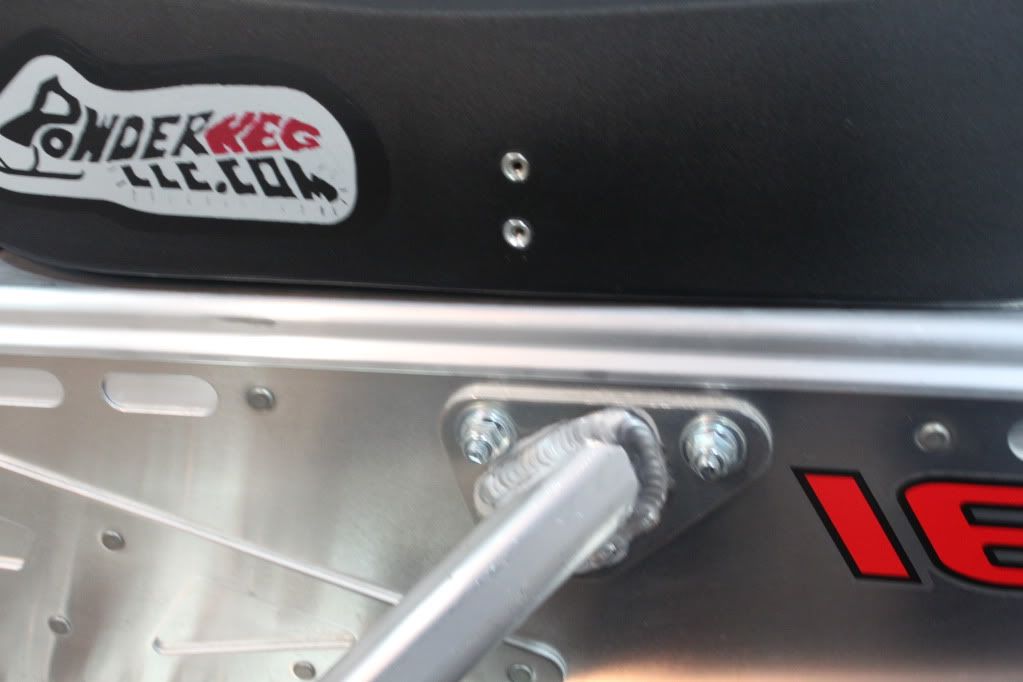
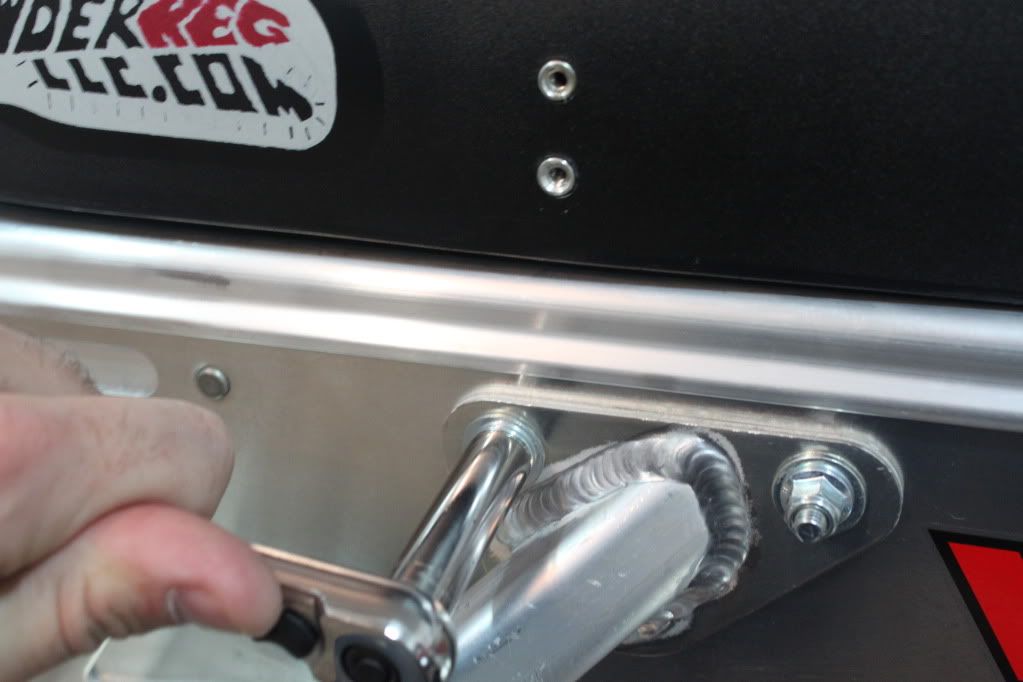
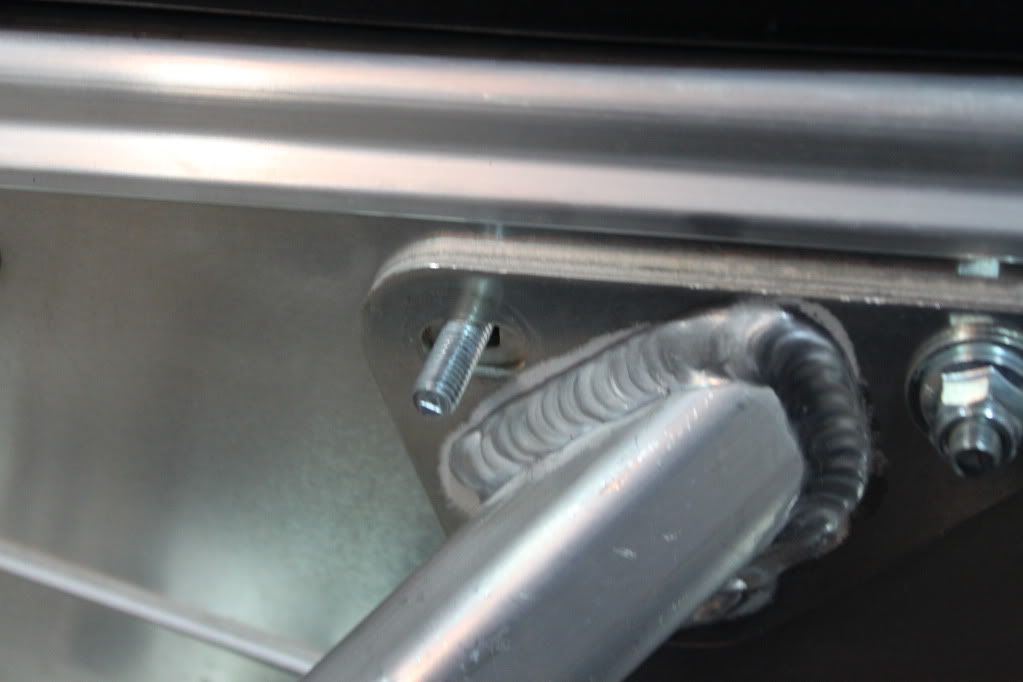
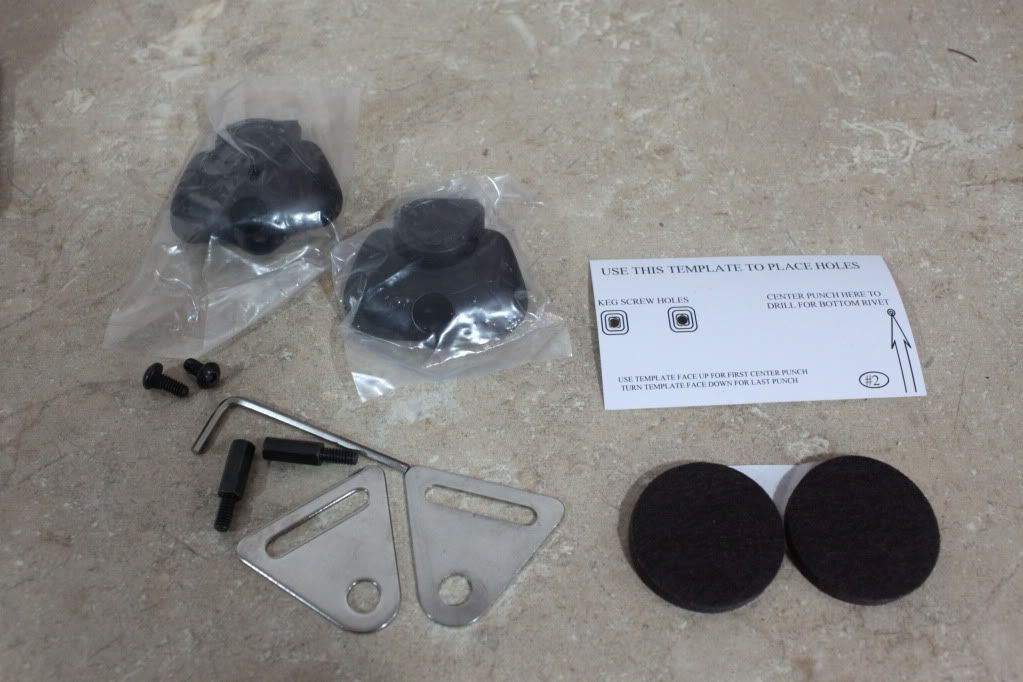
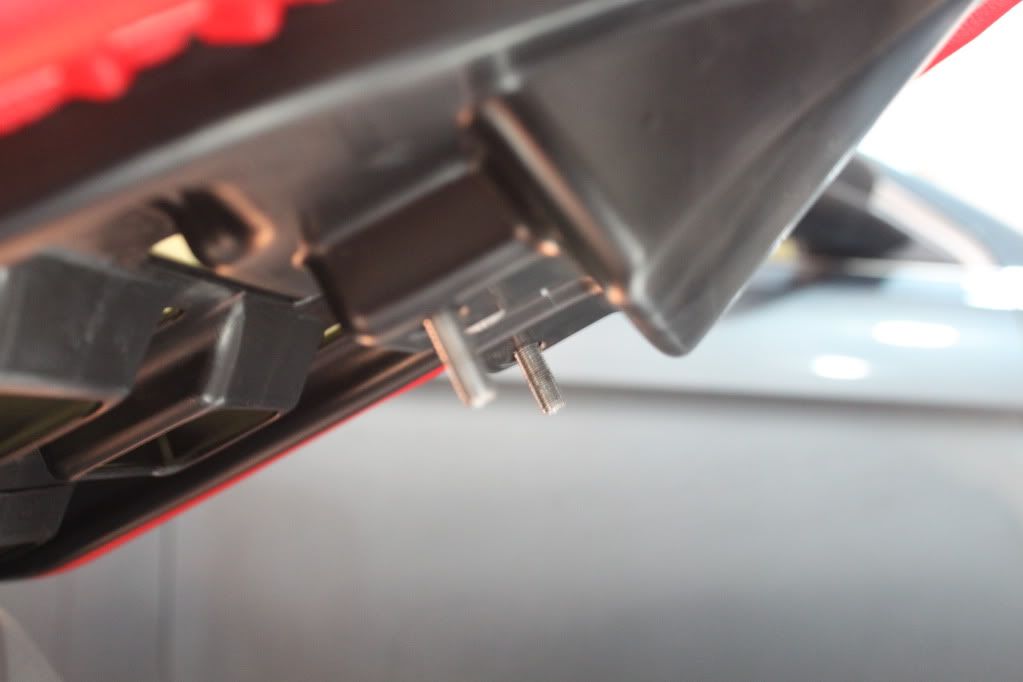
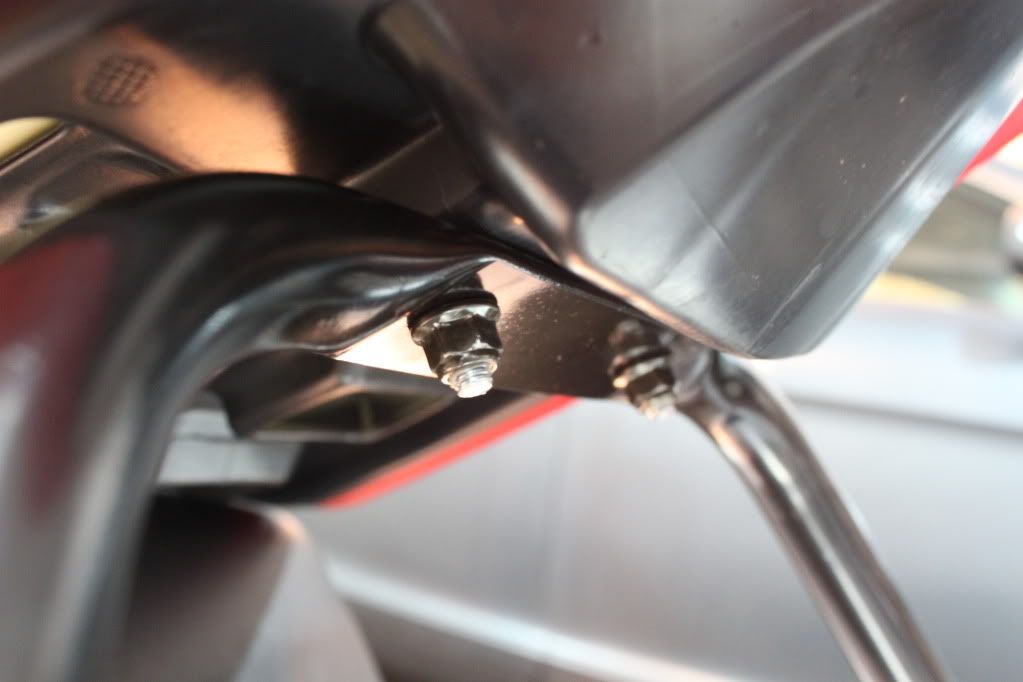
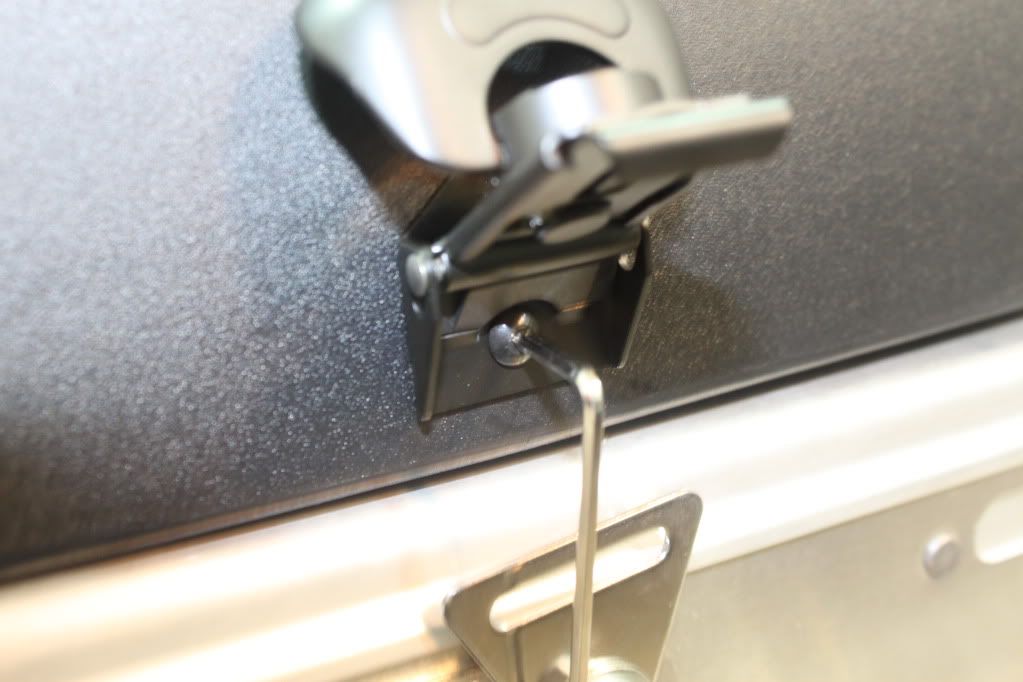
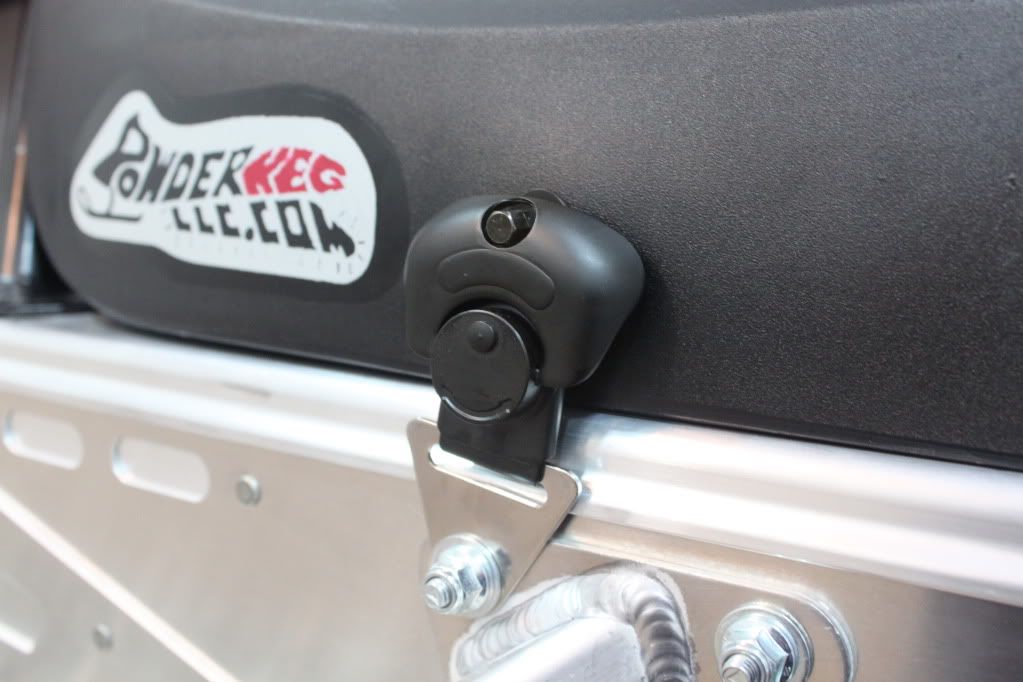
Now you can slide the stainless steel keeper on the bolt and tighten it down with the existing hardware. Make sure you keep the keeper facing perpendicular to the tunnel so that the draw latch will attach to the keeper correctly.
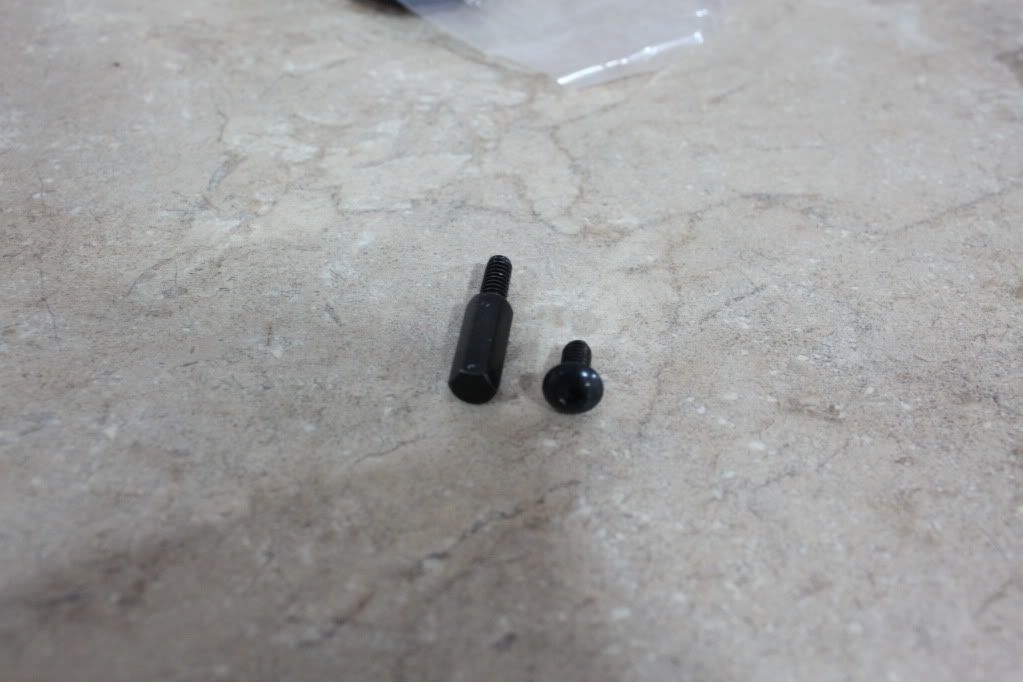
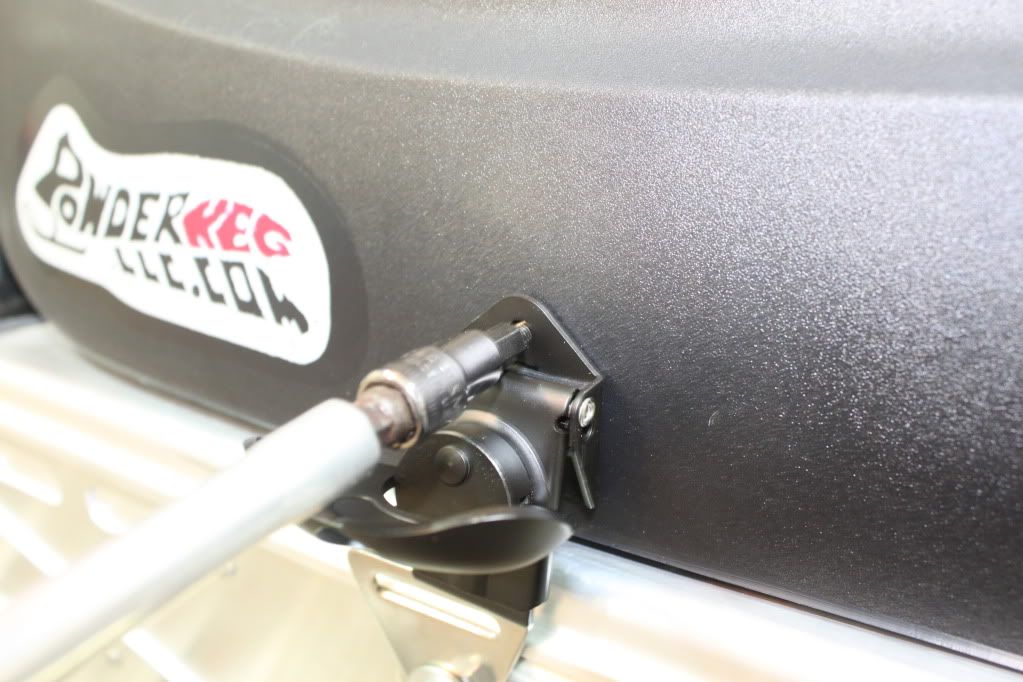
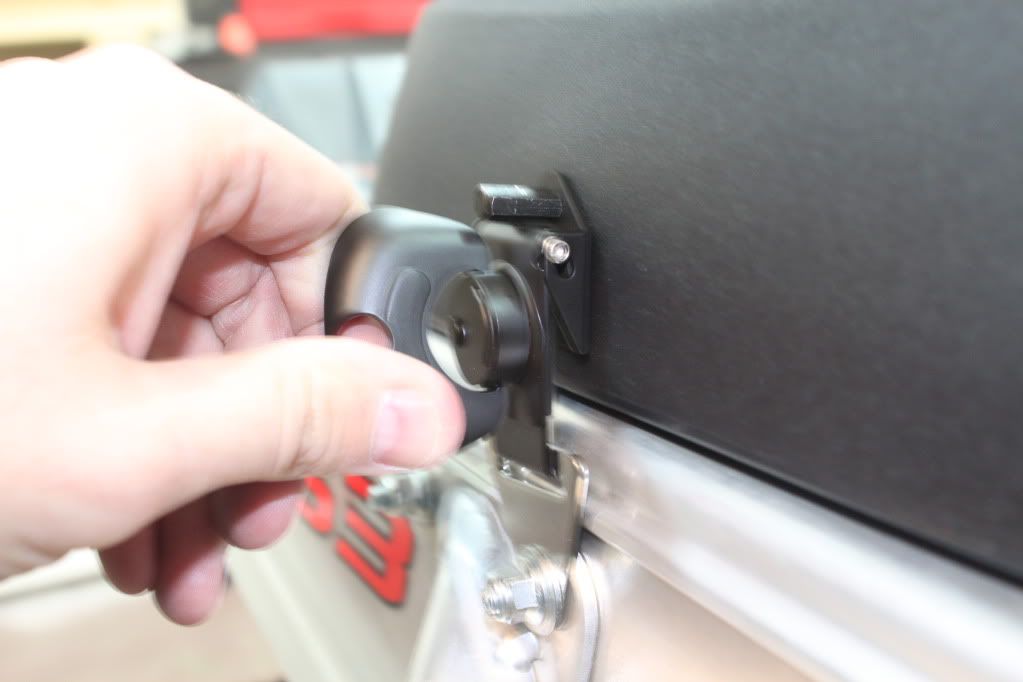
Now you want to find the 2 draw latches in the hardware that came with the Powderkeg and install both of them onto the Powderkeg storage container. You can see how these latches work by lifting the handle and twisting it. This action will explain the principles behind the latching mechanism. Powderkeg says you can use small dab of loctite on each screw but it isnt necessary. You will want to use bolt the allen head screw that holds the latch to the storage box first and then attach the threaded hex pin lastly. You will find out if you do the top one first you will not be able to tighten the bottom allen screw on. Install both Latches the same way.
Latch hardware....Allen head screw and Hex head screw for Latch
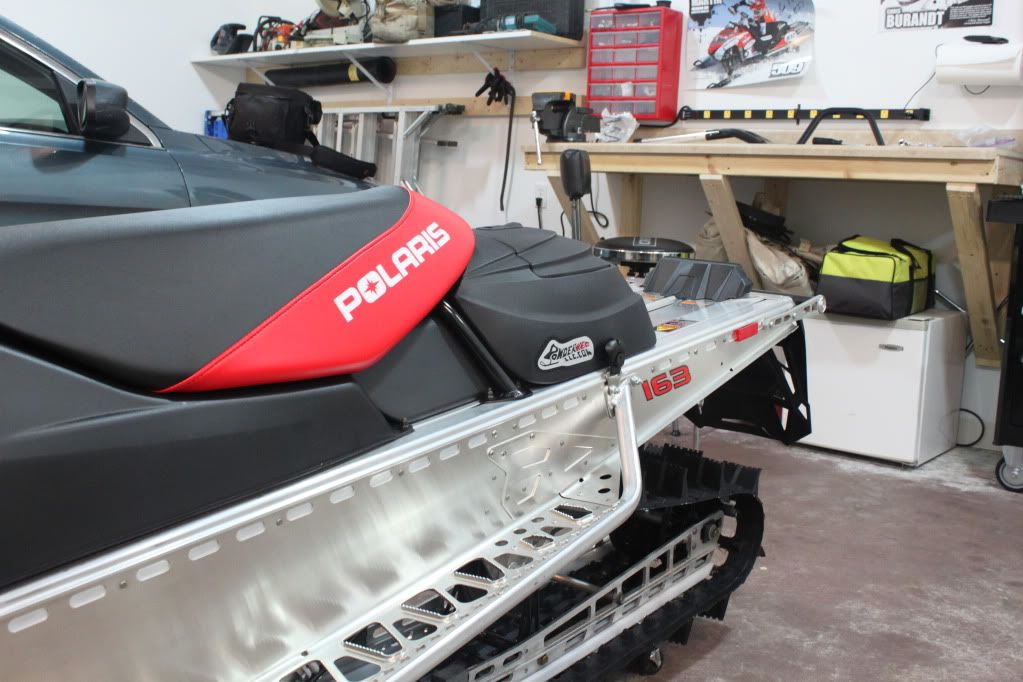
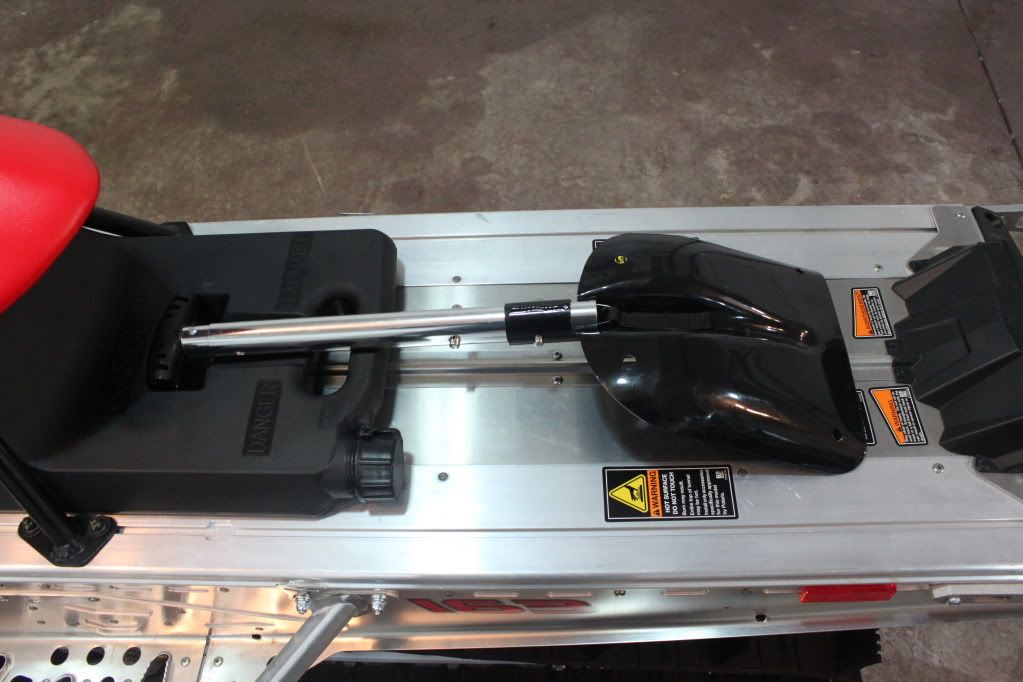
Now that both latches are installed you can now slide the fuel keg under the seat, and put the storage box on top to check for fitment. Everything fit together nice and snug for me.
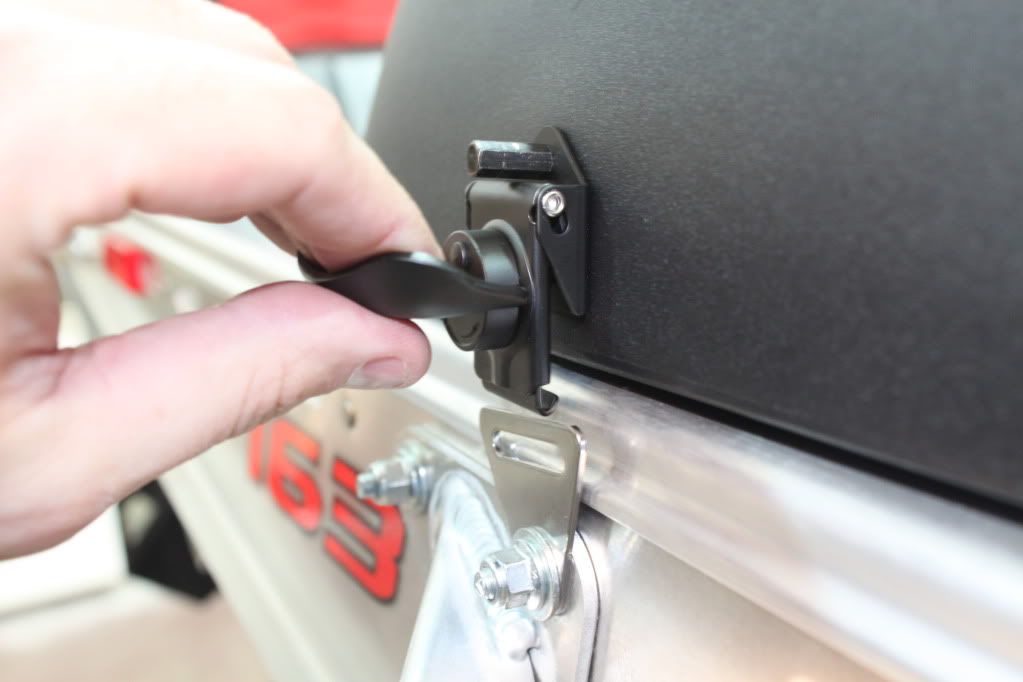
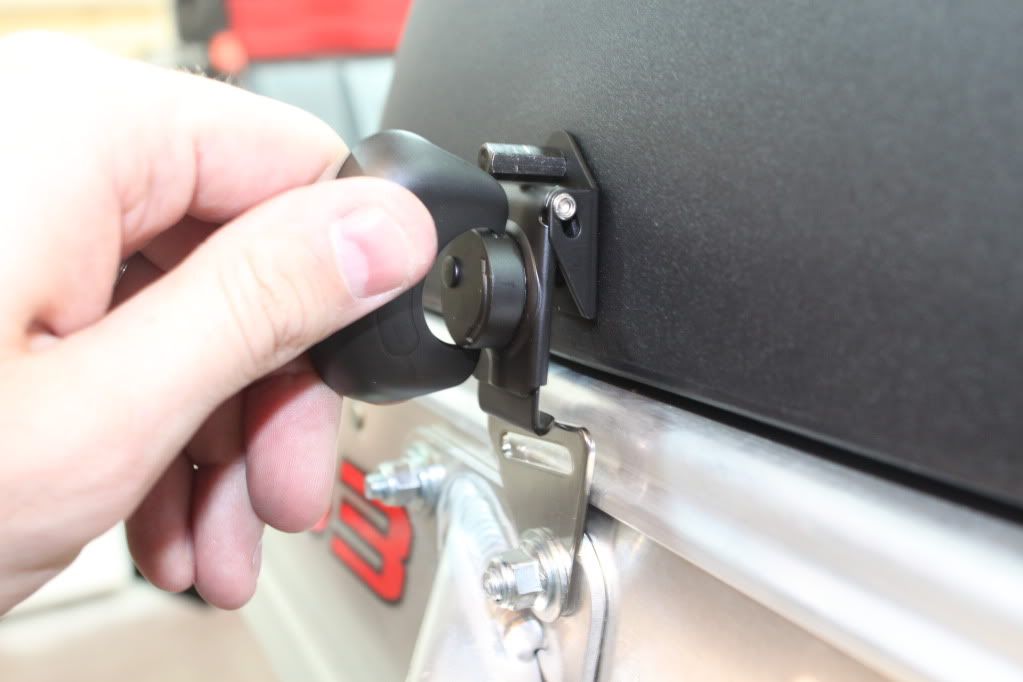
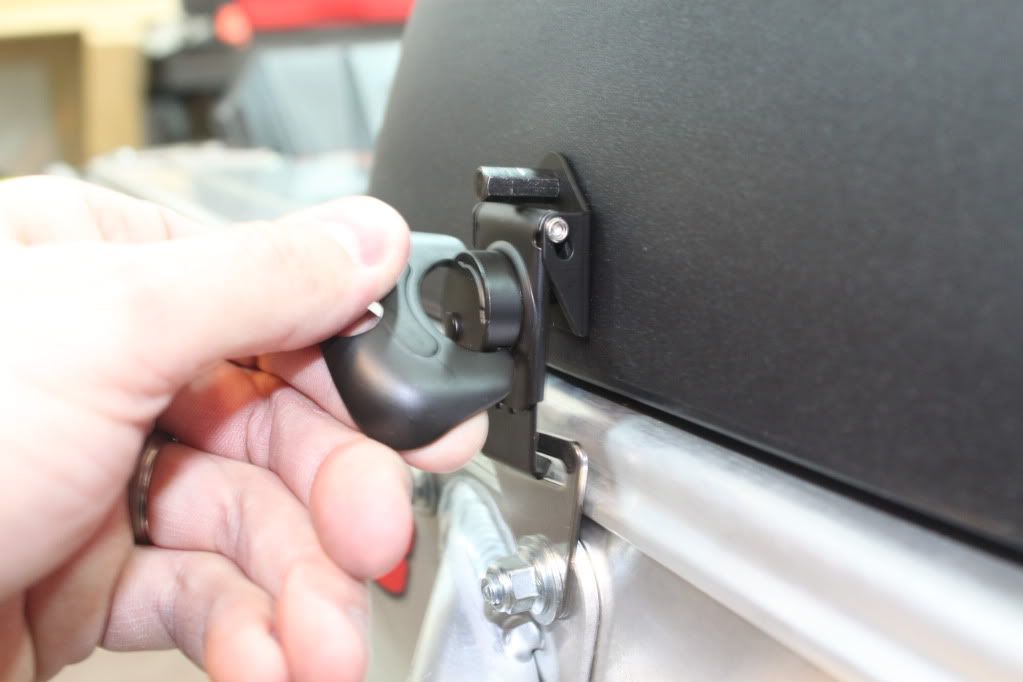
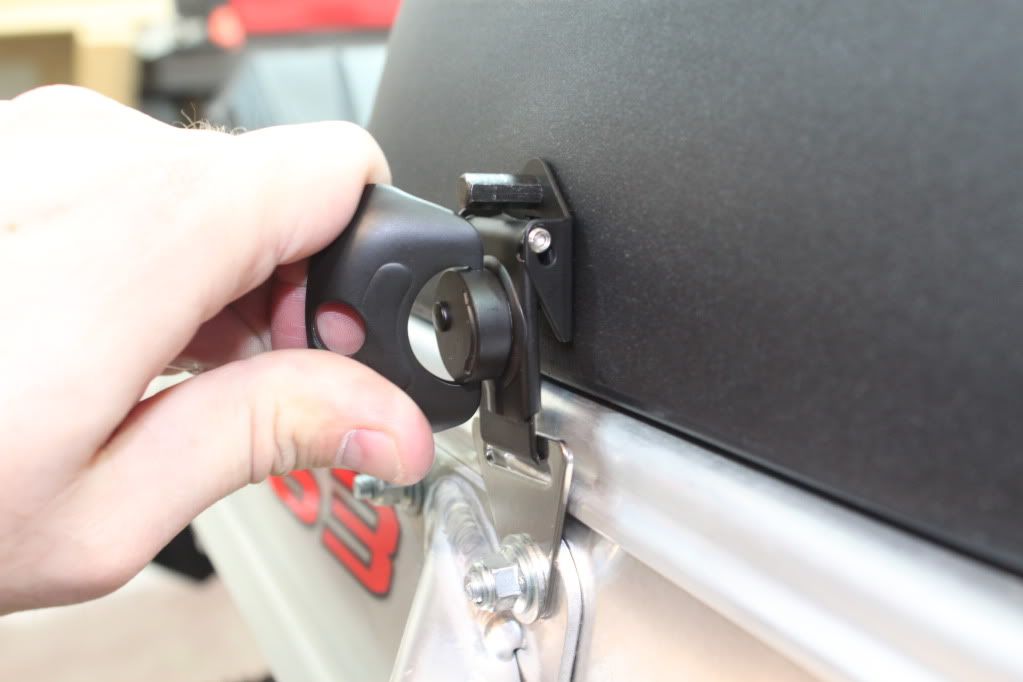
You can see how the latch tightens by rotating the handle.
NOTE: these latches can require a significent amount of force to tighten latch for the first time. The directions mentioned that, but I want to reiterate. After the first time of tightening down the storage box it seemed to work a little bit easier after that.
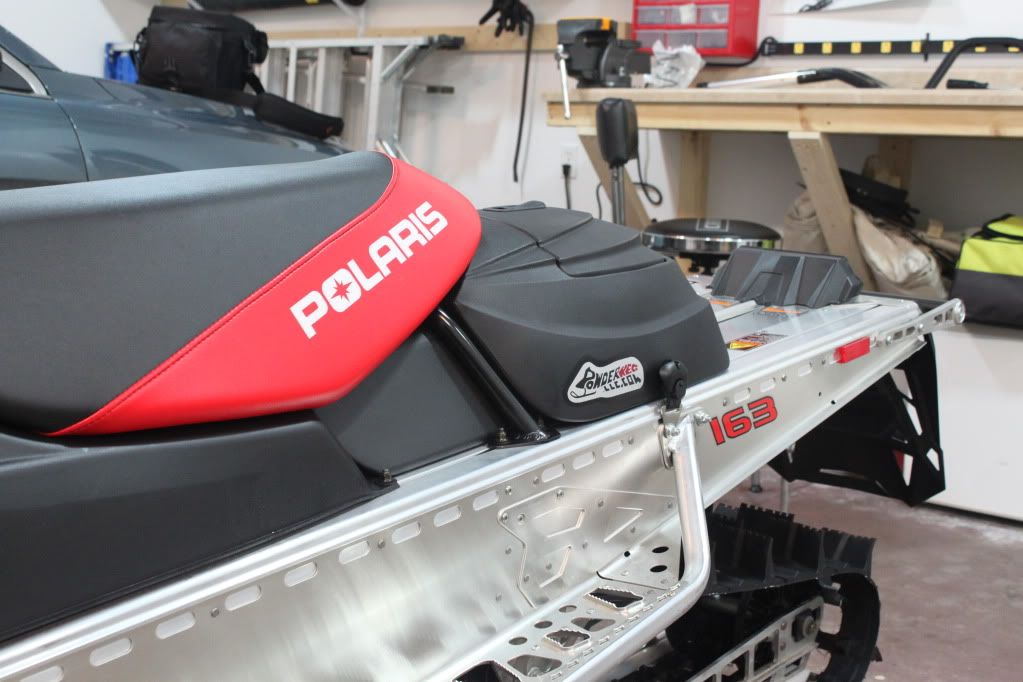
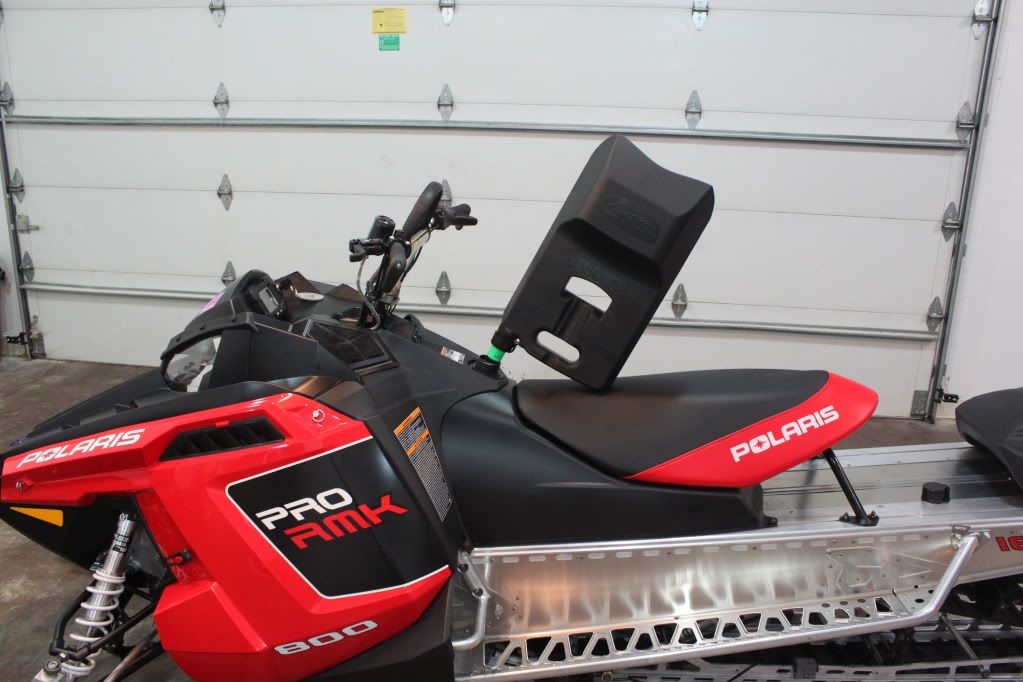
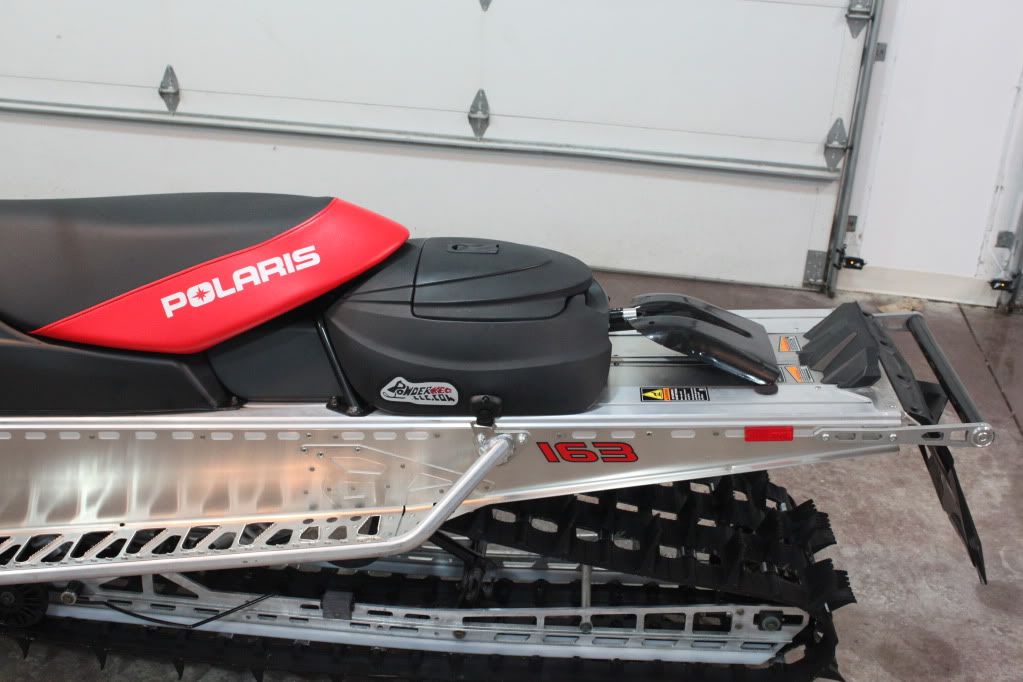
Powderkeg installed.
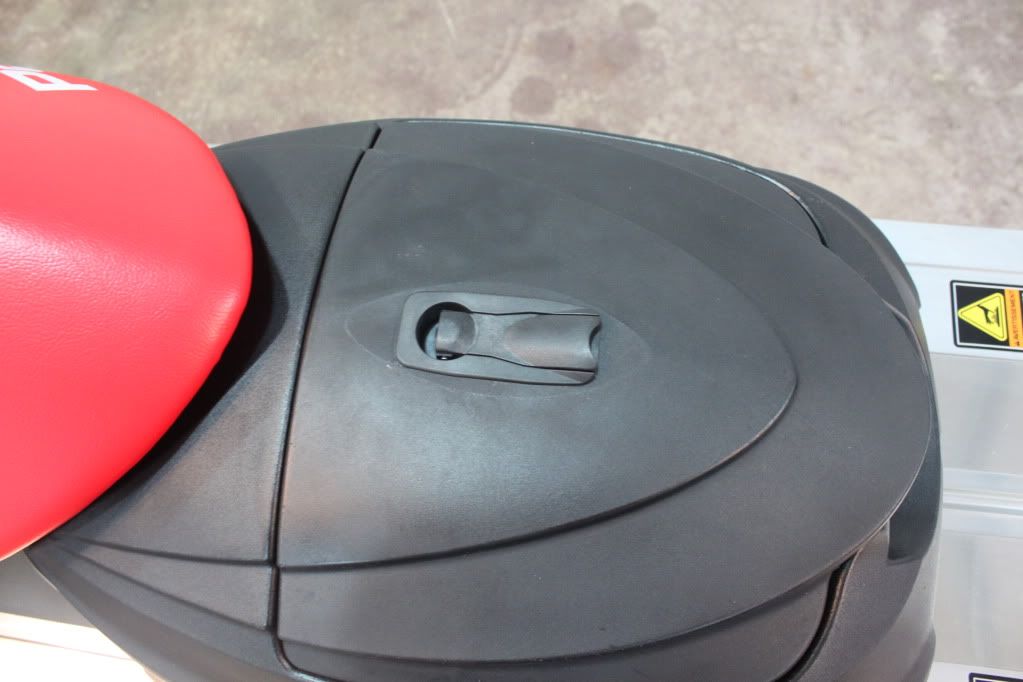
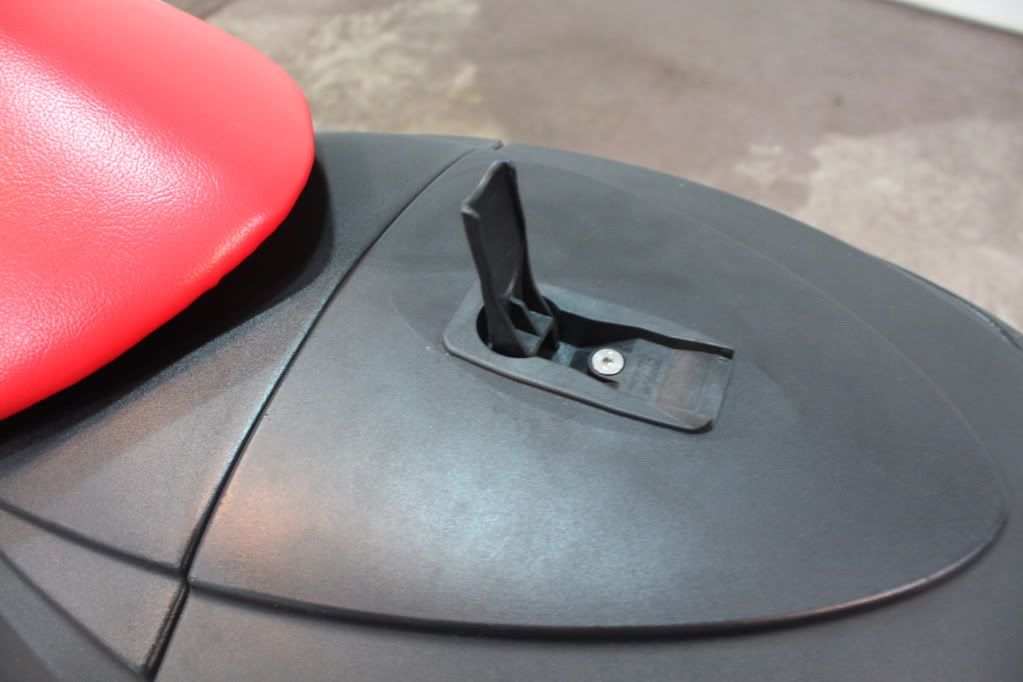
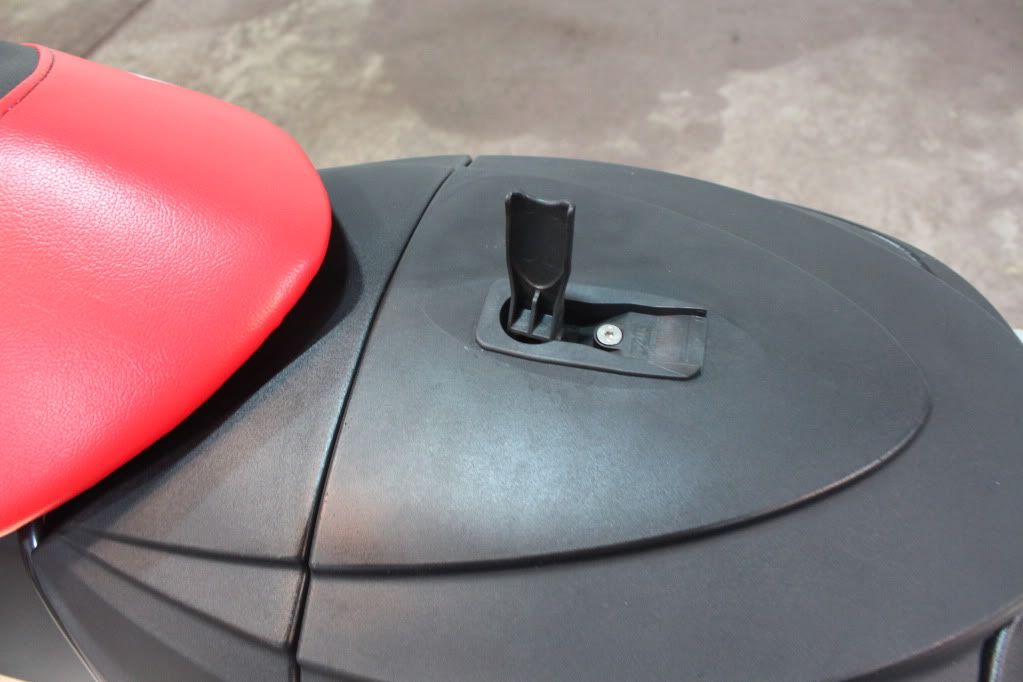
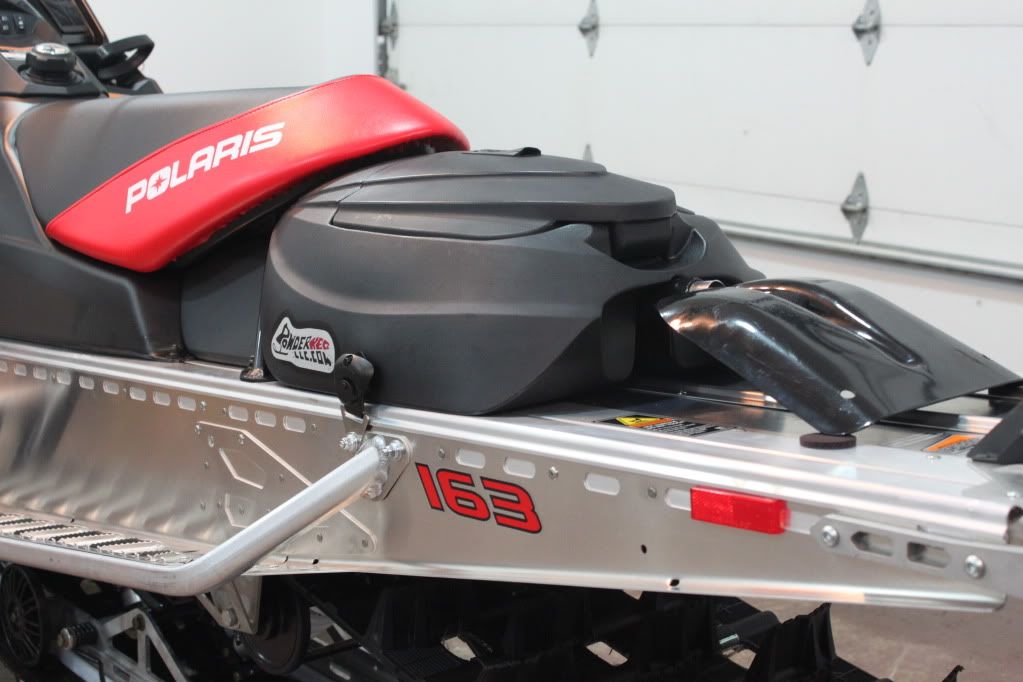
The storage box lid opens pretty easy. Simply lift the handle and twist. The door will open.
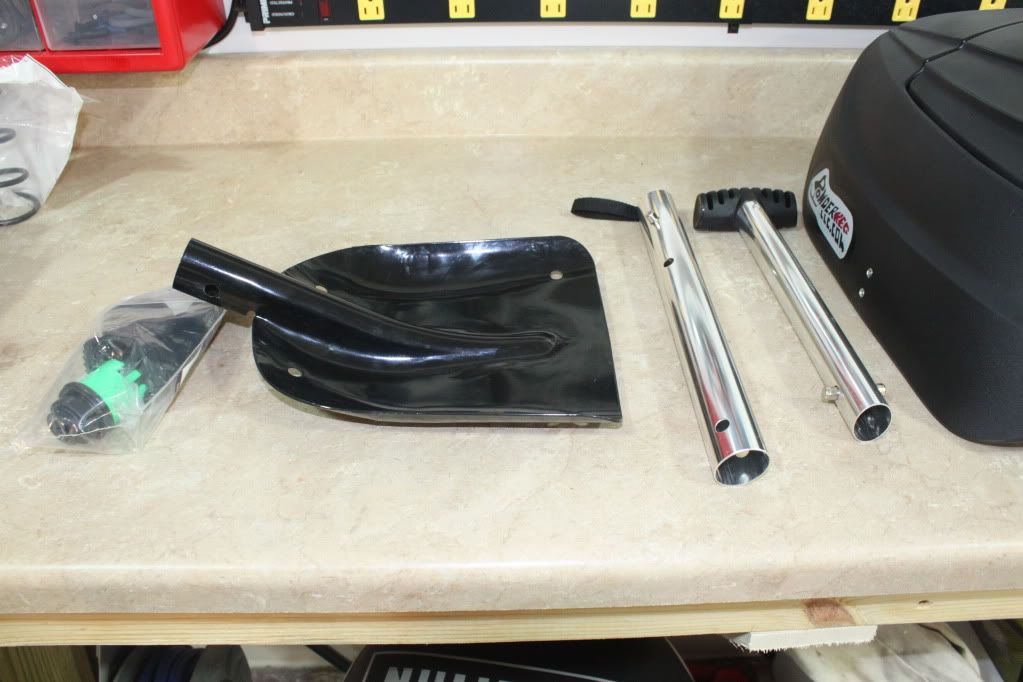
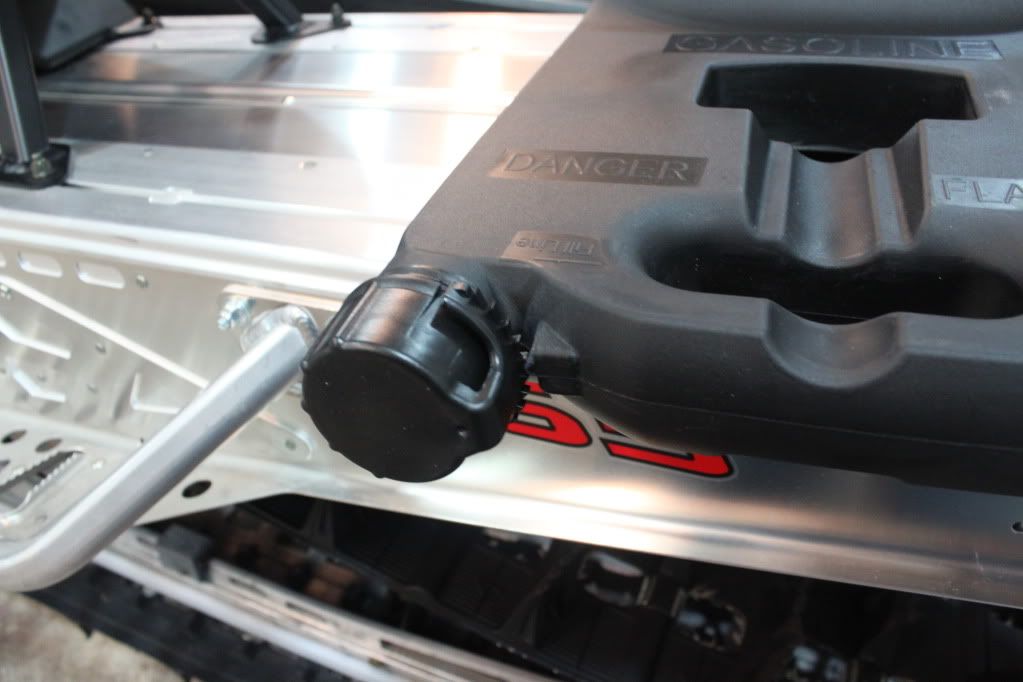
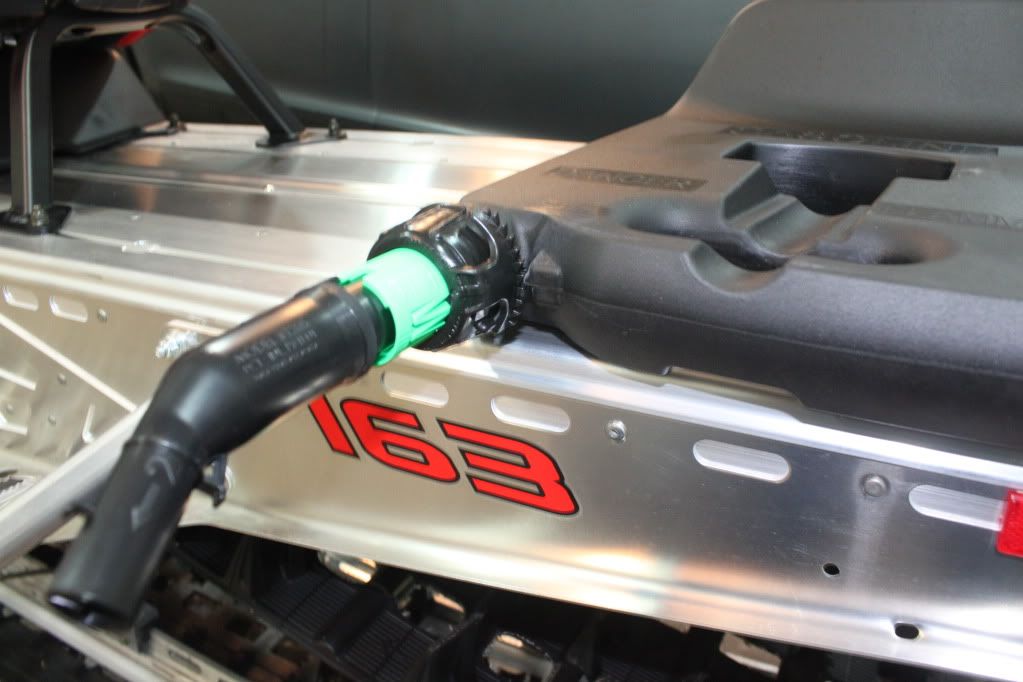
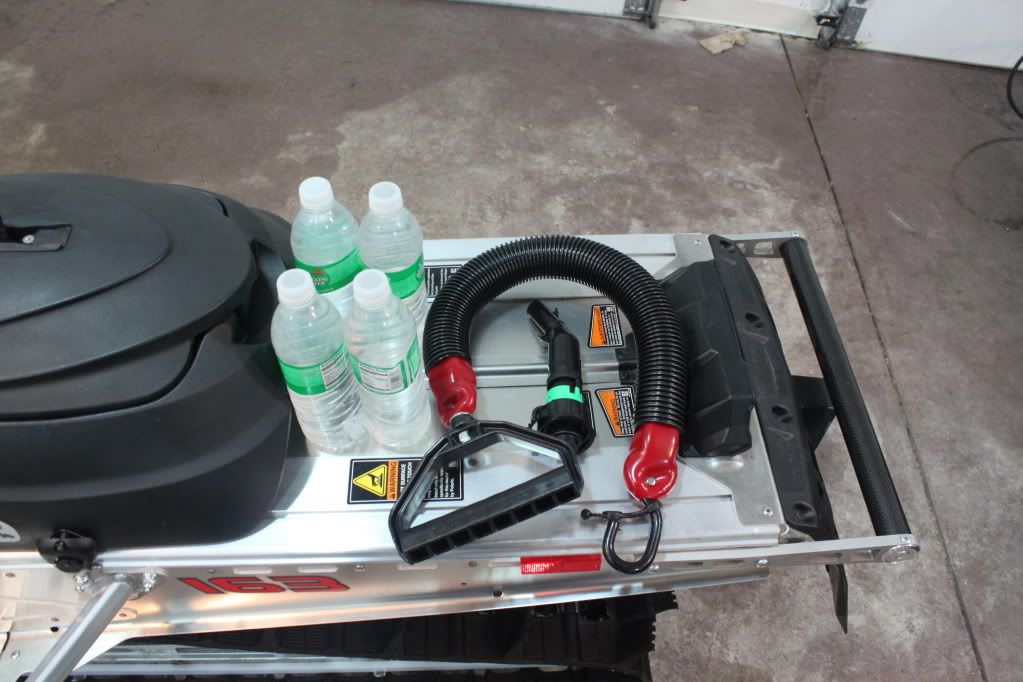
The next thing I did was check out how the fuel keg worked. It has a pretty nice carry handle built into it for ease of handling. Also Powderkeg includes a spout and a fuel cap. I will place the fuel spout in the storage box when not in use. The fuel container also is molded to accept the avy shovel from Powderkeg. The shovel comes in 3 pieces, is adjustable to 3 different length, sand looks to be a pretty sturdy shovel. Fairly lightweight as well.
I wouldn't recommend refilling your sled without holding the fuel keg but It is pretty balanced when empty to sit on the seat.
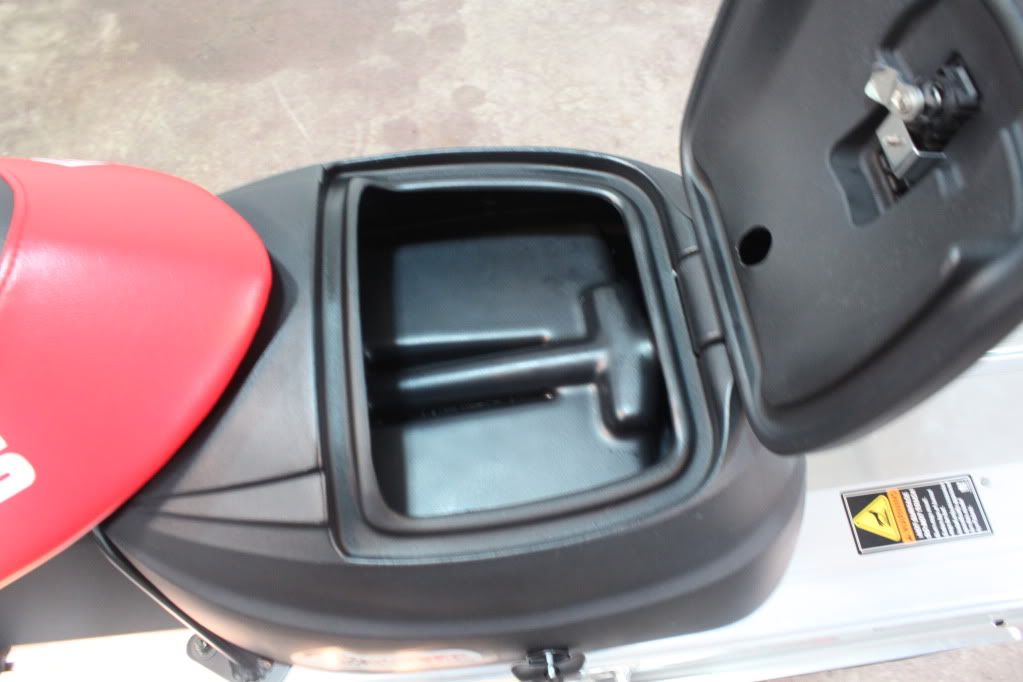
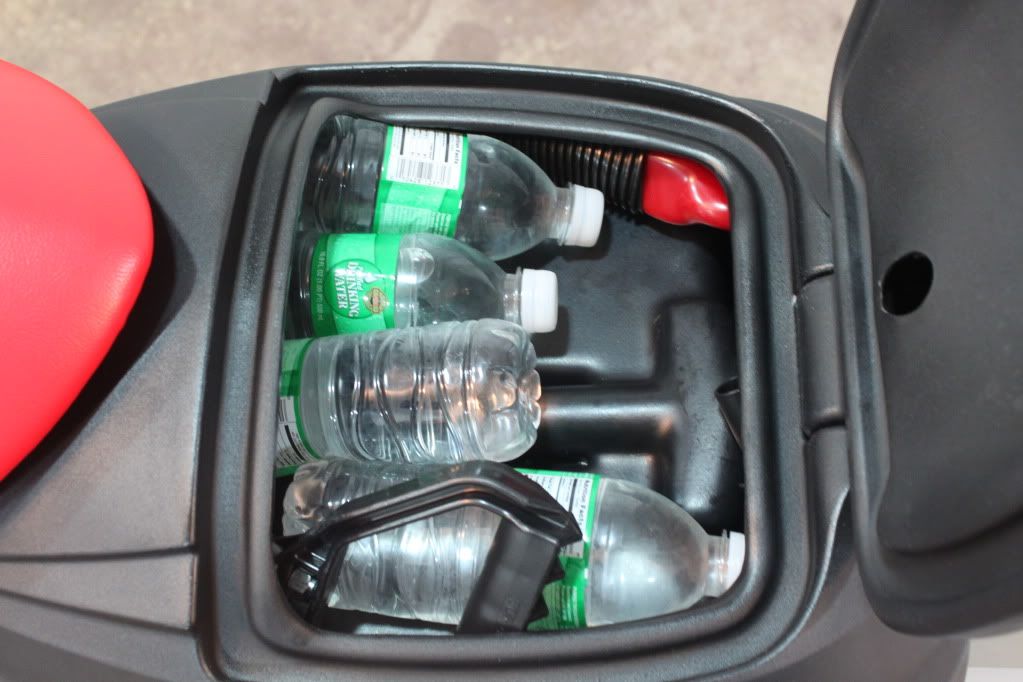
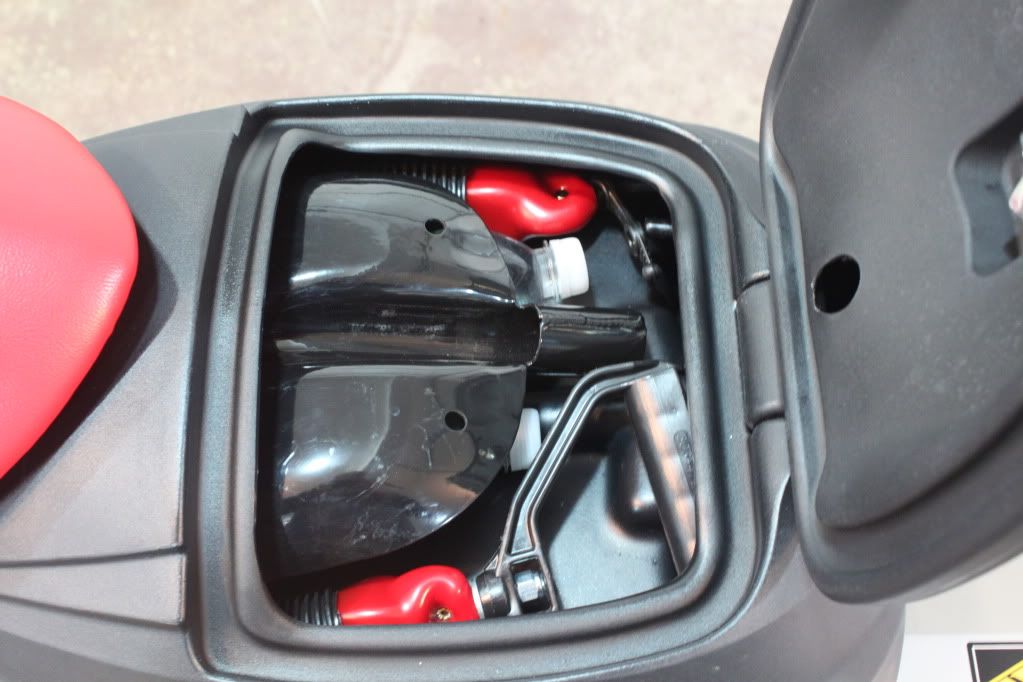
I Didnt have a lot of supplies next to me at the time I took the pictures but I did have a few water bottles and my snowbunje. I was able to easily place 4 20 oz water bottle, the snow bunje, the fuel spout, and the shovel head inside the storage box with room to spare.
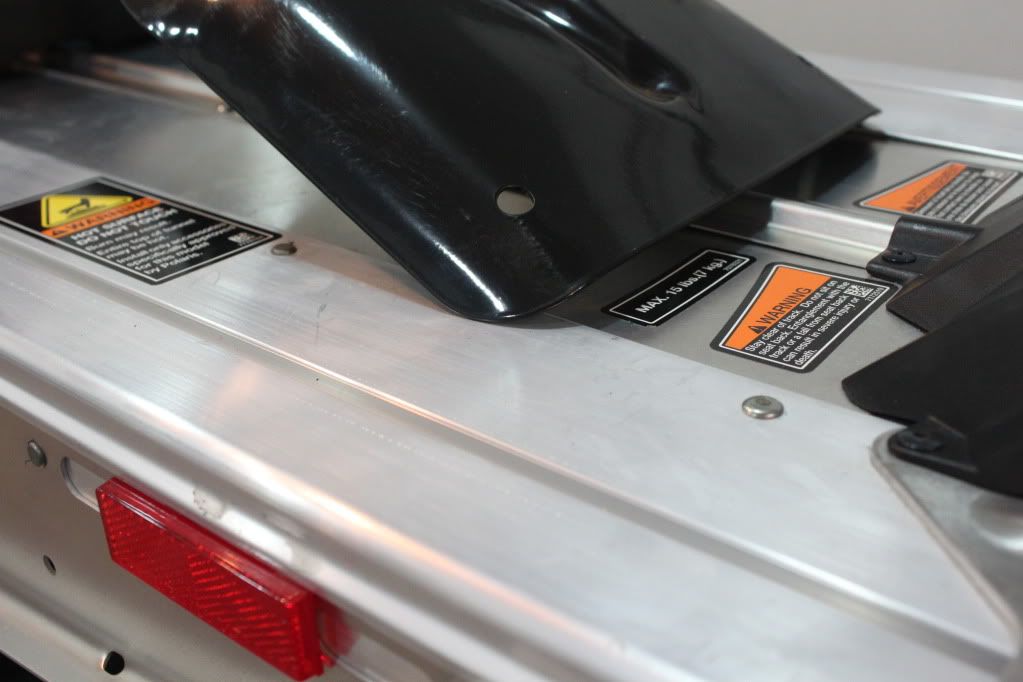
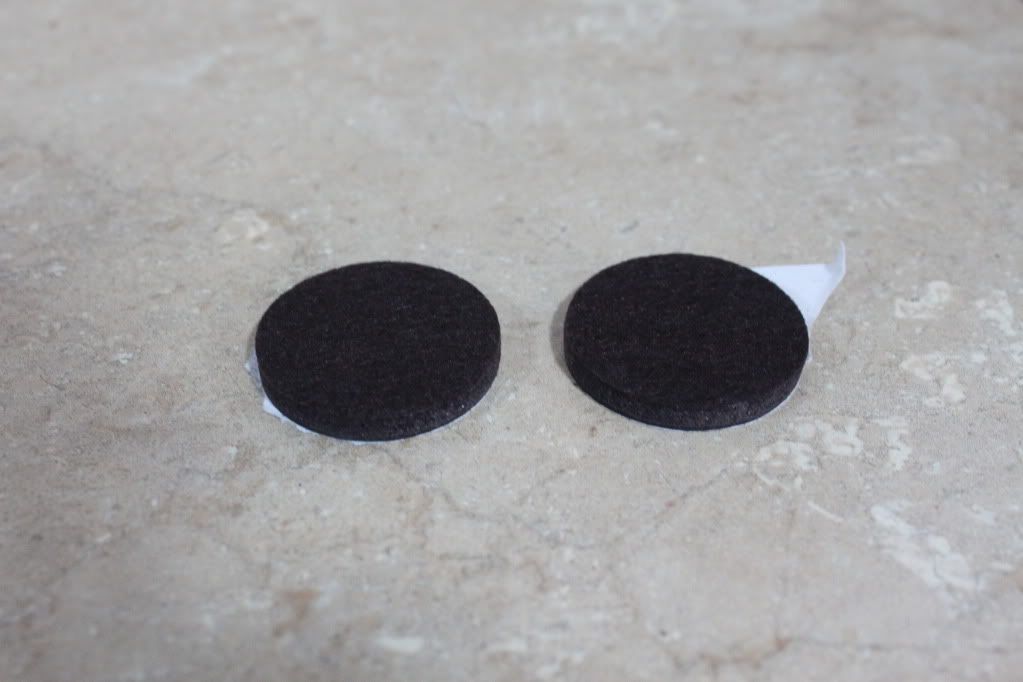
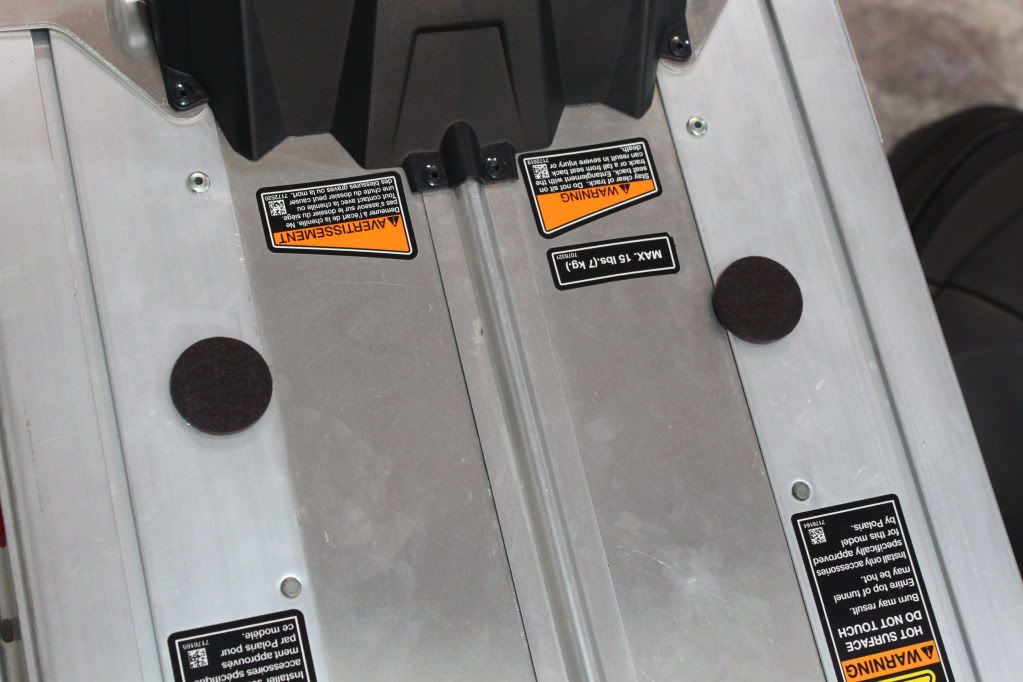
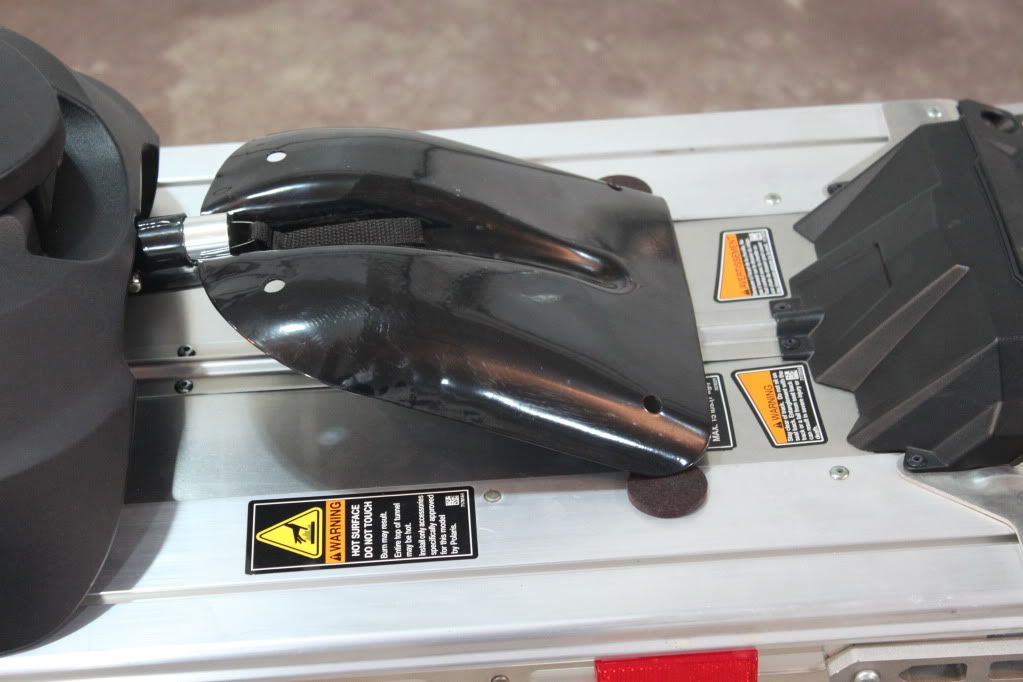
The last step to this project was to install the shovel between the fuel keg and the storage box on the RMK tunnel. Once these were in position I wanted to install the felt pads on the tunnel to protect the tunnel and the shovel blade edge from damaging eachother. The shovel needs to be installed in the downward position. If you want you can just install the handle between the storage box and fuel keg and place the shovel blade inside storage box.
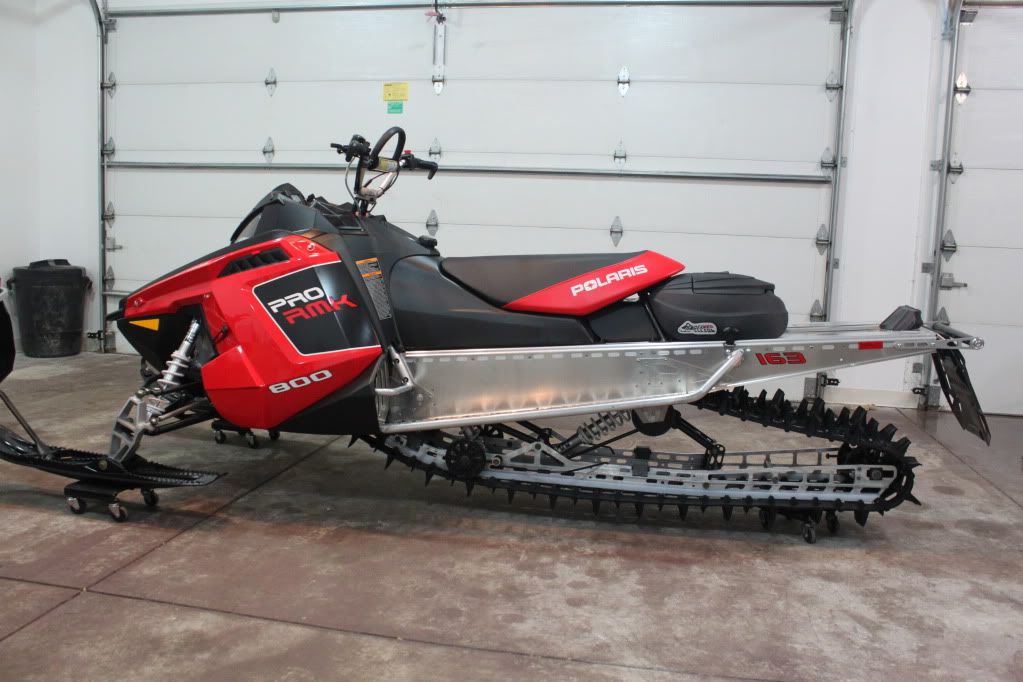
The finished project.....
Shovel blade inside storage box

Overall fit and finish of the powderkeg looks pretty good. I like how solid the hinges are on the door, and the robustness of the latching system. It also has a pretty small area it takes up as it pushes up under the seat. Considering you get a storage area, a shovel carrier, and a fuel caddy its a pretty nice piece as well as simple. I plan to get this in some powder soon to see how well it holds up against water intrusion and some offtrail abuse. Im fairly confident though it will take it. In case I missed anything let me know. Hopefully this is pretty cut and dry.
Grizzly Mtn sells these on here...im sure there are others as well but he is all I know of at this point
The Powderkeg setup for the 2011 PRO RIDE RMK includes a different rear seat support as the stock seat support is not wide enough to allow the powderkeg to squeeze in between the seat braces. The seat brace that they include is made of aluminum and actually feels lighter then the factory brace.
First thing to do is to remove the factory seat brace. This takes a 10mm socket. As you can see from the pictures below the brace Powderkeg includes is much wider then the factory brace. The Powderkeg brace bolts into the stock location of the stock brace. I had no issue with fittment on tunnel or on the seat.
The Powderkeg brace is behind the factory brace. Notice how the Powderkeg brace has the tubing reduced where it mounts to the seat, this allows for clearance for the Fuel keg
Then reinstall the Powderkeg seat brace in the stock location with factory hardware and a 10mm socket.
The next step is to remove the front most bolt holding the running board support on the side of the tunnel with a 10mm socket wrench. You must do this to both side running boards
Now you can slide the stainless steel keeper on the bolt and tighten it down with the existing hardware. Make sure you keep the keeper facing perpendicular to the tunnel so that the draw latch will attach to the keeper correctly.
Now you want to find the 2 draw latches in the hardware that came with the Powderkeg and install both of them onto the Powderkeg storage container. You can see how these latches work by lifting the handle and twisting it. This action will explain the principles behind the latching mechanism. Powderkeg says you can use small dab of loctite on each screw but it isnt necessary. You will want to use bolt the allen head screw that holds the latch to the storage box first and then attach the threaded hex pin lastly. You will find out if you do the top one first you will not be able to tighten the bottom allen screw on. Install both Latches the same way.
Latch hardware....Allen head screw and Hex head screw for Latch
Now that both latches are installed you can now slide the fuel keg under the seat, and put the storage box on top to check for fitment. Everything fit together nice and snug for me.
You can see how the latch tightens by rotating the handle.
NOTE: these latches can require a significent amount of force to tighten latch for the first time. The directions mentioned that, but I want to reiterate. After the first time of tightening down the storage box it seemed to work a little bit easier after that.
Powderkeg installed.
The storage box lid opens pretty easy. Simply lift the handle and twist. The door will open.
The next thing I did was check out how the fuel keg worked. It has a pretty nice carry handle built into it for ease of handling. Also Powderkeg includes a spout and a fuel cap. I will place the fuel spout in the storage box when not in use. The fuel container also is molded to accept the avy shovel from Powderkeg. The shovel comes in 3 pieces, is adjustable to 3 different length, sand looks to be a pretty sturdy shovel. Fairly lightweight as well.
I wouldn't recommend refilling your sled without holding the fuel keg but It is pretty balanced when empty to sit on the seat.
I Didnt have a lot of supplies next to me at the time I took the pictures but I did have a few water bottles and my snowbunje. I was able to easily place 4 20 oz water bottle, the snow bunje, the fuel spout, and the shovel head inside the storage box with room to spare.
The last step to this project was to install the shovel between the fuel keg and the storage box on the RMK tunnel. Once these were in position I wanted to install the felt pads on the tunnel to protect the tunnel and the shovel blade edge from damaging eachother. The shovel needs to be installed in the downward position. If you want you can just install the handle between the storage box and fuel keg and place the shovel blade inside storage box.
The finished project.....
Shovel blade inside storage box
Overall fit and finish of the powderkeg looks pretty good. I like how solid the hinges are on the door, and the robustness of the latching system. It also has a pretty small area it takes up as it pushes up under the seat. Considering you get a storage area, a shovel carrier, and a fuel caddy its a pretty nice piece as well as simple. I plan to get this in some powder soon to see how well it holds up against water intrusion and some offtrail abuse. Im fairly confident though it will take it. In case I missed anything let me know. Hopefully this is pretty cut and dry.
Grizzly Mtn sells these on here...im sure there are others as well but he is all I know of at this point
Last edited:
