
Planned on buying a Skinz free ride seat this year but they're backordered a long ways out. It's about stock height of the old style M sofa but not as long and loses some weight.
I'm short, so getting from one side of the sled to the other with my boss hi rise in the way takes a little extra effort. Seems I'm only sitting on the trail ride in and out anyway, so I figured I'd try something shorter and easier to get around. Rassmussen has his shorty Boss seat but it's about $600.00 and sled mod funds begin to run low this time of year.
I saw here that somebody had shortened an old style M seat and figured I got nothing to lose. Really turned out to be easier than I thought it would be.
I cut about a foot out of the middle. Cut the front and rear foam flush with the plastic frame left over.
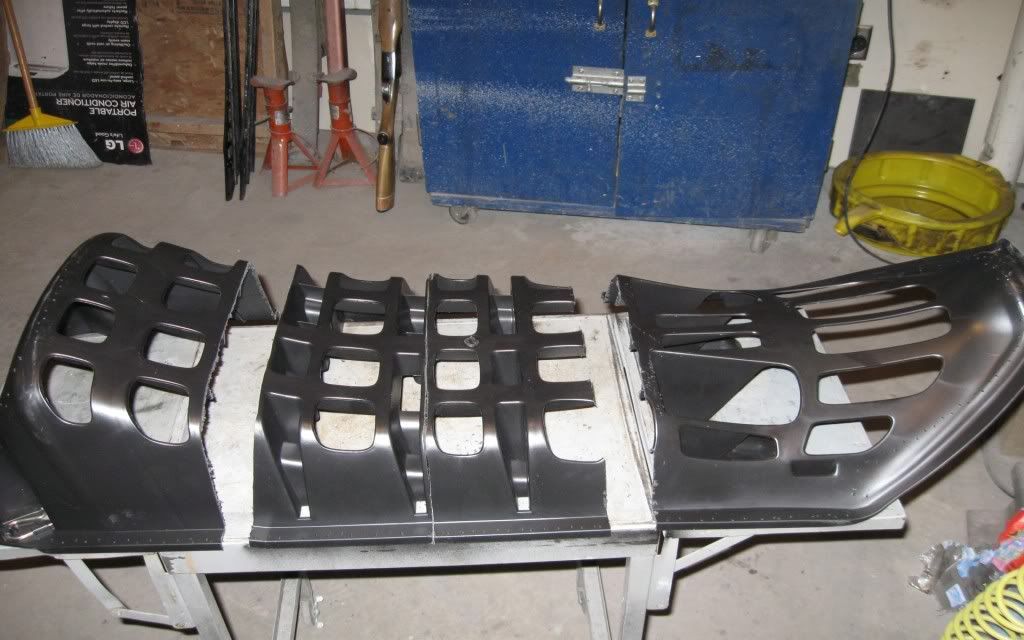
fashion some metal straps to join the front and rear seat frames. I used two along the edge and two in the middle.
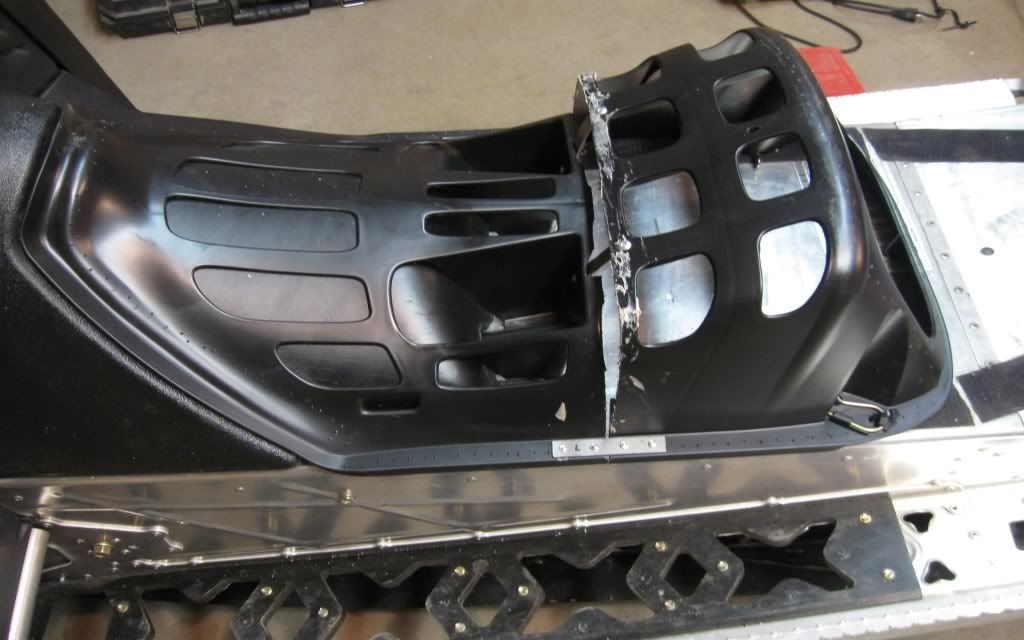
Glue the front foam piece to the rear piece. I used construction adhesive and it seemed to work ok, but it hardens pretty stiff and you sort of feel it in the seat of your pants later. Ended up using nearly a whole large tube though. I used a serrated knife to cut the foam and it wasn't the cleanest cut, so I really slathered on the adhesive. Probably added two pounds of adhesive. Gotta be a better way.. Did try using a "hot knife" but the POS harbor frieght tool didn't last 5 minutes. A hot knife would make much cleaner cuts though, if you have a good one. With smooth cuts you wouldn't need near as much adhisive. Put it on the frame to dry.
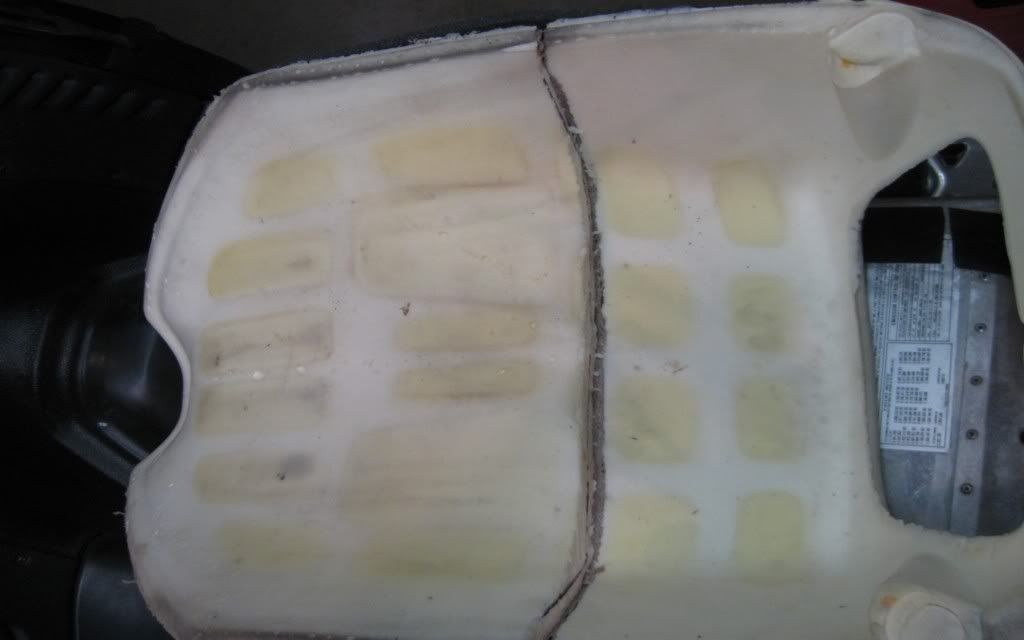
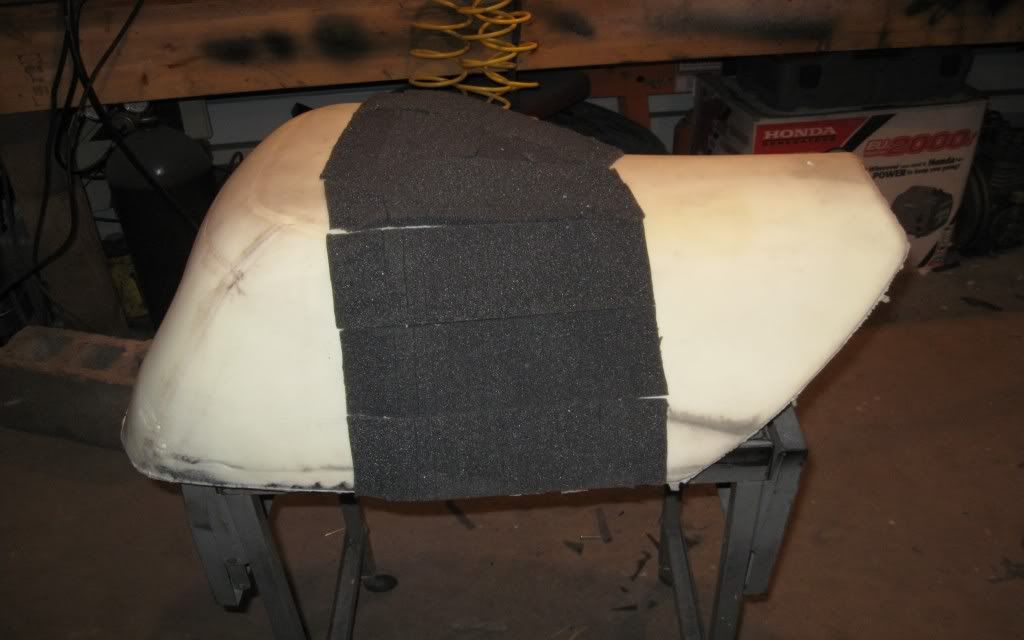
Skipped a few pictures here. oops. With the two halves joined you'll have a difference in height of about 2" from the front piece to the back. To fill this, cut a 5" crossection out of the leftover middle section of foam, then cut a couple inches off the top so it sits flush with rear section of foam. Slather on the adhesive and glue this peice down so you can transition between the rear foam and front foam. Once dry, cut at an angle from back down to front. This fills and transitions the 2" height difference from back to front. I covered all this up with some gray, 1/2" foam to sofen the glue joints and clean up the transition. Could skip this if you have some adhesive that didn't get so hard and you do a cleaner job of cutting. I ran the gray foam all the way back to the edge later on. Just on top, to eliminate the transition bump.
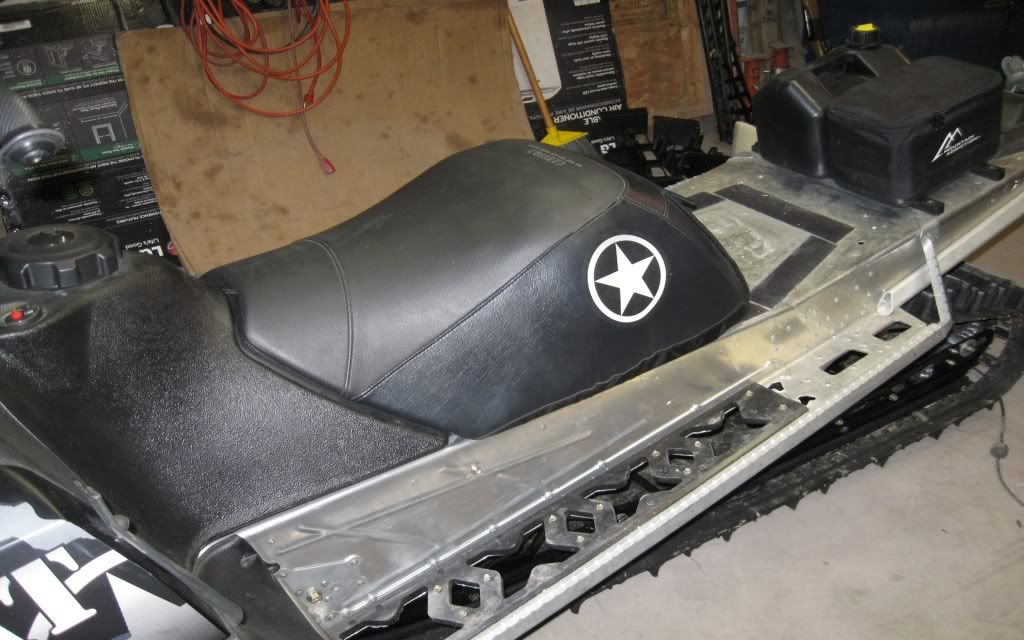
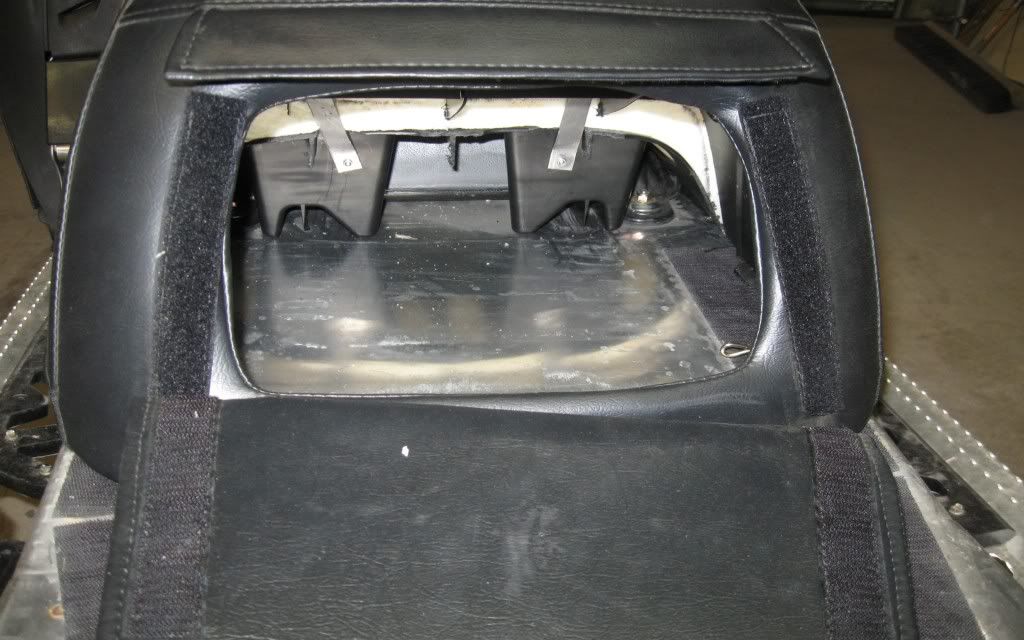
Next you put the cover back on. Start at the rear with the trunk and work your way forwards. Didn't have to make any alterations or cuts but you do have to fiddle with it to get it just right. After some trial and error, I ended up kind of bunching up the rear foot or so to use up extra material. You can see in the pics where it's bunched up a little. Basically you're just pulling down and a little back on the vinyl up to the point where you get to where it starts curivng up. I got a little air stapler from harbor freight that shoots standard T-50 staples. Funny, cause the box says it shoots 20 gauge wide crown staples but it doesn't! Which is good because I couldn't find 1/4" long wide crown staples anywhere. That's harbor freight for ya....lol. For 30 bucks it's a great little stapler though. No safety measures at all, just point and shoot. lol When stapling down the sides space staples about 2" apart for the time being. You may need to pull some and reposition, so no point in putting in to many staples. Where it starts curving up, you want to pull forward and a little down and just work your way up from one side to the other. You are going to end up with some air space between the foam and the vinyl in this front portion. For not having to do any cutting and sewing I can live with it. The vinyl is tight, so it looks fine but it's not perfect. You could add more foam to the front part of the seat to fill the voids if you want to go the extra mile.
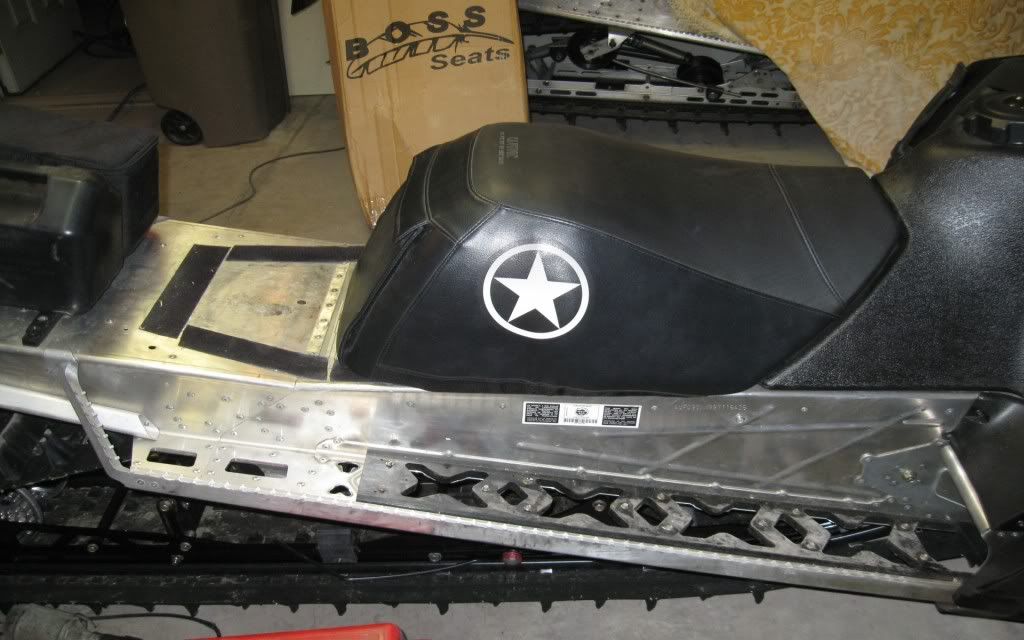
Mine weighs about 9 pounds, about 5 pounds lighter than stock and a few pounds heavier than the Boss. I like that I still have the big trunk space and I reinstalled the studs for clipping the rear of the seat down. With all the vinyl stretching, the seat is a little splayed out so you have to squeeze it together a bit to get the side tabs to align with the groove in the tank. Careful of the coolant lines when putting the rear studs back in too. I think it'll work for me!
I'm short, so getting from one side of the sled to the other with my boss hi rise in the way takes a little extra effort. Seems I'm only sitting on the trail ride in and out anyway, so I figured I'd try something shorter and easier to get around. Rassmussen has his shorty Boss seat but it's about $600.00 and sled mod funds begin to run low this time of year.
I saw here that somebody had shortened an old style M seat and figured I got nothing to lose. Really turned out to be easier than I thought it would be.
I cut about a foot out of the middle. Cut the front and rear foam flush with the plastic frame left over.
fashion some metal straps to join the front and rear seat frames. I used two along the edge and two in the middle.
Glue the front foam piece to the rear piece. I used construction adhesive and it seemed to work ok, but it hardens pretty stiff and you sort of feel it in the seat of your pants later. Ended up using nearly a whole large tube though. I used a serrated knife to cut the foam and it wasn't the cleanest cut, so I really slathered on the adhesive. Probably added two pounds of adhesive. Gotta be a better way.. Did try using a "hot knife" but the POS harbor frieght tool didn't last 5 minutes. A hot knife would make much cleaner cuts though, if you have a good one. With smooth cuts you wouldn't need near as much adhisive. Put it on the frame to dry.
Skipped a few pictures here. oops. With the two halves joined you'll have a difference in height of about 2" from the front piece to the back. To fill this, cut a 5" crossection out of the leftover middle section of foam, then cut a couple inches off the top so it sits flush with rear section of foam. Slather on the adhesive and glue this peice down so you can transition between the rear foam and front foam. Once dry, cut at an angle from back down to front. This fills and transitions the 2" height difference from back to front. I covered all this up with some gray, 1/2" foam to sofen the glue joints and clean up the transition. Could skip this if you have some adhesive that didn't get so hard and you do a cleaner job of cutting. I ran the gray foam all the way back to the edge later on. Just on top, to eliminate the transition bump.
Next you put the cover back on. Start at the rear with the trunk and work your way forwards. Didn't have to make any alterations or cuts but you do have to fiddle with it to get it just right. After some trial and error, I ended up kind of bunching up the rear foot or so to use up extra material. You can see in the pics where it's bunched up a little. Basically you're just pulling down and a little back on the vinyl up to the point where you get to where it starts curivng up. I got a little air stapler from harbor freight that shoots standard T-50 staples. Funny, cause the box says it shoots 20 gauge wide crown staples but it doesn't! Which is good because I couldn't find 1/4" long wide crown staples anywhere. That's harbor freight for ya....lol. For 30 bucks it's a great little stapler though. No safety measures at all, just point and shoot. lol When stapling down the sides space staples about 2" apart for the time being. You may need to pull some and reposition, so no point in putting in to many staples. Where it starts curving up, you want to pull forward and a little down and just work your way up from one side to the other. You are going to end up with some air space between the foam and the vinyl in this front portion. For not having to do any cutting and sewing I can live with it. The vinyl is tight, so it looks fine but it's not perfect. You could add more foam to the front part of the seat to fill the voids if you want to go the extra mile.
Mine weighs about 9 pounds, about 5 pounds lighter than stock and a few pounds heavier than the Boss. I like that I still have the big trunk space and I reinstalled the studs for clipping the rear of the seat down. With all the vinyl stretching, the seat is a little splayed out so you have to squeeze it together a bit to get the side tabs to align with the groove in the tank. Careful of the coolant lines when putting the rear studs back in too. I think it'll work for me!
Last edited:
.jpg")


