I finally got around to installing my Meat hooker's Feet Hookers...
Enjoy my photo shop work!!!


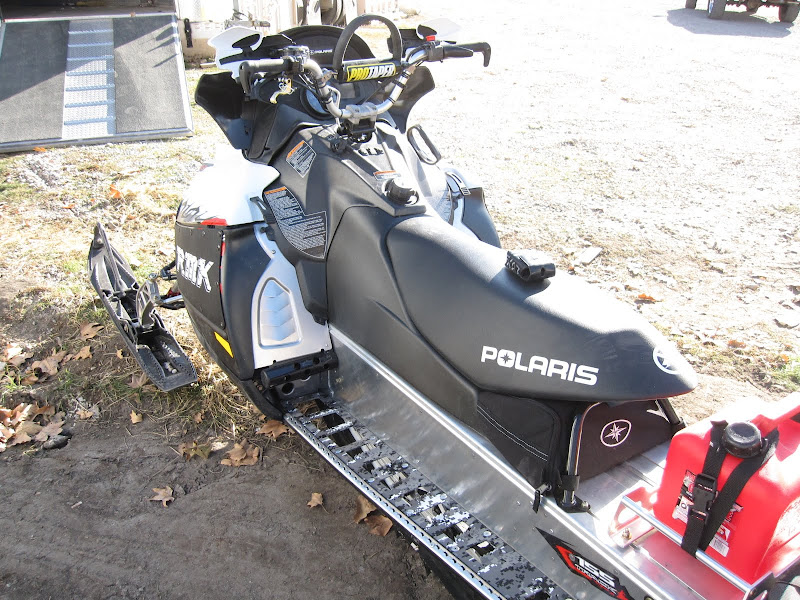
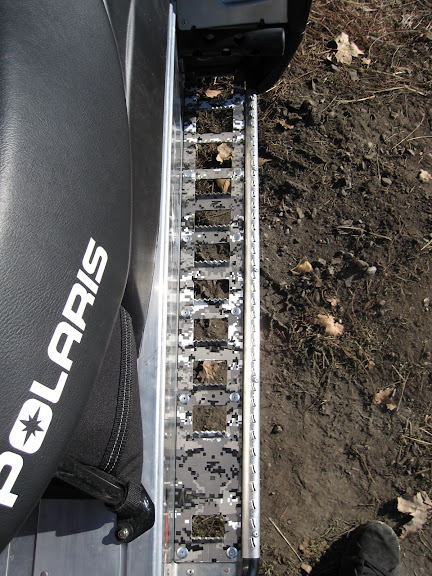
I am pleased!!!!!
First I started by drilling out the rivets at the front of the running board that hold the body plastic against the running board. I drilled from the bottom of the sled.

Next: I positioned the tail end of the feet hooker just slightly over the crack in the aluminum at the end of the running board, just after the suspension bracket. This makes it look way nice as you don't see that crack any more and you also have to cut less of the suspension bracket out.

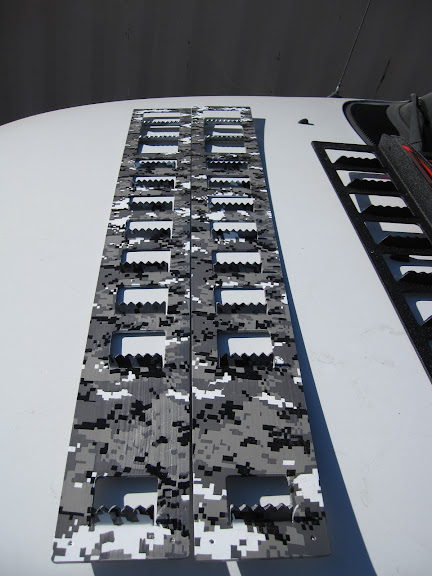
After you find your position you want, get a sharpie and trace out the edges of the holes on the hooker and also the ends.
I cut out all of the nipple type aluminum things on the running boards.


Next: Use a plasma cutter, as I did, or a sawzall and cut on your lines. Don't be scared. If you use a plasma unplug your E.C.U. Cut out some of that suspension bracket and cut all the way to the front of the running board. You will have to trim the body's plastic up there. I left the running board in tact between the last hole on the hooker and the main block of holes.


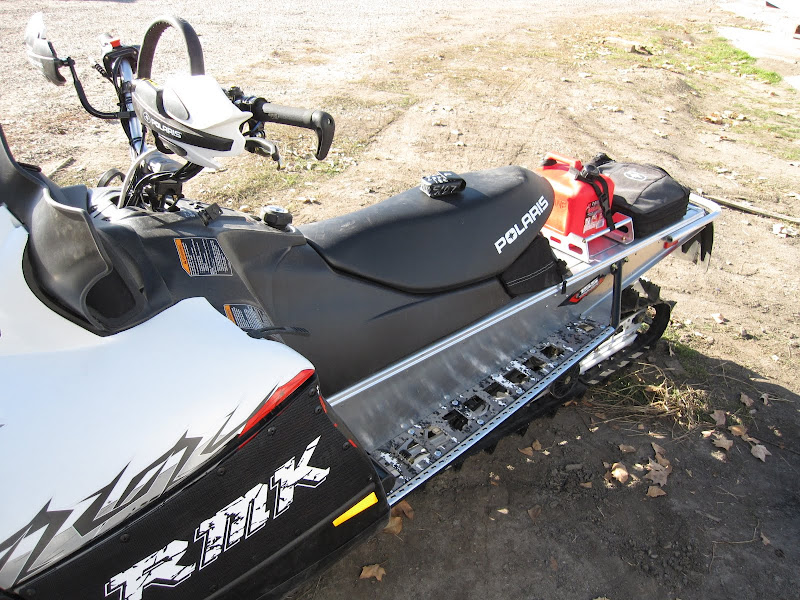
Next: Start at the front or the back when drilling and riveting, only go one direction. I suggest starting at the back, this makes it easier to drill your very front holes where the plastic used to be.
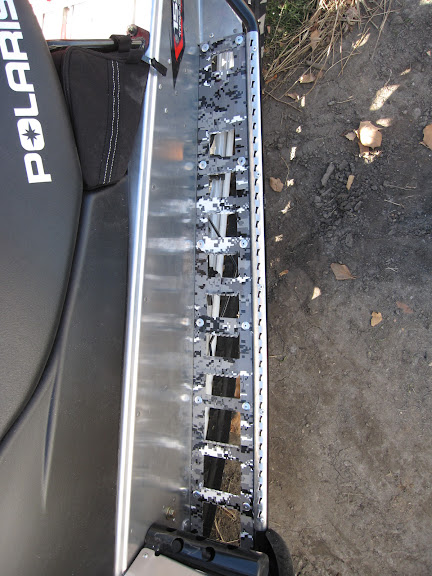
Make sure the insert is against the outside rail, not against the tunnel. The hookers are awesome because there are pilot holes except in the front. I think this is perfect because when trimming that plastic it is so uncontrollable unless you were to pull the plastic off the sled then trim it, so it allows you to place those front holes where ever you want. Do the front 2 rivets upside down, it is just easier and is "more traction"")

It's good to have a buddy help you.

And you are done!!
Your hookers are way stronger than the stock boards and your knees will survive as you will never get locked in due to the reversed front 2 cleats.
Enjoy my photo shop work!!!
I am pleased!!!!!
First I started by drilling out the rivets at the front of the running board that hold the body plastic against the running board. I drilled from the bottom of the sled.
Next: I positioned the tail end of the feet hooker just slightly over the crack in the aluminum at the end of the running board, just after the suspension bracket. This makes it look way nice as you don't see that crack any more and you also have to cut less of the suspension bracket out.
After you find your position you want, get a sharpie and trace out the edges of the holes on the hooker and also the ends.
I cut out all of the nipple type aluminum things on the running boards.
Next: Use a plasma cutter, as I did, or a sawzall and cut on your lines. Don't be scared. If you use a plasma unplug your E.C.U. Cut out some of that suspension bracket and cut all the way to the front of the running board. You will have to trim the body's plastic up there. I left the running board in tact between the last hole on the hooker and the main block of holes.
Next: Start at the front or the back when drilling and riveting, only go one direction. I suggest starting at the back, this makes it easier to drill your very front holes where the plastic used to be.
Make sure the insert is against the outside rail, not against the tunnel. The hookers are awesome because there are pilot holes except in the front. I think this is perfect because when trimming that plastic it is so uncontrollable unless you were to pull the plastic off the sled then trim it, so it allows you to place those front holes where ever you want. Do the front 2 rivets upside down, it is just easier and is "more traction"
It's good to have a buddy help you.
And you are done!!
Your hookers are way stronger than the stock boards and your knees will survive as you will never get locked in due to the reversed front 2 cleats.
Last edited: