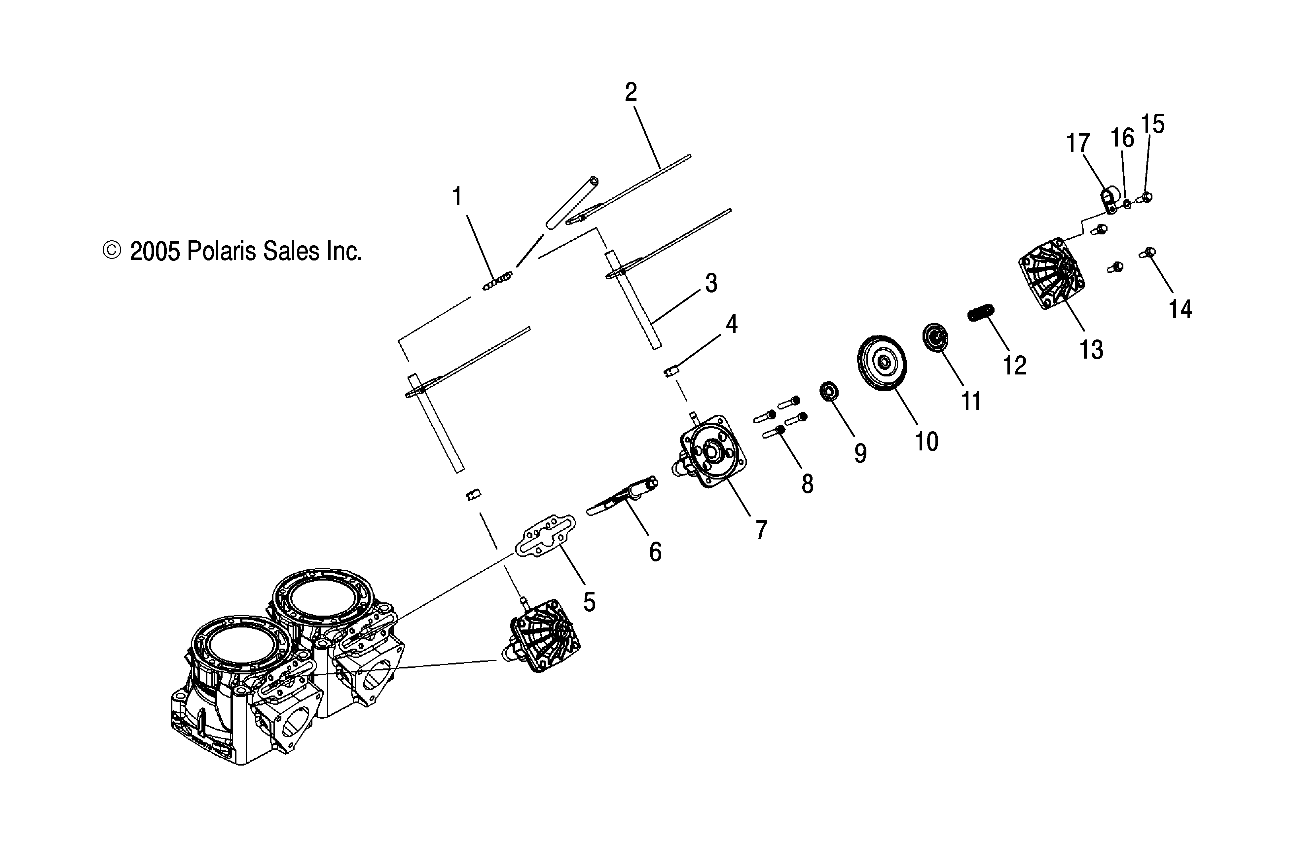
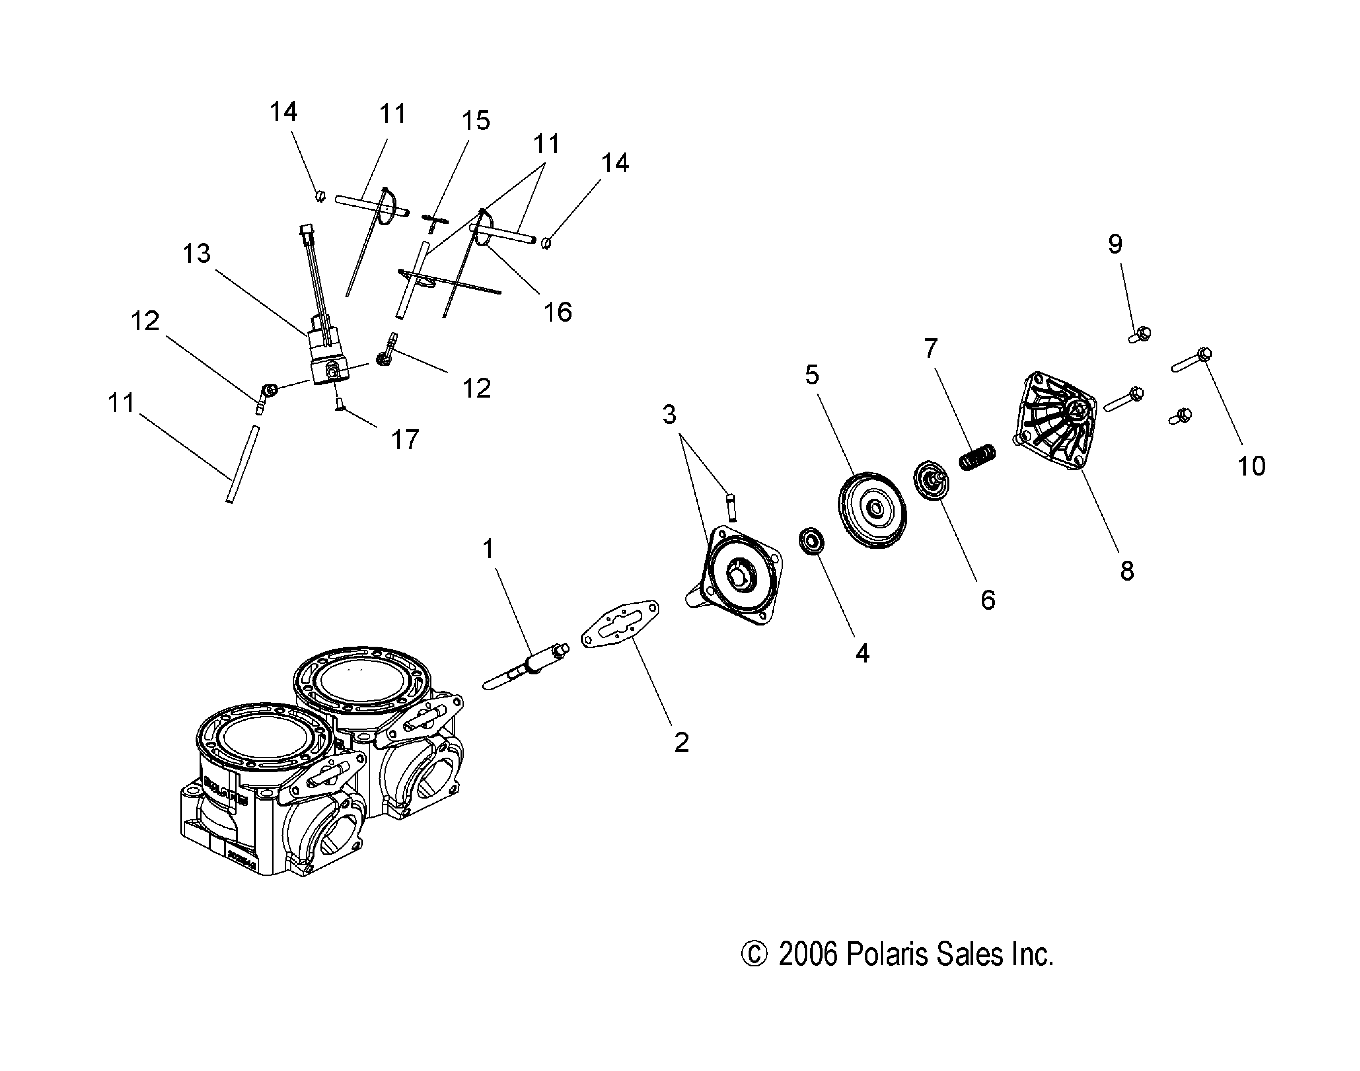
Polaris recommends cleaning the valves every 500 miles... Its a good idea!!
Remove and discard the gasket (do not be tempted to reuse the old one... no matter what. (#5)
Reverse the procedure...with new gaskets
900's and 2006 700 (755's)
NOTE: If you have the original Bellows in your 2005... change them out to the newer models that are more tear resistant.
Part number #5412733 for the updated one... about $22 each
EDIT: The updated bellows are Orange in color... the orginal bellows in the 2005 sleds were Black... replace the black bellows if you have them.
NOTE: Exhaust valve springs are spring loaded. Hold cover in place until all bolts are removed.
If the spring stays in the cover, hold the cover and twist the spring in a counterclockwise direction
while pulling the spring. Do not distort the spring upon removal.
900/755 LIBERTY VES DISASSEMBLY
1. Carefully remove theVES cover bolts (A) cover (B) and spring (C), do not distort the springwhen removing it from the cover.
Spring is under pressure, hold cover tightly against the assembly when removing the cover.
2. Remove the bellows nut (E), bellows (E) and bellows washer (F).
3. Remove the base bolts (K) and remove the base assembly (G) and guillotine (J) from the cylinder.
4. Remove the gasket (H) from the VES base (G) and clean the guillotine (J) with carbon clean or oven cleaner.
900/755 LIBERTY VES ASSEMBLY
1. Place a new gasket (H) on the valve base (G).
2. Place the guillotine (J) in the valve base.
3. Insert the base bolts (K) and torque to 12 ft. lbs. (16 Nm).
4. Place the bellows washer (F) and the bellows (E) on the valve base.
5. Apply Loctite 242 to the bellows nut (D) and torque to 12 ft. lbs. (16 Nm).
6. Install spring (C) and valve cap (B) on to the base and torque the cover bolts (A) to 9 ft.lbs. (12 Nm).
Exhaust Valve Cleaning
The exhaust valve guillotines must be cleaned to ensure
maximum engine performance and throttle response.
-- Carefully extract the guillotine out of the cylinder. Discard
the gasket.
-- Using a clean rag or shop towel, remove the oil residue from
the cylinder, guillotine, and EV base.
-- Inspect the guillotine for signs of damage. Replace
guillotine if damage is found, and inspect the cylinder and
piston for damage.
--Clean the guillotine with brake cleaner and a piece of fine
steel wool. Clean only to remove hardened carbon deposits.
--Once clean, rinse blade with mild detergent and water. Dry
completely.
-- Install a new gasket, then reinstall the EV assembly. Apply
Loctite 242 to the fastener threads, then torque to
specification.
-- Reconnect the vent hose.
Exhaust Valve Housing Fasteners
12 Ft.Lbs. (16 Nm) - Apply Loctite 242

Last edited:


