Install the app
How to install the app on iOS

Follow along with the video below to see how to install our site as a web app on your home screen.

Note: This feature may not be available in some browsers.

  • Don't miss out on all the fun! Register on our forums to post and have added features! Membership levels include a FREE membership tier.

05 900 top end questions and torque specs

diamonddave

Chilly’s Mentor, SMF's Kryptonite
Lifetime Membership
Helping a buddy with an 05 900 who tore apart his topend and have a few questions

1) Torque specs for the cylinders and head bolts??

2) Ring gap spec?? Cylinder wall to piston spec (06 polaris oem pistons and rings)

3) Pistons have already been removed. Which way do the holes in the pistons face; go??

4) Any other advice

Thanks, Dave
 
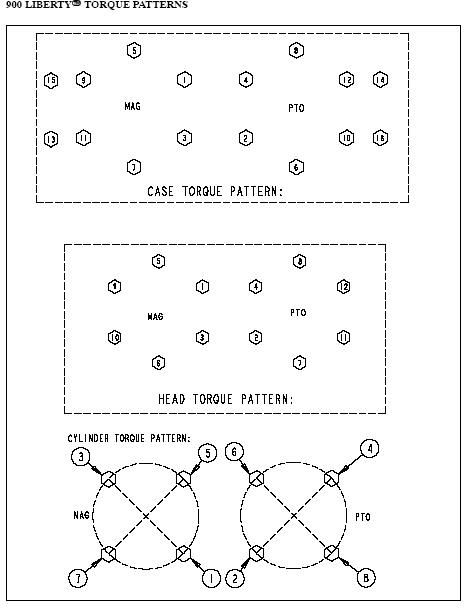
Make sure when you torque the bolts that you follow the correct pattern for the head and the cylinders, the arrows on the pistons need to face the intake side which is also the the exhaust side. When you install the c-clips in the pistons make sure the MAG c-clips are in the 10:00 position and the PTO c-clips are in the 2:00 position and lube your cylinders up good and secure the rings onto the locating pins in the piston grooves so they don't pop out (Head Bolts are 22 ft-lbs and Cylinder Bolts are 40 ft-lbs). Hope some of this helps you out.
 
Last edited:
ENGINE TORQUE SPECIFICATIONS
When tightening bolts, nuts, or screws, a torque pattern should be followed to ensure uniform equal tension is applied to all
fasteners. Proper torque application prevents fasteners from loosening or breaking in critical service. It also minimizeswear and
eliminates premature or needless repair costs. Following uniform torque application sequence patterns ensures optimum performance
from precision machined, close tolerance assemblies.

Liberty900Torquepattern.jpg


EDIT: CYLINDER HEAD: 25 ft.lbs.(±2ft.lbs.)

CYLINDER BASE 40 ft.lbs.(±3ft.lbs)

Apply Loctite 242 to cylinder & head bolts

Piston Ring End Gap in / mm .016” -- .022”

PISTON RING INSTALLED GAP
Position the ring 1/2“ (1.3 cm) from the top of the cylinder using the piston to push it squarely into place. Measure installed gap
with a feeler gauge at both the top and bottom of the cylinder

Piston / Cylinder Clearance .0045” -- .0098”

When installing a piston into a cylinder, verify each piston
ring opening is located at each piston ring locating pin.
Squeeze the top ring, then carefully slide the cylinder over
the compressed ring. Do the same with the bottom ring.

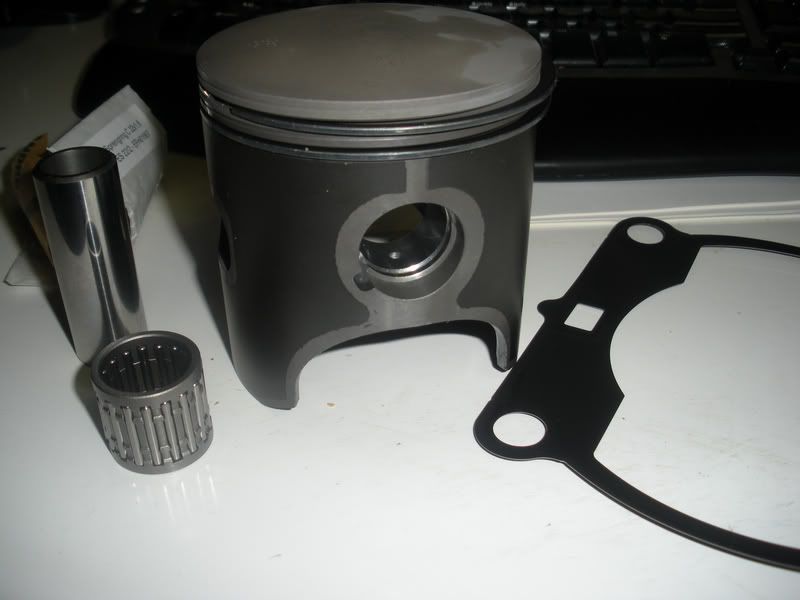
Pistons have already been removed. Which way do the holes in the pistons face; go??


7. Install new c--clips in the piston grooves with the gap facing straight up (12:
Make sure that the c--clip is fully seated in the piston groove. Use c--clip installation
8. Install the piston rings onto the piston with the bevel side up and the gap facing
9. If old base gaskets are damaged, install new base gaskets (D) on the upper crankcase.
10. Lubricate the cylinders and pistons with Polaris 2--stroke oil and carefully install
the piston rings onto the locating pins and rocking the cylinder gently from the
11. Install the cylinder base bolts (D) and torque to 34 ft.lbs (46Nm) in the sequence
5.1--5.5.
12. Install new head o--rings (C) if old ones are damaged.
13. Install head (B) on cylinders.
14. Apply Loctite 242 on head bolt (A) threads and torque to 22ft.lbs(29Nm).

Here is some other info you might find helpfull.

Team Tip S-05-09-02 Reminder: 2005 900 Cleanfire Engine Cylinder Bolt Washer Addition
The possibility exists where the bores drilled for the cylinder bolts in the upper crankcase may not have been
drilled deep enough or metal shavings may be at the bottom of the bore(s). When this occurs, the cylinder bolt
clamp force is reduced even while the desired cylinder bolt torque has been reached.
The primary symptom is a white-carbon build-up on one spark plug metal casing wall.
If this symptom occurs, Polaris recommends the following action:
1. Drain the engine coolant.
2. Remove the cylinder head. Discard the o-rings.
3. Loosen and remove the cylinder bolts. Install a washer, PN 7556234, on each bolt. Re-install the cylinder
bolts and torque to 34 lb.ft. (46 Nm) following the torque sequence in the service manual.
4. Re-install the cylinder using new o-rings and fasteners. Follow the recommended torque specifications and
torque sequences in the service manual.
5. Re-fill the cooling system. Bleed the air out of the system and test.
Polaris recommends the washers, PN 7556234, be added to the cylinder bolts WHENEVER the engine is
removed or re-built for any reason.
 
Last edited:
I hate to disagree with you Eric, but those torque spes are from a 05 manual and are incorrect. As Don said the cyl bolts are 40 ft lbs and the cyl head bolts are 25 ft lbs.

Also the 05 manual had a misprint in how to install the pistons. The transfer port in the piston should be installed to the rear of the cyl. As a rule of thumb, on a two stroke engine the piston ring locating pin will always be located away from the exhaust port.

Cause if you put the port towards the front then the piston ring gaps will be next to the exhaust port. Will lead to lots of blow by.

Are you also are contradicting the pic in the 2005 Polaris manual which shows the ports facing forward.

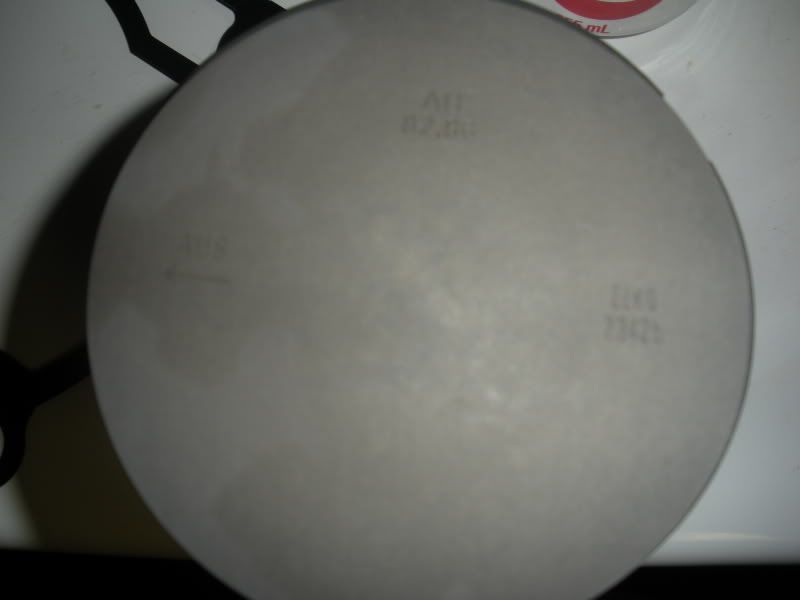
I think (not positive) but the new replacement pistons have a marking indicating which direction to go.

Anybody have a pic of the 900 piston showing markings?

I don't have pix but the 06 pistons have arrows on them directing the position of the piston during installation.
 
I don't have pix but the 06 pistons have arrows on them directing the position of the piston during installation.

Correct! At the time I printed the original question, I had not seen the motor tore down. If you take the jugs and the pistons and look at them, it's pretty easy to figure out the correct way they go/face.
 
Dave... ya got me again!!

Everyone else... Defer to Daves info... he's taught me a lot and is the most informed no nonsense Polaris Master tech I've met.
 
Dave... ya got me again!!

Everyone else... Defer to Daves info... he's taught me a lot and is the most informed no nonsense Polaris Master tech I've met.

This is the firet time I ever seen you make a mistake.

Well first mistake in how many years !!!
 
Premium Features


Back
Top