
D
Danbot
Well-known member
Being a guy who can't leave "well enough" alone, I tore into my 13 Pro looking to eliminate as much steering slop as I could, not that there's as much as a Cat telescopic post ... but it's there.
I already had my side panels and hood off for other work, by removing the console I had full access to the steering post. There are 2 plastic push darts above the footwells and the gas cap retainer to remove... and the console will swing out of the way, hanging by the pull start cord.
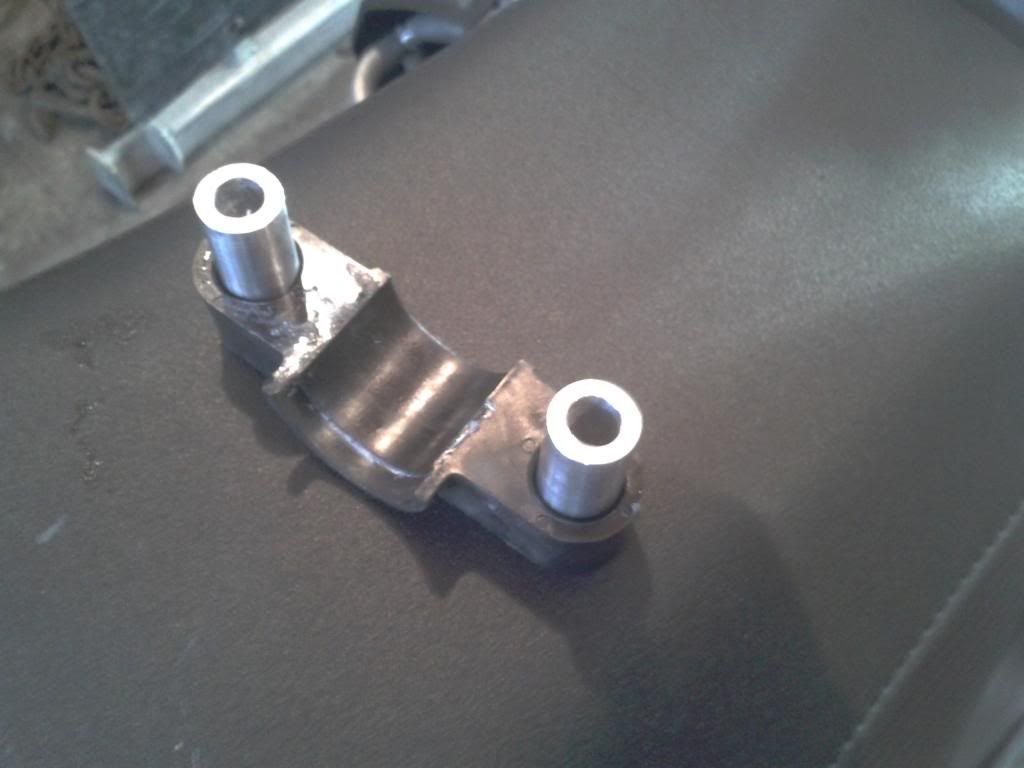
You should now see the upper, and lower steering post bushing / supports. I started on the lower: Remove the 2 bolts, and steel strap. Remove the outer (bolt side) half of the bushing being careful not to drop the 2 aluminum spacer / bushings.
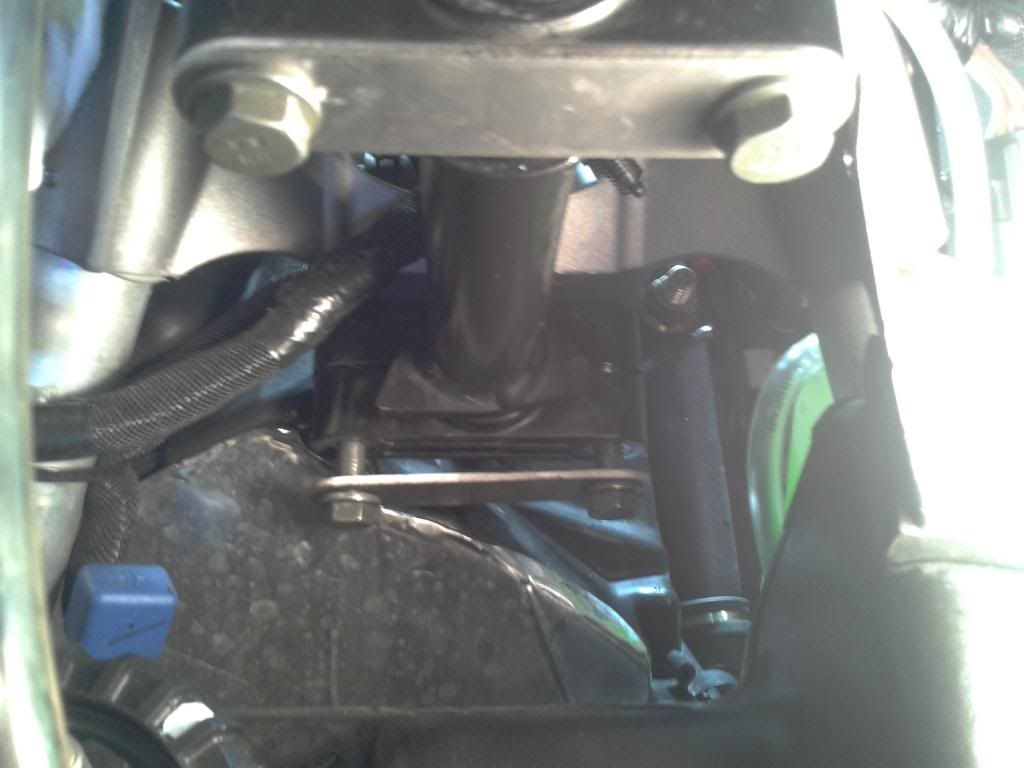
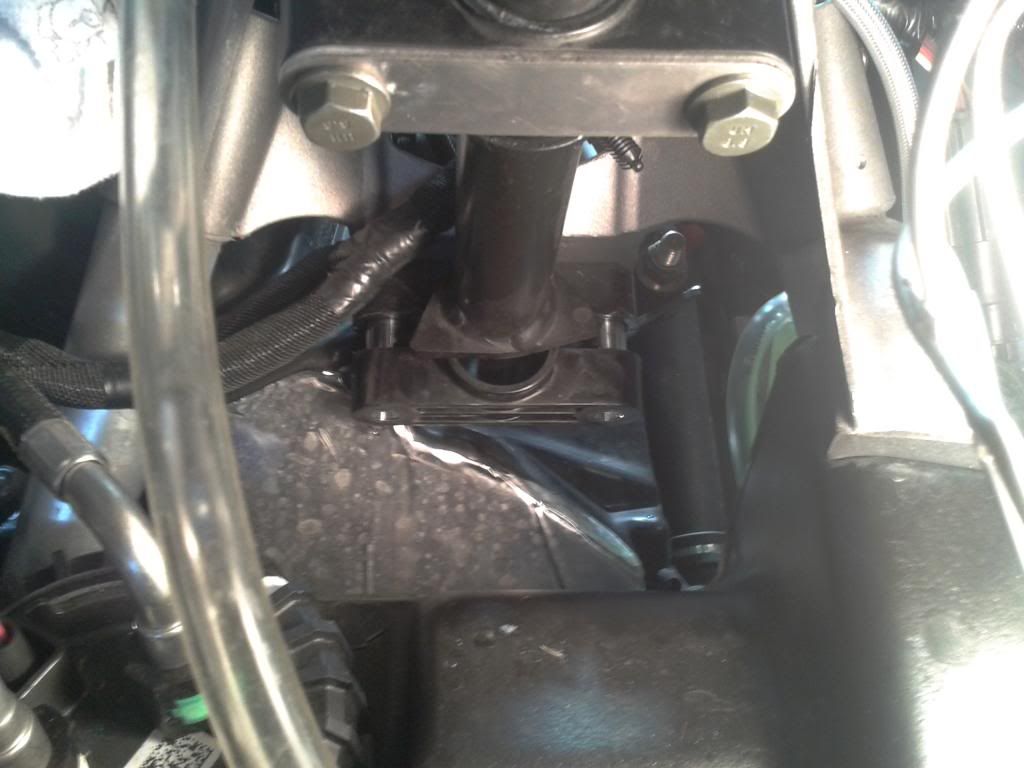
I found that the plastic bushing / supports were not fully being clamped together because the aluminum spacer bushings bottom out in each plastic bushing. I carefully used the side of a bench grinder wheel to remove a very small amount off the end of each aluminum spacer. I did not measure, it doesn't take much. Now bolt everything back together and test fit. Do this slowly in small steps so you don't remove too much and end up with resistance in the steering. I left just barely perceptible amount of play.
This can be easily repeated on both the upper and lower steering post bushings, as well as the upper bushing on the pitman arm shaft (they are all built the same way). I did not bother trying to get the lower pitman arm shaft bushing, but feel it's un-necessary at this time. I also applied some fresh lithium grease during assembly. My steering now feels completely slop free, and silky smooth!
warning!!! it is possible to shorten the aluminum collars too much, and end up with resistance or binding in the steering. Use your own judgement, and work in VERY small steps.
I already had my side panels and hood off for other work, by removing the console I had full access to the steering post. There are 2 plastic push darts above the footwells and the gas cap retainer to remove... and the console will swing out of the way, hanging by the pull start cord.
You should now see the upper, and lower steering post bushing / supports. I started on the lower: Remove the 2 bolts, and steel strap. Remove the outer (bolt side) half of the bushing being careful not to drop the 2 aluminum spacer / bushings.
I found that the plastic bushing / supports were not fully being clamped together because the aluminum spacer bushings bottom out in each plastic bushing. I carefully used the side of a bench grinder wheel to remove a very small amount off the end of each aluminum spacer. I did not measure, it doesn't take much. Now bolt everything back together and test fit. Do this slowly in small steps so you don't remove too much and end up with resistance in the steering. I left just barely perceptible amount of play.
This can be easily repeated on both the upper and lower steering post bushings, as well as the upper bushing on the pitman arm shaft (they are all built the same way). I did not bother trying to get the lower pitman arm shaft bushing, but feel it's un-necessary at this time. I also applied some fresh lithium grease during assembly. My steering now feels completely slop free, and silky smooth!
warning!!! it is possible to shorten the aluminum collars too much, and end up with resistance or binding in the steering. Use your own judgement, and work in VERY small steps.
Last edited:
")