Install the app
How to install the app on iOS

Follow along with the video below to see how to install our site as a web app on your home screen.

Note: This feature may not be available in some browsers.

  • Don't miss out on all the fun! Register on our forums to post and have added features! Membership levels include a FREE membership tier.

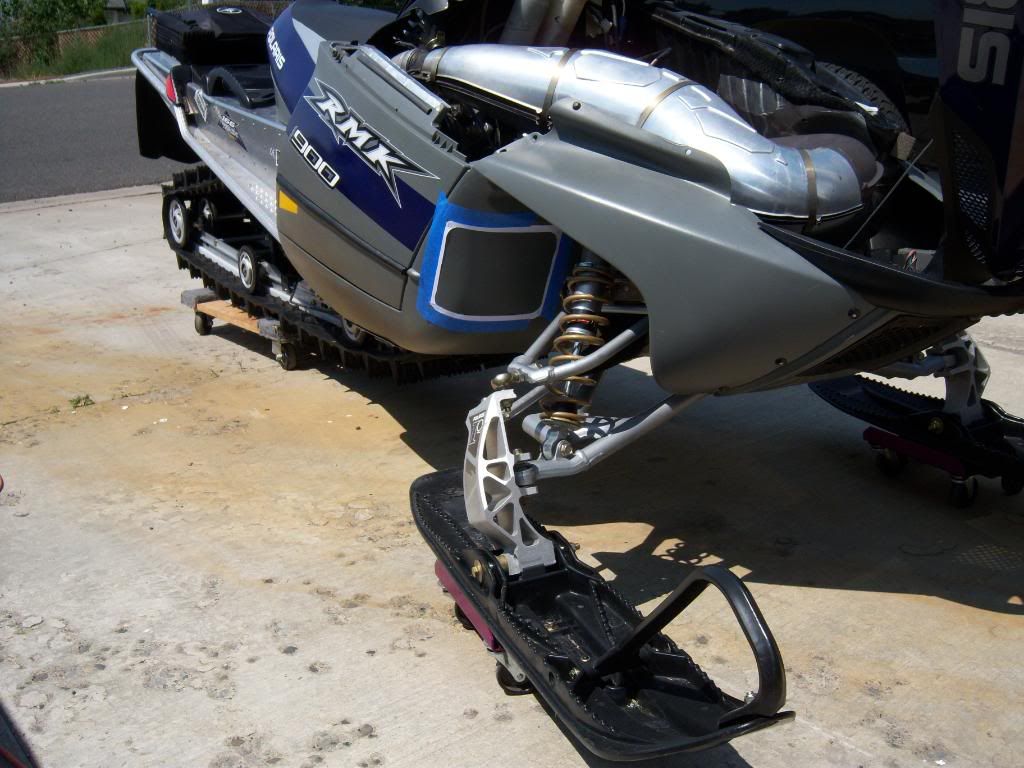
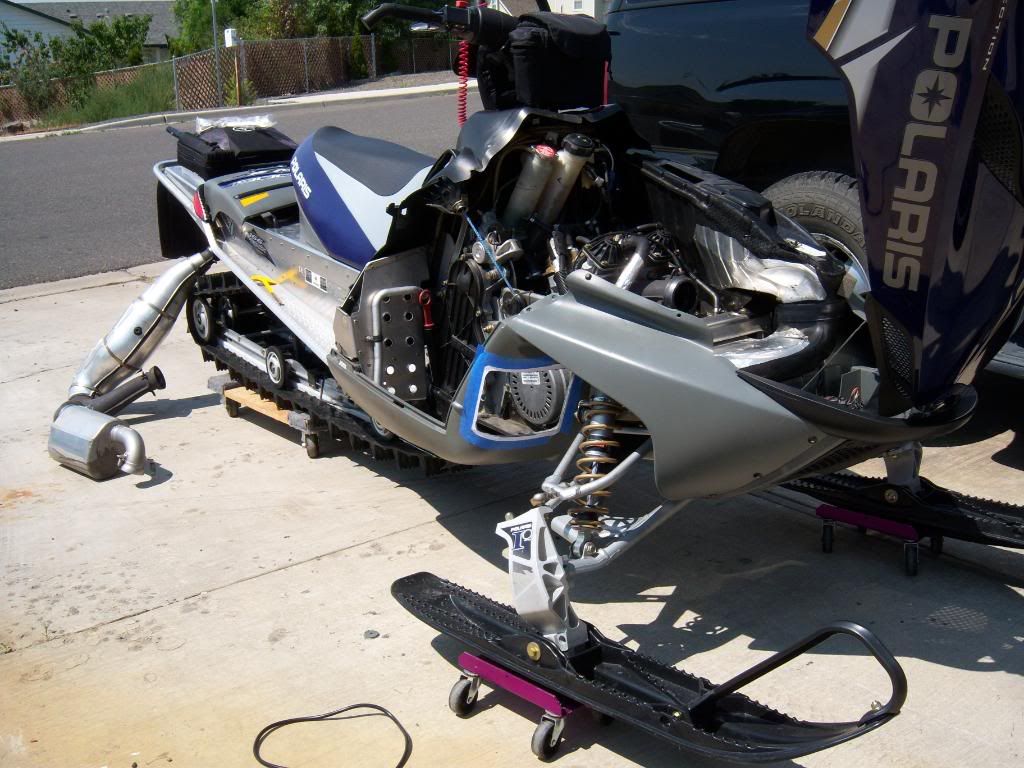
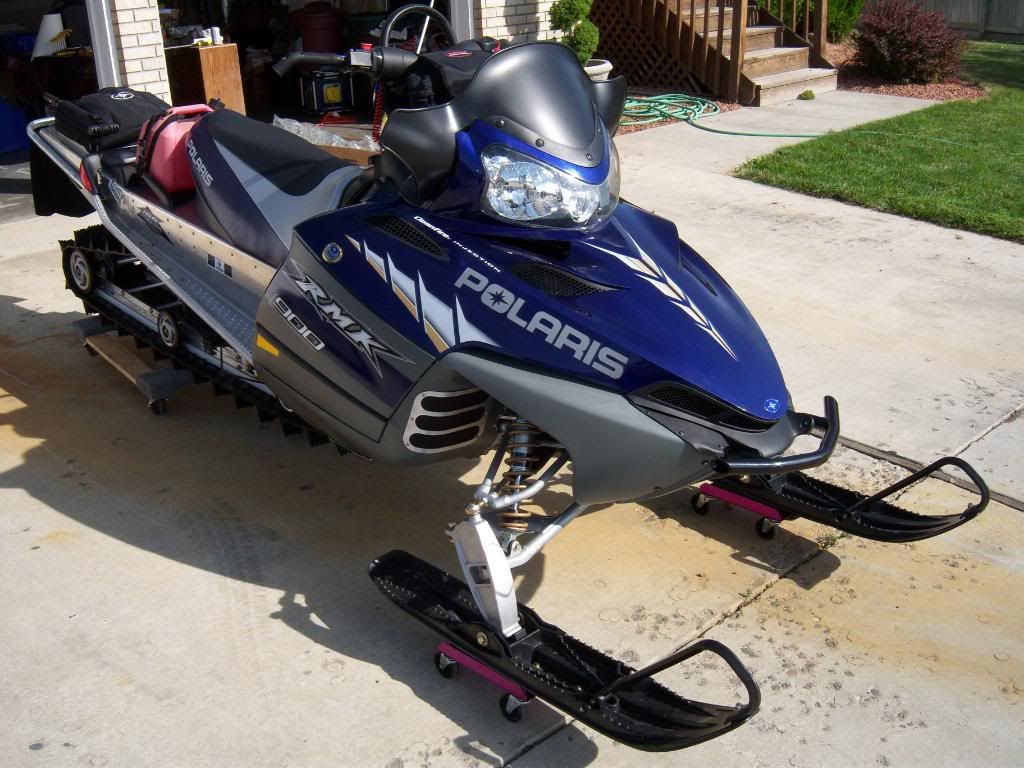
How to cut for SLP hot air eliminator kit RH & LH

I have the templete,, all taped to plastic body.

My question: Are you using a dremmel ? I see the inboard most radius cuts are very close to the control arm pivot points and seem to look like it's gonna be a tight area... Any tips ??
 
I have the templete,, all taped to plastic body.

My question: Are you using a dremmel ? I see the inboard most radius cuts are very close to the control arm pivot points and seem to look like it's gonna be a tight area... Any tips ??

Yes I used a dremmel. It cuts fast so you have to be careful. Also it melts the plastic while you cut and causes some buildup that snaps right off after it cools. Then I smoothed it out with a file. Picking up the rivet holes was kind of a pain also. I did some from the inside of the tub with the clutch off and a couple from the outside. I think some guys just cut the whole thing out but I didn't. :boom:
 
Yes I used a dremmel. It cuts fast so you have to be careful. Also it melts the plastic while you cut and causes some buildup that snaps right off after it cools. Then I smoothed it out with a file. Picking up the rivet holes was kind of a pain also. I did some from the inside of the tub with the clutch off and a couple from the outside. I think some guys just cut the whole thing out but I didn't. :boom:

I used a roto-zip and just cut out the 3 individual sections...then lined the cover up and drilled the top center hole first, then riveted it. Then I lined up and drilled riveted as I went, making sure it was positioned correctly.I used the blk mesh screen on the backside too, so I also used small washers to hold it tight and sandwich the plastic between the cover and mesh.
The only rivet you need to install from the inside/out, is if you drill a center hole on the inside, right behind the a arm mount. I had mine powder coated black and made my own fabric screen out of "Solar screen"

P1000857.jpg P1000858.jpg
 
Last edited:
Yes I used a dremmel. It cuts fast so you have to be careful. Also it melts the plastic while you cut and causes some buildup that snaps right off after it cools. Then I smoothed it out with a file. Picking up the rivet holes was kind of a pain also. I did some from the inside of the tub with the clutch off and a couple from the outside. I think some guys just cut the whole thing out but I didn't. :boom:
they sell a dremel bit that is for cutting drywall and plastic, it looks like a flat tipped drill bit with really long flutes it works like a long skinny router bit, i forget the exact name of the bit but it works awesome, doesnt get hot and wont melt the plastic! i traced my templates with a white paint marker so the lines are easier to see when the dust flies!
 
Yes the long fluted cutter for the dremel works the best, but be carefull if that thing grabs it will want to take off. If you are carfull and take it slow it will make a perfect cut:beer;
 
rivet placement

one other thing to maybe take note of on your clutch side, make a note of where the rivets will "be" on the inside, as i had stared marveling my craftmenship i realized that where the rivet was on the inside was going to be, removing the belt was going to be difficult, much worse with cold hands at the top of the mountain, so i had to redrill the hole and move it over an inch(*&^%##@) I know im anal but i also sealed around mine and then trimmed it real nice witha razor blade after it dried...? i dunno i just make it up as i go along?
 
I cut the entire thing out in 1 piece with a hole saw for the corners and a hacksaw blade for the straights... super easy and no 'taking off' while you cut.

It's one of those WTF did I just do moments when you see the size hole you just cut into your sled, lol.....


100_3148.jpg

100_3152.jpg

100_3226.jpg


aparently thats all I have for the moment
 
Last edited:
Hole saw, 9 holes for each vent...plastic retains it's strength and still lets plenty of air through. If you cut the entire area out, one stick in the wrong place will leave a gaping hole in the front of your sled.
 
If you use a dremmel have someone hold a vacuum hose while you cut, it will save you a lot of time cleaning up the bits of plastic that fly all over the place. I also put a plastic bag over my clutch to keep those bits of plastic out of it. The rivet that miko700 talked about can be a problem, to remove my belt I have to slip one of the notches in the belt past the end of the rivet.
 
another vote for a hole saw and leave a bit attached between the holes like a honeycomb. This leaves a bit more of the orininal shape and more intergrity
 
Used hole saw to install but then used Flowrites long before the kit was out. Would recommend leaving some plastic.
 
Ok, im done w/ the vents.. I got thin aluminum sheet from Lowes, and cut the SLP vent pattern lh & rh, .. I used regulat window screen material, fiberglass screen... 5 bucks.
I used #8 fastners w/ lock washer & nut.

After im done, i look how close that clutch really is to the plastic,,, just seems like fluff powder will make it thru the screen and dust that clutch and slip.

Should i double the screen,, or does small dusting just fry to steam so quick it doesn't have time to slip ?

I drive trail, Michigan.... Groomed trail,,, not very often do i get 1st sled on trail after fresh snow. So w/ that being noted: powder riding is almost nil.

ouble up,, or fine.
 
Regular window screen is too big, the openings are large.
Buy the "Solar Screen" at Lowe's, The mesh is a lot finer. The theory is...if the mesh is smaller than the water droplets, it will roll off and not pass through.

I used solar screen for the outer layer, then a layer of the pet screen to act as a barrier in case a small twig or something pushed into it. I also have the steel mesh square that came with the SLP kit on the inside

17.jpg 22.2.jpg
 
Premium Features


Back
Top