Tunnel Cooler/ Heat Exchanger, Radiator Delete
So I know a few people have done this now, but I figured I'd give a quick description of how I did mine and how it has worked so far on my KX525 big bore 2-stroke. Feel free to post up how you went about it as well.
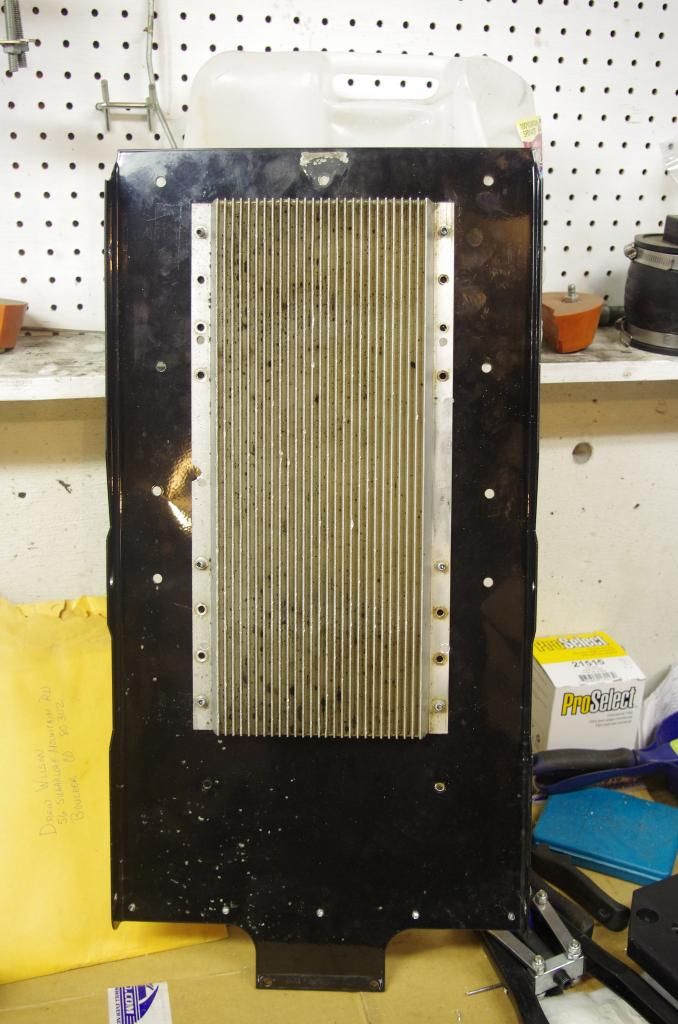
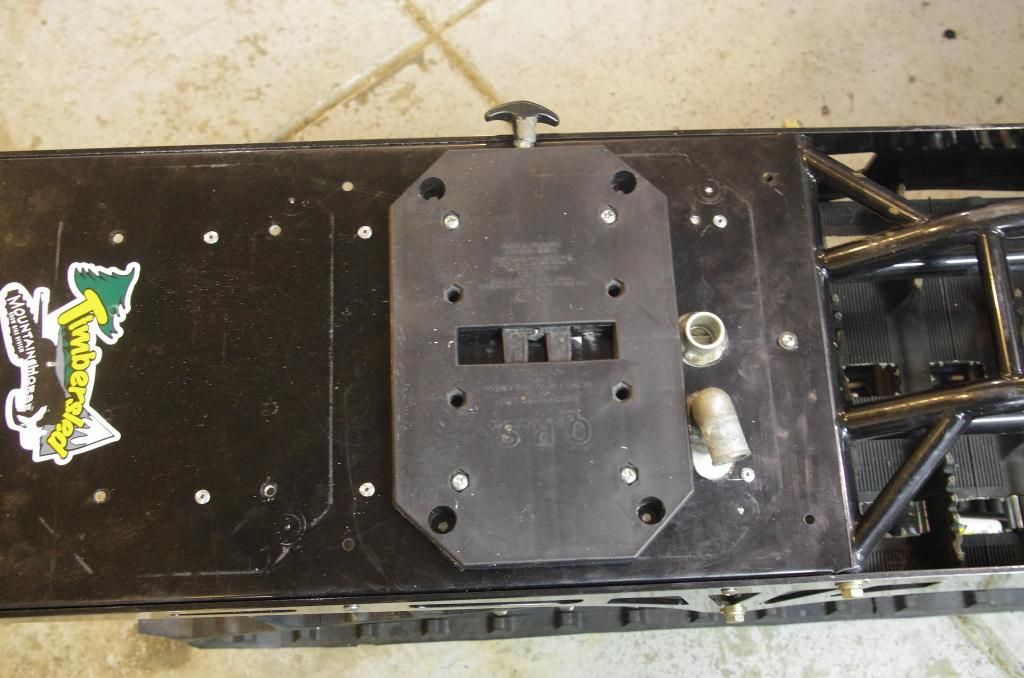
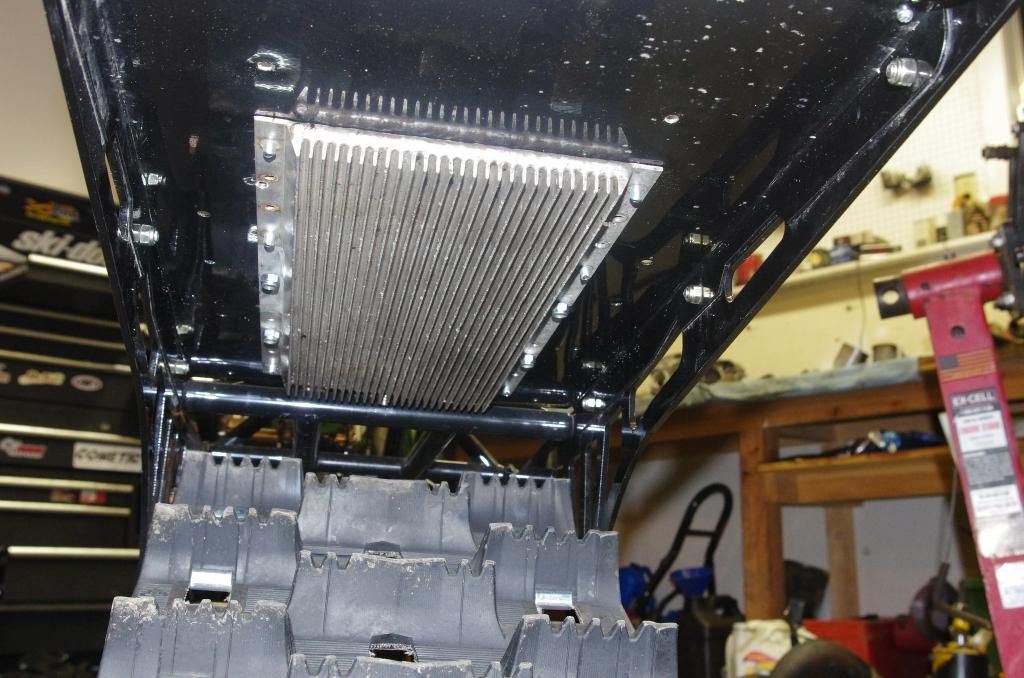
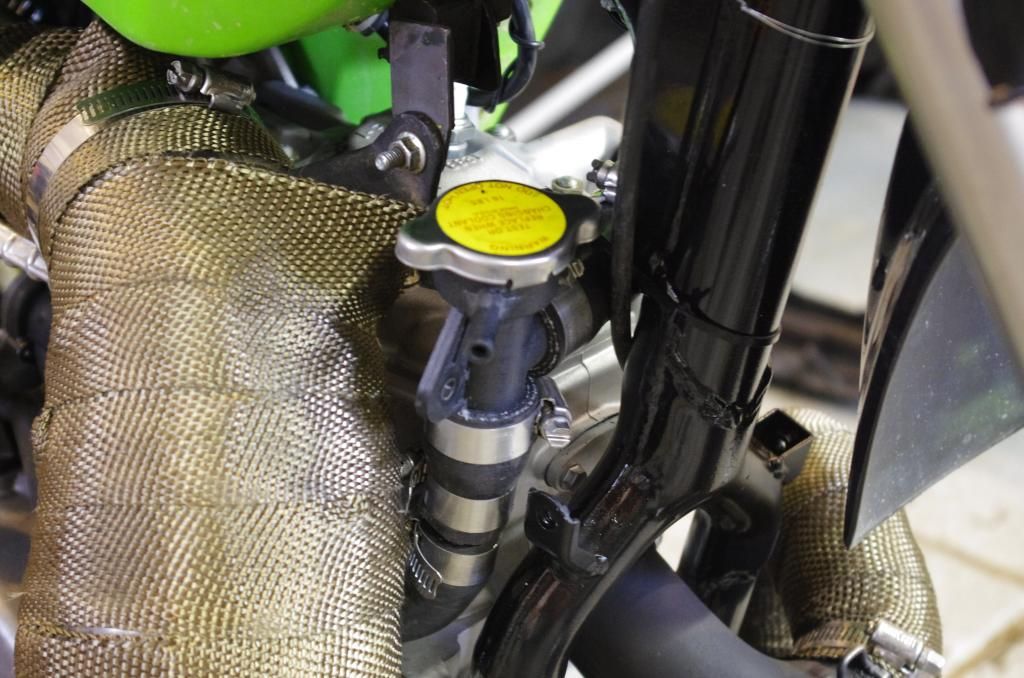
I used a front heat exchanger from an older Arctic Cat EXT 550. You can use whatever, that's just the one I found and it seems to fit very nicely in the Timbersled tunnel. I also used a radiator cap assembly from an '06 Arctic Cat Bearcat. Again, this just worked out because it was a 90 degree housing with a radiator cap, perfect for my needs. My cap is the highest point in the system, so it was fairly easy to bleed.
For a thermostat, I'm using the KTM 2 stroke thermostat and using the bypass to feed my carb heater. So, my circuit goes like this:
Head -> Radiator cap -> Thermostat -> Tunnel Cooler -> Water pump
I used smaller 5/8" hose to and from the cooler. The bike has 19mm or 3/4" hose everywhere, but I didn't want that much coolant in the system and 8' of 3/4" hose full of coolant weighs a lot. I think you save around .5lb running 5/8 hose instead of 3/4.
The bypass circuit is Thermostat -> Carb Heater -> Water pump (bypasses the cooler)
I first had the bypass routed Thermostat -> Carb heater -> Tunnel Cooler -> Water pump, but I couldn't keep the coolant temps up enough because there was too much cooling going on with the bypass circuit pushing coolant through the cooler.
For the first couple rides I ran a snow flap because I was concerned with not having enough cooling. It turns out that a tunnel cooler is extremely efficient and I haven't been running a flap for a while now.
At this point, I was still not able to keep the temperatures up in deep snow unless I was climbing for a while, so I made engine covers. Now I am running a fairly consistent 130ish degrees at all times. I also found that with covers, my coolant temp doesn't drop as rapidly when I stop to help dig someone out because the engine cases aren't packed with snow.
Going up a hardpack trail for a few miles with no ice scratchers, no snow flap, and staying out of the snow on the side of the trail, it climbs to about 165 degrees, but comes down quick as soon as you ride off the trail for a few feet. That's pretty good in my book. Ice scratchers would keep it more consistent, but I'll just get off the trail every once in a while like I should anyway.


I also found that header wrap on a 2 stroke snow bike pipe is not the best way to go. The wrap melts snow and sucks up water, giving the pipe a nice, cooling water jacket and makes it run like crap. I now have header wrap only in a couple places to avoid burning gloves or snow pants.
The other benefit of running no radiators is that you don't have anything there to rip off on trees.


So I know a few people have done this now, but I figured I'd give a quick description of how I did mine and how it has worked so far on my KX525 big bore 2-stroke. Feel free to post up how you went about it as well.
I used a front heat exchanger from an older Arctic Cat EXT 550. You can use whatever, that's just the one I found and it seems to fit very nicely in the Timbersled tunnel. I also used a radiator cap assembly from an '06 Arctic Cat Bearcat. Again, this just worked out because it was a 90 degree housing with a radiator cap, perfect for my needs. My cap is the highest point in the system, so it was fairly easy to bleed.
For a thermostat, I'm using the KTM 2 stroke thermostat and using the bypass to feed my carb heater. So, my circuit goes like this:
Head -> Radiator cap -> Thermostat -> Tunnel Cooler -> Water pump
I used smaller 5/8" hose to and from the cooler. The bike has 19mm or 3/4" hose everywhere, but I didn't want that much coolant in the system and 8' of 3/4" hose full of coolant weighs a lot. I think you save around .5lb running 5/8 hose instead of 3/4.
The bypass circuit is Thermostat -> Carb Heater -> Water pump (bypasses the cooler)
I first had the bypass routed Thermostat -> Carb heater -> Tunnel Cooler -> Water pump, but I couldn't keep the coolant temps up enough because there was too much cooling going on with the bypass circuit pushing coolant through the cooler.
For the first couple rides I ran a snow flap because I was concerned with not having enough cooling. It turns out that a tunnel cooler is extremely efficient and I haven't been running a flap for a while now.
At this point, I was still not able to keep the temperatures up in deep snow unless I was climbing for a while, so I made engine covers. Now I am running a fairly consistent 130ish degrees at all times. I also found that with covers, my coolant temp doesn't drop as rapidly when I stop to help dig someone out because the engine cases aren't packed with snow.
Going up a hardpack trail for a few miles with no ice scratchers, no snow flap, and staying out of the snow on the side of the trail, it climbs to about 165 degrees, but comes down quick as soon as you ride off the trail for a few feet. That's pretty good in my book. Ice scratchers would keep it more consistent, but I'll just get off the trail every once in a while like I should anyway.


I also found that header wrap on a 2 stroke snow bike pipe is not the best way to go. The wrap melts snow and sucks up water, giving the pipe a nice, cooling water jacket and makes it run like crap. I now have header wrap only in a couple places to avoid burning gloves or snow pants.
The other benefit of running no radiators is that you don't have anything there to rip off on trees.


Last edited:


